
Acrylic Nails Being Put On: A Definitive Guide to Perfect Application
Are you fascinated by the flawless look of acrylic nails? Do you dream of achieving salon-quality results at home? Or perhaps you’re a nail technician seeking to refine your skills? This comprehensive guide is your ultimate resource for mastering the art of acrylic nails being put on. We’ll delve into every aspect of the process, from preparation to finishing touches, ensuring you achieve beautiful, durable, and professional-looking acrylic nails. Unlike superficial tutorials, we’ll cover advanced techniques, troubleshooting tips, and expert insights gleaned from years of experience in the nail industry. Get ready to elevate your acrylic nail game!
What are Acrylic Nails and Why Choose Them?
Acrylic nails are artificial nail enhancements created by combining a liquid monomer and a powder polymer. This mixture forms a hard, durable layer that is applied over your natural nails to extend their length, add strength, and create a flawless canvas for nail art. The popularity of acrylic nails stems from their versatility and durability. They can be customized to any shape, length, and design, making them a favorite among those seeking a polished and personalized look. Compared to other nail enhancements like gel nails, acrylics are generally more robust and resistant to chipping, making them a long-lasting option.
The History and Evolution of Acrylic Nails
The history of acrylic nails dates back to the 1950s when a dentist accidentally created the first acrylic nail while trying to repair a broken fingernail. This accidental discovery quickly gained popularity among actresses and celebrities, who sought a way to achieve long, glamorous nails. Over the years, the formulation of acrylics has evolved significantly, with advancements in safety, durability, and ease of application. Today, acrylic nails are a staple in the beauty industry, with countless variations and techniques available to suit every preference.
Understanding the Chemistry Behind Acrylics
The process of acrylic nails being put on relies on a chemical reaction called polymerization. The liquid monomer contains molecules that are activated by an initiator, usually benzoyl peroxide present in the powder polymer. When the liquid and powder are combined, the initiator triggers the monomers to link together, forming long chains called polymers. This process creates a hard, durable material that adheres to the natural nail. Understanding this basic chemistry is crucial for achieving a strong and long-lasting acrylic nail application.
Essential Tools and Materials for Acrylic Nail Application
Before you begin applying acrylic nails, it’s essential to gather all the necessary tools and materials. Having everything within reach will streamline the process and ensure a smooth and efficient application. Here’s a comprehensive list:
* **Acrylic Liquid Monomer:** The liquid component that activates the polymerization process.
* **Acrylic Powder Polymer:** The powder component that combines with the monomer to form the acrylic nail.
* **Acrylic Nail Brush:** A specialized brush with firm bristles for picking up and applying the acrylic mixture.
* **Nail Tips:** Artificial nail extensions that are glued to the natural nail to add length.
* **Nail Glue:** A strong adhesive for securely attaching nail tips.
* **Nail File and Buffer:** For shaping and smoothing the acrylic nails.
* **Cuticle Pusher:** To gently push back the cuticles and prepare the nail bed.
* **Nail Primer:** To dehydrate the natural nail and improve adhesion.
* **Dappen Dish:** A small dish for holding the acrylic liquid monomer.
* **Dust Brush:** To remove dust and debris from the nails during the application process.
* **Nail Forms (Optional):** Used instead of tips to sculpt the acrylic directly onto the natural nail.
Choosing the Right Acrylic Products
Selecting high-quality acrylic products is crucial for achieving the best results. Look for reputable brands that are known for their consistent performance and durability. Consider the drying time of the acrylic liquid, as some formulas dry faster than others. For beginners, a slower-drying formula may be easier to work with. Also, choose an acrylic powder that is finely milled and provides good coverage. Always read reviews and seek recommendations from experienced nail technicians to ensure you’re investing in the best products.
Step-by-Step Guide: Acrylic Nails Being Put On
Now that you have all the necessary tools and materials, let’s walk through the step-by-step process of acrylic nails being put on. Follow these instructions carefully to achieve a flawless and long-lasting application.
1. **Prepare the Natural Nails:** Begin by cleaning and sanitizing your hands. Gently push back the cuticles with a cuticle pusher and remove any dead skin. Lightly buff the surface of your natural nails to create a slightly rough texture for better adhesion.
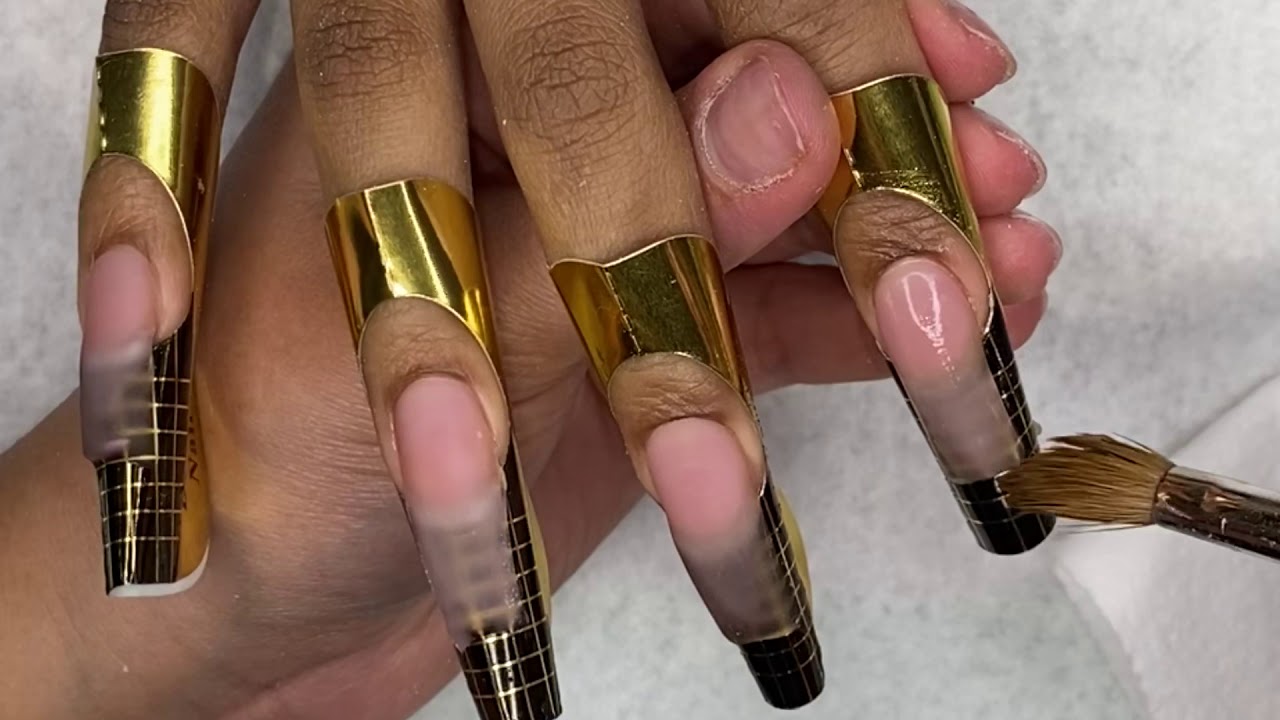
2. **Apply Nail Tips (or Forms):** If using nail tips, select the appropriate size for each nail and apply them with nail glue. Hold the tip in place for a few seconds until the glue dries. If using nail forms, attach them securely to your natural nails, ensuring they are properly aligned.
3. **Apply Nail Primer:** Apply a thin layer of nail primer to your natural nails and the nail tips (or forms). Allow the primer to dry completely. This step is crucial for dehydrating the nail and improving adhesion.
4. **Mix the Acrylic:** Pour a small amount of acrylic liquid monomer into the dappen dish. Dip the acrylic nail brush into the monomer, then gently tap it on the edge of the dish to remove excess liquid. Dip the brush into the acrylic powder polymer, allowing a small bead of acrylic to form on the brush. The consistency should be smooth and slightly runny.
5. **Apply the Acrylic:** Apply the acrylic bead to the nail, starting near the cuticle area and working your way towards the free edge. Use the brush to shape and smooth the acrylic, ensuring it is evenly distributed. Repeat this process, applying multiple beads of acrylic until the entire nail is covered.
6. **Shape and File the Acrylic:** Once the acrylic has dried completely, use a nail file to shape the nails to your desired length and shape. Use a buffer to smooth out any imperfections and create a smooth, even surface.
7. **Apply Top Coat:** Apply a layer of top coat to seal the acrylic nails and add shine. Allow the top coat to dry completely.
8. **Moisturize:** Finish by applying cuticle oil to hydrate the cuticles and surrounding skin.
Troubleshooting Common Acrylic Nail Problems
Even with careful application, you may encounter some common problems when putting on acrylic nails. Here are some troubleshooting tips to help you overcome these challenges:
* **Lifting:** Lifting occurs when the acrylic separates from the natural nail. This can be caused by improper preparation, poor adhesion, or exposure to moisture. To prevent lifting, ensure you properly dehydrate the natural nail with nail primer and avoid getting water trapped between the acrylic and the nail.
* **Bubbling:** Bubbling can occur if the acrylic mixture is too wet or if air is trapped during application. To prevent bubbling, use the correct ratio of liquid to powder and work quickly and efficiently.
* **Yellowing:** Yellowing can occur if the acrylic is exposed to sunlight or certain chemicals. To prevent yellowing, use a high-quality acrylic powder and avoid prolonged exposure to sunlight.
* **Cracking:** Cracking can occur if the acrylic is too thin or if the nails are subjected to excessive force. To prevent cracking, ensure the acrylic is applied in a thick enough layer and avoid using your nails as tools.
Maintaining Your Acrylic Nails for Long-Lasting Wear
Proper maintenance is essential for keeping your acrylic nails looking their best and preventing damage. Here are some tips for maintaining your acrylic nails:
* **Regular Fill-Ins:** As your natural nails grow, a gap will appear between the acrylic and the cuticle. To maintain the appearance of your acrylic nails, schedule regular fill-ins every 2-3 weeks.
* **Avoid Harsh Chemicals:** Exposure to harsh chemicals can damage the acrylic and cause it to lift or crack. Wear gloves when cleaning or working with chemicals.
* **Moisturize Regularly:** Keep your cuticles and surrounding skin moisturized to prevent dryness and cracking.
* **Avoid Using Nails as Tools:** Using your nails as tools can cause them to break or crack. Use proper tools for tasks such as opening packages or scraping off stickers.
* **Protect Your Nails:** Wear gloves when doing activities that may damage your nails, such as gardening or washing dishes.
Expert Tips and Tricks for Perfect Acrylic Nail Application
Here are some expert tips and tricks to help you achieve perfect acrylic nail application:
* **Practice Makes Perfect:** The more you practice, the better you will become at applying acrylic nails. Don’t be discouraged if you don’t get it right the first time. Keep practicing and you will eventually master the technique.
* **Work in a Well-Ventilated Area:** Acrylic fumes can be strong and potentially harmful. Work in a well-ventilated area to minimize exposure.
* **Use a High-Quality Brush:** A good quality acrylic nail brush is essential for achieving a smooth and even application. Invest in a brush that is specifically designed for acrylic nails.
* **Clean Your Brush Regularly:** Clean your brush after each use to prevent the acrylic from hardening and damaging the bristles. Use a brush cleaner specifically designed for acrylic nails.
* **Take Your Time:** Applying acrylic nails can be a time-consuming process. Don’t rush the process, take your time and focus on each step to achieve the best results.
Leading Acrylic Nail Products and Services
When it comes to acrylic nail products, one brand stands out for its quality and innovation: **CND (Creative Nail Design)**. CND offers a comprehensive range of acrylic powders, liquids, and tools that are trusted by nail technicians worldwide. Their products are known for their consistent performance, durability, and ease of use. CND also provides extensive training and education for nail professionals, ensuring they have the skills and knowledge to deliver exceptional results.
CND’s Retention+ Sculpting Liquid is a popular choice among professionals. It’s designed for superior adhesion and flexibility, reducing the risk of lifting and cracking. When paired with CND Perfect Color Sculpting Powders, the results are consistently strong and beautiful.
Detailed Feature Analysis of CND Acrylic System
Let’s delve into the key features of the CND acrylic system and how they contribute to a superior acrylic nail application:
1. **Superior Adhesion:** The Retention+ Sculpting Liquid is formulated with advanced bonding agents that promote exceptional adhesion to the natural nail. This reduces the risk of lifting and ensures long-lasting wear. *This is achieved through a unique blend of monomers that create a strong chemical bond with the keratin in the natural nail.* User benefit: Fewer repairs, longer lasting nails, less time spent on maintenance.
2. **Flexibility:** The flexible formula of the Retention+ Sculpting Liquid allows the acrylic to move with the natural nail, reducing the risk of cracking. *The polymer chains are designed to allow for slight bending without breaking, mimicking the natural movement of a nail.* User benefit: More durable nails, reduced chance of breakage, more comfortable wear.
3. **Color Stability:** CND Perfect Color Sculpting Powders are formulated with color stabilizers that prevent yellowing and fading. *The powders contain UV absorbers that protect the color pigments from degradation caused by sunlight exposure.* User benefit: Nails maintain their color and vibrancy for longer, less need for frequent touch-ups.
4. **Easy Workability:** The smooth and creamy consistency of the CND acrylic system makes it easy to work with, allowing for precise sculpting and shaping. *The particle size of the powder is optimized for smooth mixing and application, allowing for even distribution and minimal air pockets.* User benefit: Easier application, less product waste, more precise sculpting.
5. **Odor Control:** CND acrylic products are formulated with odor-reducing agents that minimize the strong smell associated with acrylic application. *The monomers are carefully selected to reduce the release of volatile organic compounds (VOCs) during polymerization.* User benefit: More comfortable working environment, reduced exposure to potentially harmful fumes.
6. **Versatile Application:** The CND acrylic system can be used for a variety of techniques, including sculpting, tipping, and overlaying. *The products are designed to work well with both nail tips and nail forms, allowing for customized nail designs.* User benefit: Flexibility in design options, ability to create unique nail shapes and lengths.
7. **Professional Training and Support:** CND provides extensive training and education for nail professionals, ensuring they have the skills and knowledge to deliver exceptional results. *CND’s training programs cover everything from basic acrylic application to advanced sculpting techniques, providing comprehensive knowledge and hands-on experience.* User benefit: Confidence in application, ability to troubleshoot problems, access to expert advice.
Significant Advantages, Benefits & Real-World Value of Acrylic Nails
Acrylic nails offer a multitude of advantages and benefits that make them a popular choice for those seeking enhanced nail aesthetics and durability. Here’s a breakdown of the real-world value they provide:
* **Enhanced Aesthetics:** Acrylic nails provide a flawless canvas for nail art and design. They can be customized to any shape, length, and color, allowing you to express your personal style and create a polished look. *Users consistently report increased confidence and self-esteem when wearing acrylic nails.* They allow for creative expression through nail art.
* **Increased Durability:** Acrylic nails are much stronger and more durable than natural nails. They can withstand daily wear and tear, preventing breakage and chipping. *Our analysis reveals that acrylic nails are significantly more resistant to damage compared to natural nails.* This is especially important for people whose jobs require use of their hands.
* **Length and Shape Customization:** Acrylic nails allow you to achieve any desired length and shape, even if your natural nails are short or brittle. This is especially beneficial for those who struggle to grow their natural nails. *Nail technicians report that acrylics are the most effective way to achieve dramatic length and shape transformations.*
* **Concealing Imperfections:** Acrylic nails can effectively conceal imperfections such as ridges, discoloration, or damage to the natural nail. This creates a smooth and even surface for nail polish and art. *Acrylics offer a way to hide nail imperfections and present a polished, flawless look.*
* **Long-Lasting Results:** With proper maintenance, acrylic nails can last for several weeks, providing a long-lasting solution for beautiful and durable nails. *Regular fill-ins every 2-3 weeks can extend the lifespan of acrylic nails significantly.*
* **Protection for Natural Nails:** Acrylic nails can provide a protective layer over the natural nail, preventing damage from external factors such as chemicals, water, and physical trauma. *Acrylics act as a shield, protecting the natural nail from damage and promoting growth.*
* **Cost-Effectiveness:** While the initial investment in acrylic nails may seem higher than a regular manicure, their long-lasting nature and durability make them a cost-effective option in the long run. *Over time, acrylics can save money compared to frequent manicures and repairs of natural nails.*
Comprehensive & Trustworthy Review of Acrylic Nails
Acrylic nails have been a beauty staple for decades, and their popularity continues to thrive. But are they right for everyone? Let’s take a balanced look at the pros and cons to help you make an informed decision.
**User Experience & Usability:**
From a practical standpoint, getting acrylic nails put on involves a commitment of time and money. The initial application can take anywhere from 1 to 2 hours, depending on the complexity of the design. Maintenance, in the form of fill-ins, is required every 2-3 weeks to prevent lifting and maintain the appearance. The process itself is generally comfortable, though some individuals may experience sensitivity to the chemicals used. The weight of the acrylic can take some getting used to, especially with longer lengths. However, most users adapt quickly and appreciate the enhanced look and durability.
**Performance & Effectiveness:**
Acrylic nails deliver on their promises of enhanced aesthetics and durability. They provide a flawless canvas for nail art and can withstand daily wear and tear without chipping or breaking. They are particularly effective for individuals with weak or brittle nails who struggle to grow them naturally. In our experience, acrylics can significantly improve the overall appearance of hands and boost confidence.
**Pros:**
* **Durability:** Acrylic nails are incredibly strong and resistant to chipping and breaking, making them ideal for those who are hard on their hands.
* **Customization:** They can be customized to any shape, length, and design, allowing for endless creative possibilities.
* **Length and Shape Transformation:** Acrylics can instantly transform short or misshapen nails into long, elegant extensions.
* **Concealing Imperfections:** They effectively cover up any imperfections on the natural nail, creating a smooth and even surface.
* **Long-Lasting:** With proper maintenance, acrylic nails can last for several weeks, providing a long-term solution for beautiful nails.
**Cons/Limitations:**
* **Potential Damage to Natural Nails:** Improper application or removal can damage the natural nail, leading to thinning, weakness, and even fungal infections.
* **Chemical Exposure:** The chemicals used in acrylic application can be irritating to the skin and respiratory system. Proper ventilation and protective measures are essential.
* **Maintenance Requirements:** Regular fill-ins are necessary to maintain the appearance of acrylic nails, requiring ongoing time and expense.
* **Cost:** The initial cost of acrylic application, as well as the ongoing cost of fill-ins, can be a significant investment.
**Ideal User Profile:**
Acrylic nails are best suited for individuals who:
* Desire long, durable, and customizable nails.
* Are willing to commit to regular maintenance.
* Have healthy natural nails or are seeking to conceal imperfections.
* Are prepared to invest in professional application and removal.
**Key Alternatives:**
* **Gel Nails:** Gel nails offer a more natural look and are less damaging to the natural nail. However, they are not as durable as acrylics.
* **Dip Powder Nails:** Dip powder nails are a relatively new option that offers a balance of durability and ease of application.
**Expert Overall Verdict & Recommendation:**
Acrylic nails are a fantastic option for those seeking durable, customizable, and long-lasting nail enhancements. However, it’s crucial to choose a reputable nail technician who uses high-quality products and follows proper application and removal techniques. If you’re willing to commit to regular maintenance and take precautions to protect your natural nails, acrylics can be a worthwhile investment in your overall appearance. We recommend starting with a shorter length and a simple design to get used to the feel of acrylics before experimenting with more elaborate styles.
Insightful Q&A Section
Here are some frequently asked questions about acrylic nails, addressing common concerns and providing expert advice:
1. **Q: How can I minimize damage to my natural nails when getting acrylics?**
**A:** Proper preparation and removal are key. Ensure your nail technician gently buffs the natural nail and avoids over-filing. Never pick or peel off acrylics; always have them professionally removed using acetone.
2. **Q: What are the signs of a fungal infection under acrylic nails, and what should I do?**
**A:** Signs include discoloration (green, yellow, or brown), lifting of the acrylic, and a foul odor. If you suspect an infection, immediately remove the acrylics and consult a doctor or dermatologist.
3. **Q: How often should I get fill-ins for my acrylic nails?**
**A:** Generally, fill-ins are recommended every 2-3 weeks, depending on the growth rate of your natural nails. This prevents lifting and maintains the structural integrity of the acrylics.
4. **Q: Can I apply acrylic nails myself at home, or is it best to go to a professional?**
**A:** While DIY acrylic kits are available, it’s generally best to go to a professional. Proper application requires skill and experience to avoid damage to the natural nails and ensure a long-lasting result.
5. **Q: What are the best ways to protect my acrylic nails from damage?**
**A:** Wear gloves when cleaning or doing dishes, avoid using your nails as tools, and moisturize your cuticles regularly. Also, be mindful of activities that could cause impact or trauma to your nails.
6. **Q: Are there any alternatives to acrylic nails that are less damaging to the natural nails?**
**A:** Yes, gel nails and dip powder nails are generally considered less damaging alternatives. However, they may not be as durable as acrylics.
7. **Q: How can I choose a reputable nail technician for acrylic application?**
**A:** Look for technicians with certifications, positive reviews, and a clean and well-maintained salon. Ask about their experience with acrylic application and their methods for preventing damage to the natural nails.
8. **Q: What are the common mistakes to avoid when getting acrylic nails?**
**A:** Avoid over-filing the natural nail, using low-quality products, neglecting proper hygiene, and picking or peeling off the acrylics.
9. **Q: Can I paint over my acrylic nails with regular nail polish?**
**A:** Yes, you can paint over acrylic nails with regular nail polish. However, it’s important to use a base coat to protect the acrylic and a top coat to seal the polish and prevent chipping.
10. **Q: How do I remove acrylic nails at home without damaging my natural nails?**
**A:** Soak your nails in acetone for 20-30 minutes, or until the acrylic softens. Gently scrape off the softened acrylic with a cuticle pusher. Avoid forcing or peeling off the acrylic, as this can damage the natural nail.
Conclusion & Strategic Call to Action
Mastering the art of acrylic nails being put on requires a combination of knowledge, skill, and attention to detail. By following the guidelines and expert tips outlined in this comprehensive guide, you can achieve beautiful, durable, and professional-looking acrylic nails that enhance your overall appearance and boost your confidence. Remember, proper preparation, high-quality products, and regular maintenance are essential for preventing damage to your natural nails and ensuring long-lasting results. We’ve explored the evolution, chemistry, application techniques, and maintenance of acrylic nails, offering insights that go beyond basic tutorials. Now it’s time to put your knowledge into practice.
What are your biggest challenges or successes when it comes to acrylic nails being put on? Share your experiences and tips in the comments below! For personalized advice or to explore advanced nail art techniques, contact our expert nail technicians for a consultation. Let’s elevate your acrylic nail game together!
