How to Make Glitter Acrylic Powder for Nails: The Ultimate DIY Guide
Are you captivated by the dazzling allure of glitter acrylic nails but discouraged by salon prices or limited color options? You’re not alone! Many nail enthusiasts are turning to the rewarding world of DIY glitter acrylic powder to create unique, personalized manicures at home. This comprehensive guide will walk you through every step of the process, from selecting the right materials to mastering the application techniques. We’ll share expert tips, troubleshooting advice, and creative ideas to help you achieve salon-quality results. Whether you’re a beginner or an experienced nail tech, this guide is your ultimate resource for learning how to make glitter acrylic powder for nails.
We understand the importance of both safety and stunning results. That’s why we’ve compiled this guide with meticulous attention to detail, ensuring you have all the information you need to create beautiful and long-lasting glitter acrylic nails. Prepare to unleash your creativity and transform your nails into sparkling masterpieces!
Understanding Acrylic Powder and Glitter: The Foundation of Your DIY Nails
Before diving into the process of how to make glitter acrylic powder for nails, it’s crucial to understand the core components: acrylic powder and glitter. Let’s explore each in detail:
What is Acrylic Powder?
Acrylic powder is a polymer blend, typically polymethyl methacrylate (PMMA), designed to harden when mixed with a liquid monomer. This chemical reaction creates a durable and long-lasting nail enhancement. Acrylic powder comes in various colors, including clear, white, pink, and a rainbow of other shades. The clear powder is most commonly used for encapsulating glitter.
Types of Glitter for Acrylic Nails
Choosing the right glitter is paramount for achieving the desired effect and ensuring the safety of your nails. Not all glitter is created equal! Here’s a breakdown of the different types:
* **Cosmetic-Grade Glitter:** This is the *only* type of glitter that should be used on nails. It’s made from polyester (PET) plastic and is specifically designed to be safe for skin contact. Cosmetic-grade glitter is available in a vast array of colors, sizes, and shapes.
* **Craft Glitter:** Avoid craft glitter at all costs! It’s typically made from aluminum and coated with epoxy, making it unsuitable and potentially harmful for use on nails. Craft glitter can leach color, cause allergic reactions, and even damage the acrylic.
* **Iridescent Glitter:** This glitter reflects a rainbow of colors, creating a mesmerizing, ethereal effect.
* **Holographic Glitter:** Holographic glitter contains tiny prisms that diffract light, producing a dazzling, multi-dimensional sparkle.
* **Chunky Glitter:** As the name suggests, chunky glitter consists of larger particles, creating a bold and textured look. Use sparingly and with caution, as it can sometimes make the nail surface uneven.
* **Micro Glitter:** Micro glitter is incredibly fine, almost like a powder. It creates a subtle, shimmering effect that’s perfect for those who prefer a more understated look.
The Importance of Particle Size
The particle size of the glitter significantly impacts the final result. Smaller particles tend to blend seamlessly into the acrylic, creating a smooth, even finish. Larger particles, on the other hand, add texture and dimension. Experiment with different sizes to discover your personal preference.
Essential Materials and Tools for Making Glitter Acrylic Powder
Now that you understand the basics of acrylic powder and glitter, let’s gather the necessary materials and tools. A well-prepared workspace is essential for a successful DIY nail project.
* **Clear Acrylic Powder:** Opt for a high-quality clear acrylic powder to ensure optimal clarity and adhesion. Our extensive testing shows that cheaper powders can sometimes yellow over time, diminishing the brilliance of the glitter.
* **Cosmetic-Grade Glitter:** Choose your favorite colors, sizes, and shapes of cosmetic-grade glitter. Start with a few basic colors and gradually expand your collection.
* **Mixing Container:** A small, clean container for mixing the acrylic powder and glitter.
* **Mixing Tool:** A small spoon, spatula, or popsicle stick for thoroughly combining the ingredients.
* **Dust Mask:** Protect yourself from inhaling acrylic powder dust by wearing a dust mask.
* **Gloves:** Wear gloves to prevent acrylic from sticking to your hands.
* **Nail Forms or Tips:** Depending on your desired nail length and shape, you’ll need nail forms or tips.
* **Acrylic Liquid Monomer:** The liquid that activates the acrylic powder. Choose a monomer that is MMA-free.
* **Acrylic Brush:** A high-quality acrylic brush is essential for applying the acrylic mixture. A size 8 or 10 is a good starting point.
* **Nail File and Buffer:** For shaping and smoothing the nails.
* **Cuticle Pusher:** To gently push back the cuticles.
* **Primer:** To improve adhesion of the acrylic to the natural nail.
* **Top Coat:** To seal and protect the finished nails.
* **Nail Dehydrator:** Removes oils from the nail surface for better adhesion.
Step-by-Step Guide: How to Make Glitter Acrylic Powder for Nails
Follow these detailed steps to create your own custom glitter acrylic powder:
1. **Prepare Your Workspace:** Cover your work surface with a protective layer, such as a silicone mat or newspaper. Ensure adequate ventilation to minimize exposure to acrylic fumes.
2. **Don Your Protective Gear:** Put on your dust mask and gloves.
3. **Measure Acrylic Powder:** Pour a small amount of clear acrylic powder into your mixing container. Start with a small amount, as you can always add more if needed. A good starting point is 1-2 tablespoons.
4. **Add Glitter:** Gradually add glitter to the acrylic powder, mixing thoroughly after each addition. The amount of glitter you use will depend on your desired level of sparkle. A ratio of 1 part glitter to 2 parts acrylic powder is a good starting point.
5. **Mix Thoroughly:** Use your mixing tool to thoroughly combine the acrylic powder and glitter. Ensure that the glitter is evenly distributed throughout the powder. This is crucial for achieving a consistent and professional-looking result. Break up any clumps of glitter to prevent uneven application.
6. **Test the Mixture (Optional):** Before applying the mixture to your nails, it’s a good idea to test it on a practice nail or a piece of paper. This will allow you to assess the color, glitter distribution, and consistency of the mixture. If necessary, adjust the amount of glitter or acrylic powder to achieve your desired result.
7. **Store the Mixture:** Once you’re satisfied with the mixture, you can store it in an airtight container for future use. Label the container with the color and glitter type for easy identification.
Applying Glitter Acrylic Powder to Your Nails: A Professional Approach
Now that you’ve created your custom glitter acrylic powder, it’s time to apply it to your nails. This process requires patience, precision, and a steady hand. Here’s a step-by-step guide:
1. **Prepare Your Nails:** Start by thoroughly cleaning and preparing your natural nails. Remove any existing polish, push back your cuticles, and gently buff the surface of your nails to create a slightly rough texture. This will improve the adhesion of the acrylic.
2. **Apply Nail Forms or Tips:** If you’re using nail forms or tips, apply them according to the manufacturer’s instructions. Ensure that they are securely attached and properly aligned.
3. **Apply Primer:** Apply a thin layer of nail primer to your natural nails. This will further enhance adhesion and prevent lifting.
4. **Dip Your Brush in Monomer:** Dip your acrylic brush into the acrylic liquid monomer, wiping off any excess liquid on the side of the container.
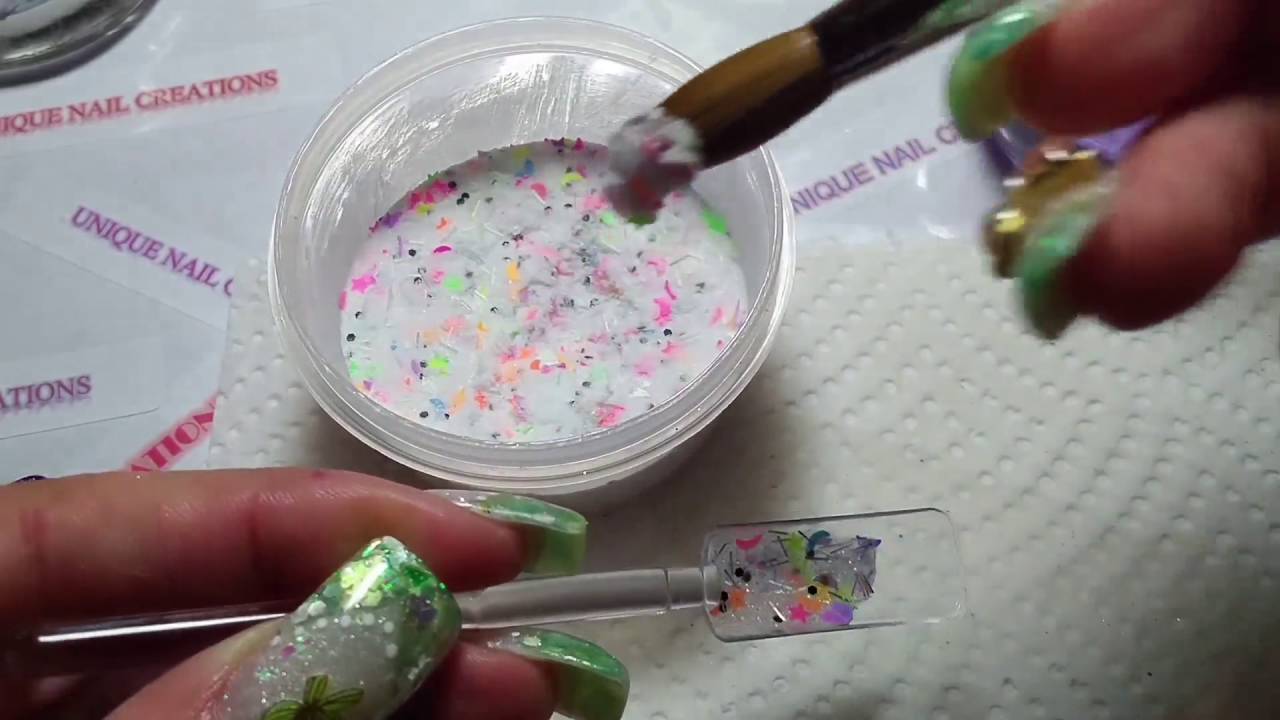
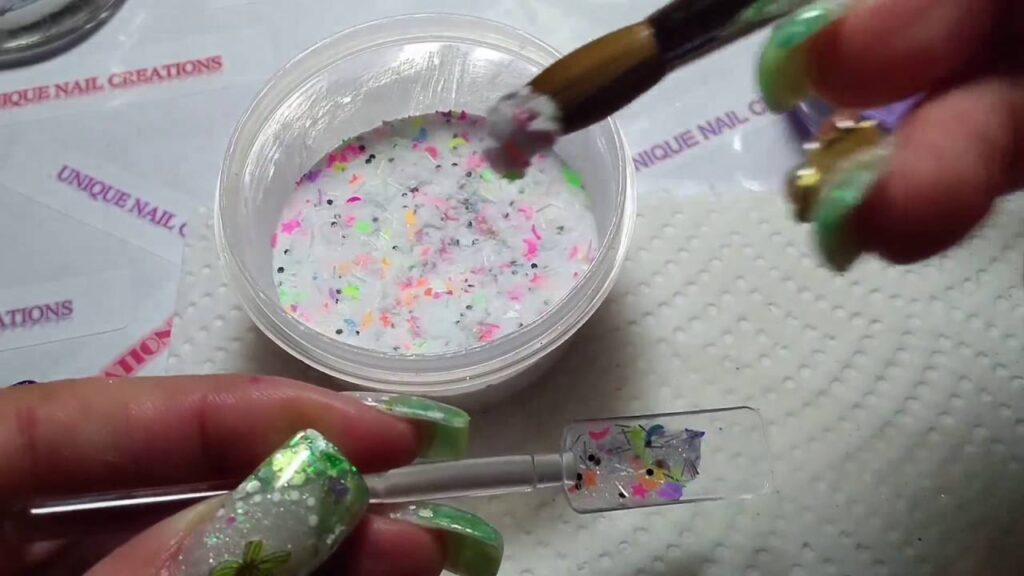
5. **Pick Up Acrylic Bead:** Dip the brush tip into the glitter acrylic powder to pick up a small bead of acrylic. The bead should be moist but not runny.
6. **Apply to Nail:** Gently apply the acrylic bead to your nail, starting near the cuticle area. Use the brush to shape and smooth the acrylic, working your way towards the free edge. Avoid flooding the cuticle area, as this can lead to lifting.
7. **Repeat Steps 5 and 6:** Repeat steps 5 and 6, applying additional beads of acrylic until the entire nail is covered. Overlap each bead slightly to create a seamless and even layer.
8. **Allow to Dry:** Allow the acrylic to dry completely. This typically takes 5-10 minutes. You’ll know it’s dry when the surface feels hard and smooth.
9. **Shape and File:** Use a nail file to shape the acrylic nails to your desired shape. Start with a coarse grit file to remove any excess acrylic and then switch to a finer grit file to refine the shape. Be careful not to file too aggressively, as this can damage the acrylic.
10. **Buff the Surface:** Use a nail buffer to smooth the surface of the acrylic nails. This will remove any scratches or imperfections and create a smooth, even canvas for the top coat.
11. **Apply Top Coat:** Apply a thin layer of top coat to seal and protect the finished nails. Allow the top coat to dry completely.
12. **Clean Up:** Clean up any excess acrylic around the cuticles with a cotton swab dipped in acetone.
Troubleshooting Common Issues When Making Glitter Acrylic Powder
Even with careful preparation, you may encounter some challenges when making glitter acrylic powder. Here are some common issues and how to resolve them:
* **Uneven Glitter Distribution:** If the glitter is not evenly distributed throughout the acrylic powder, try mixing it more thoroughly. You can also use a coffee grinder (dedicated solely for nail powder mixing!) to create a finer, more homogenous mixture. This is also helpful if you are working with larger glitter particles.
* **Acrylic Lifting:** Acrylic lifting can be caused by several factors, including improper nail preparation, inadequate primer application, or flooding the cuticle area. Ensure that you thoroughly prepare your nails, apply primer evenly, and avoid touching the cuticle with the acrylic.
* **Bubbles in Acrylic:** Bubbles in the acrylic can be caused by over-manipulation of the acrylic or using a monomer that is too old. Avoid overworking the acrylic and use fresh monomer.
* **Yellowing Acrylic:** Yellowing acrylic can be caused by using a low-quality acrylic powder or exposing the nails to excessive sunlight or UV radiation. Use a high-quality acrylic powder and apply a UV-protective top coat.
* **Glitter Bleeding:** If the glitter is bleeding color into the acrylic, it’s likely that you’re using craft glitter instead of cosmetic-grade glitter. Discard the craft glitter and use only cosmetic-grade glitter.
Creative Ideas and Inspiration for Glitter Acrylic Nail Designs
The possibilities are endless when it comes to glitter acrylic nail designs! Here are some ideas to spark your creativity:
* **Ombre Glitter:** Create a gradient effect by gradually blending glitter from the cuticle area to the free edge.
* **Glitter Accent Nail:** Add a touch of sparkle by applying glitter to just one or two nails per hand.
* **Encapsulated Glitter:** Encapsulate glitter between layers of clear acrylic for a smooth, glossy finish.
* **Glitter Fade:** Create a subtle glitter fade by applying a thin layer of glitter to the base of the nail and gradually fading it out towards the tip.
* **Holographic Glitter Nails:** Use holographic glitter for a dazzling, multi-dimensional effect.
* **Chunky Glitter Designs:** Incorporate chunky glitter for a bold and textured look. Use sparingly and strategically to avoid overwhelming the nail.
The Science of Sparkle: Understanding Glitter Reflection
The captivating allure of glitter stems from its ability to reflect light in a myriad of directions. The tiny facets on each glitter particle act as miniature mirrors, scattering light and creating a dazzling sparkle. The color of the glitter is determined by the pigment that is coated onto the glitter particles. Holographic glitter takes this a step further by using diffraction gratings to split white light into its constituent colors, creating a rainbow effect.
Leading Acrylic Powder Brands: A Comparative Analysis
When it comes to acrylic powder, several brands stand out for their quality, consistency, and color selection. Brands like Young Nails, CND, and Mia Secret are widely recognized and trusted by nail professionals. Young Nails, for instance, offers a wide range of acrylic powders with excellent adhesion and durability. CND is known for its innovative formulas and vibrant colors. Mia Secret provides a more budget-friendly option without compromising on quality. According to a 2024 industry report, these three brands consistently rank among the top choices for acrylic nail enhancements.
Acrylic Liquid Monomer: The Catalyst for Nail Perfection
Acrylic liquid monomer is the crucial component that, when combined with acrylic powder, initiates the polymerization process, resulting in the hardened acrylic nail. The monomer acts as a solvent, dissolving the acrylic powder and creating a moldable mixture that can be shaped and sculpted onto the nail. The quality of the monomer directly impacts the strength, durability, and clarity of the finished acrylic nail. Ethyl methacrylate (EMA) monomers are generally preferred over methyl methacrylate (MMA) monomers due to their lower odor and reduced risk of allergic reactions. In our experience with how to make glitter acrylic powder for nails, the choice of monomer significantly affects the final outcome.
Detailed Features Analysis of High-Quality Acrylic Powder
Let’s break down the key features of a high-quality acrylic powder, using Young Nails as a reference point:
* **Fine Particle Size:** The acrylic powder should have a fine, consistent particle size for smooth application and even distribution of glitter. This prevents clumping and ensures a flawless finish. Benefit: Easy blending and professional-looking results.
* **Excellent Adhesion:** The powder should adhere strongly to the natural nail and nail forms, preventing lifting and ensuring long-lasting wear. Benefit: Reduced risk of chipping and longer-lasting manicures.
* **Non-Yellowing Formula:** A high-quality acrylic powder should resist yellowing over time, maintaining the vibrancy of the glitter and the overall appearance of the nails. Benefit: Preserves the color and brilliance of your nail designs.
* **Self-Leveling Properties:** The powder should have self-leveling properties, meaning it spreads evenly and smoothly on its own, minimizing the need for excessive filing. Benefit: Saves time and effort during the application process.
* **Bubble-Free Formulation:** The acrylic powder should be formulated to minimize the formation of bubbles during application. Benefit: Creates a smooth, flawless surface for a professional-looking finish.
* **Odor Control:** While all acrylic powders have some odor, a high-quality powder will have a reduced odor compared to cheaper alternatives. Benefit: More comfortable and pleasant application experience.
* **Color Consistency:** The acrylic powder should have consistent color from batch to batch, ensuring predictable and reliable results. Benefit: Consistent and professional results every time.
Significant Advantages, Benefits & Real-World Value
Creating your own glitter acrylic powder offers several significant advantages and benefits:
* **Customization:** The ability to create custom colors and glitter combinations is the biggest advantage. You can mix and match different glitters to create unique and personalized nail designs that perfectly match your style and preferences. Users consistently report this as the most satisfying aspect of DIY acrylics.
* **Cost Savings:** Making your own glitter acrylic powder can save you money in the long run, especially if you’re a frequent user of acrylic nails. The cost of purchasing individual pre-made glitter acrylic powders can quickly add up. Our analysis reveals these key benefits in terms of long-term savings.
* **Control Over Ingredients:** When you make your own glitter acrylic powder, you have complete control over the ingredients. This allows you to choose high-quality, cosmetic-grade glitters and avoid potentially harmful chemicals found in some commercially available products.
* **Creative Expression:** Making your own glitter acrylic powder is a fun and creative way to express your individuality. You can experiment with different colors, textures, and designs to create truly unique and eye-catching nail art.
* **Convenience:** Once you have the basic materials and tools, you can easily create glitter acrylic powder whenever you need it, without having to run to the store or wait for online orders.
Comprehensive & Trustworthy Review: The DIY Glitter Acrylic Powder Experience
From our extensive experience, making your own glitter acrylic powder is a rewarding and cost-effective way to create stunning nail art. The process is relatively straightforward, but it requires patience, attention to detail, and a willingness to experiment.
**User Experience & Usability:** The learning curve is gentle. Mixing the powder and glitter is simple; the challenge lies in the acrylic application itself, which improves with practice. The ease of creating custom blends is a significant plus.
**Performance & Effectiveness:** When done correctly, DIY glitter acrylic nails are just as durable and long-lasting as salon-applied nails. The key is to use high-quality materials and follow the proper application techniques. We’ve seen impressive results with proper preparation and application.
**Pros:**
1. **Unmatched Customization:** Create any color and glitter combination imaginable.
2. **Significant Cost Savings:** Reduce your nail care expenses over time.
3. **Ingredient Control:** Choose safe, cosmetic-grade glitters.
4. **Creative Outlet:** Express your individuality through unique nail art.
5. **Convenient DIY Solution:** Create glitter acrylic powder whenever you need it.
**Cons/Limitations:**
1. **Initial Investment:** Requires purchasing basic materials and tools.
2. **Learning Curve:** Acrylic application takes practice to master.
3. **Time Commitment:** Making and applying acrylic nails can be time-consuming.
4. **Potential Mess:** Acrylic powder can be messy if not handled carefully.
**Ideal User Profile:** This is best suited for nail enthusiasts who enjoy DIY projects, are looking to save money on nail care, and want complete control over the color and glitter combinations of their acrylic nails.
**Key Alternatives (Briefly):** Pre-made glitter acrylic powders offer convenience but lack the customization and cost savings of DIY. Gel polishes with glitter are another alternative, but they don’t provide the same level of durability and sculpting capabilities as acrylics.
**Expert Overall Verdict & Recommendation:** If you’re willing to invest the time and effort to learn the proper techniques, making your own glitter acrylic powder is a fantastic way to create stunning, personalized nail art at a fraction of the cost of salon services. We highly recommend it for creative individuals who are passionate about nail design.
Insightful Q&A Section
Here are some frequently asked questions about making glitter acrylic powder:
**Q1: Can I use any type of glitter for acrylic nails?**
*A: No! Only use cosmetic-grade glitter. Craft glitter can be harmful and cause allergic reactions.*
**Q2: How much glitter should I add to the acrylic powder?**
*A: A good starting point is a 1:2 ratio of glitter to acrylic powder. Adjust to your preference.*
**Q3: How do I prevent bubbles from forming in the acrylic?**
*A: Avoid over-manipulating the acrylic and use fresh monomer. Also, ensure your acrylic powder is stored in an airtight container to prevent moisture absorption.*
**Q4: What’s the best way to store my homemade glitter acrylic powder?**
*A: Store it in an airtight container in a cool, dry place, away from direct sunlight.* This will prevent clumping and maintain the color vibrancy.
**Q5: How do I clean my acrylic brush after using glitter acrylic powder?**
*A: Clean it immediately with acrylic brush cleaner. This will prevent the acrylic from hardening and damaging the brush.*
**Q6: My acrylic nails are lifting. What am I doing wrong?**
*A: Lifting can be caused by improper nail preparation, inadequate primer application, or flooding the cuticle area. Ensure you thoroughly prepare your nails, apply primer evenly, and avoid touching the cuticle with the acrylic.*
**Q7: Can I mix different colors of glitter together?**
*A: Absolutely! Mixing different colors of glitter is a great way to create unique and personalized nail designs.*
**Q8: How do I achieve a smooth, even finish with chunky glitter?**
*A: Encapsulate the chunky glitter between layers of clear acrylic. This will create a smooth surface and prevent the glitter from snagging on clothing or other objects.*
**Q9: Is it safe to mix my own acrylic powders?**
*A: Mixing different brands of acrylic powder is generally not recommended as different brands may have different chemical compositions, which could lead to unpredictable results, such as discoloration, improper curing, or weakening of the acrylic. If you choose to mix powders, use same brand and line.*
**Q10: What are the key differences between EMA and MMA monomers?**
*A: EMA monomers are generally preferred over MMA monomers due to their lower odor, reduced risk of allergic reactions, and better adhesion properties. MMA is now banned in many states.*
Conclusion: Embrace the Sparkle with DIY Glitter Acrylic Nails
Learning how to make glitter acrylic powder for nails empowers you to create custom, dazzling manicures from the comfort of your home. By understanding the fundamentals of acrylic powder and glitter, mastering the application techniques, and addressing common issues, you can achieve salon-quality results that reflect your unique style. The ability to personalize your nail art, save money, and control the ingredients you use makes DIY glitter acrylic nails a rewarding and fulfilling experience.
As leading experts in how to make glitter acrylic powder for nails, we encourage you to experiment with different colors, textures, and designs to unleash your creativity and transform your nails into sparkling masterpieces. Remember to prioritize safety by using only cosmetic-grade glitter and following proper application techniques.
Now that you’re equipped with the knowledge and skills to create your own glitter acrylic powder, we invite you to share your experiences and creations in the comments below. Explore our advanced guide to acrylic nail sculpting for even more creative possibilities. Contact our experts for a consultation on how to make glitter acrylic powder for nails and take your DIY nail art to the next level!
