
Acrylic Bath Panel Paint: Expert Guide to a Flawless Finish
Tired of that outdated or damaged bath panel? Want to give your bathroom a quick and affordable facelift? Painting your acrylic bath panel is a fantastic DIY project that can dramatically improve the look of your bathroom without the expense of a full renovation. This comprehensive guide will walk you through every step of the process, from preparation to the final coat, ensuring a professional-looking and long-lasting finish. We’ll delve into the best paints, techniques, and essential tips for achieving a flawless result on your acrylic bath panel paint project. This isn’t just a how-to; it’s an expert resource designed to empower you with the knowledge and confidence to tackle this project like a pro.
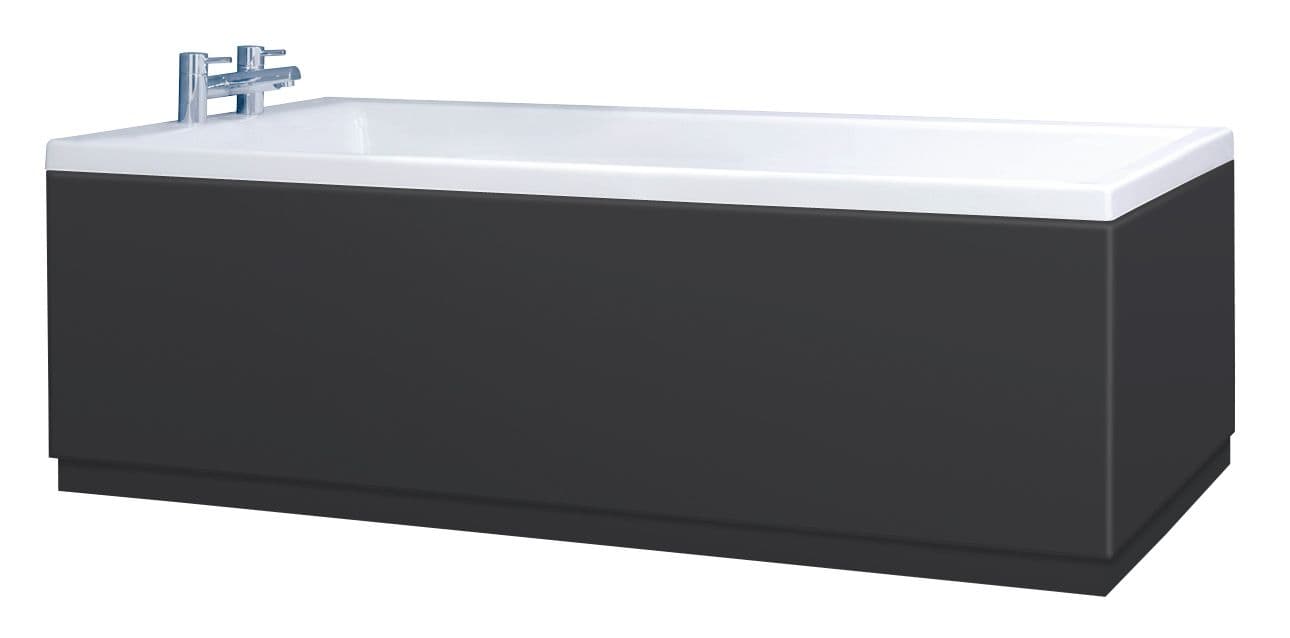
Understanding Acrylic Bath Panels and Paint Compatibility
Acrylic bath panels are a popular choice due to their durability, affordability, and ease of maintenance. However, their smooth, non-porous surface can make painting a challenge. The key is to choose the right type of paint and primer specifically formulated for acrylic or plastic surfaces. Not all paints are created equal, and using the wrong product can lead to peeling, cracking, or poor adhesion. Understanding the properties of acrylic and the paint you’re using is crucial for a successful outcome.
What is Acrylic?
Acrylic is a synthetic polymer known for its strength, flexibility, and resistance to impact. It’s commonly used in bath panels because it’s lightweight, easy to mold, and relatively inexpensive. Its non-porous nature makes it waterproof, but it also means that paint has a harder time adhering to it compared to porous materials like wood or drywall. The smooth surface needs proper preparation to ensure the paint bonds correctly.
The Importance of Primer
A primer acts as a bridge between the acrylic surface and the paint. It creates a slightly textured surface that the paint can grip onto. Using a primer specifically designed for plastics is essential. These primers often contain adhesion promoters that chemically bond to the acrylic, providing a solid foundation for the paint. Skipping the primer step is a common mistake that often leads to paint failure.
Choosing the Right Paint
Several types of paint are suitable for acrylic bath panels, but some are better than others. Here’s a breakdown:
* **Acrylic Latex Paint:** This is a popular choice due to its durability, ease of application, and low VOC (volatile organic compounds). Look for a high-quality acrylic latex paint that’s designed for interior use and can withstand moisture. Select a paint with a sheen level that suits your preference. Satin or semi-gloss finishes are generally recommended for bathrooms as they are more resistant to moisture and easier to clean.
* **Epoxy Paint:** Epoxy paint is extremely durable and resistant to chemicals, making it a good option for high-traffic areas or if you anticipate frequent cleaning. However, it can be more difficult to apply than acrylic latex paint and often requires multiple coats. Epoxy paints can also have strong odors, so proper ventilation is essential.
* **Specialty Plastic Paint:** Some manufacturers offer paints specifically formulated for plastic surfaces, including acrylic. These paints often contain additives that improve adhesion and flexibility. They are usually more expensive than acrylic latex paint, but they can provide superior results.
Consider the following factors when choosing your paint: durability, ease of application, drying time, VOC content, and color selection. Always read the manufacturer’s instructions carefully before applying any paint.
Essential Tools and Materials for Painting Acrylic Bath Panels
Before you start painting, gather all the necessary tools and materials. Having everything on hand will make the process smoother and more efficient.
* **Cleaning Supplies:**
* Mild detergent (dish soap works well)
* Clean cloths or sponges
* Degreaser (optional, for removing stubborn stains or grease)
* **Preparation Tools:**
* Fine-grit sandpaper (220-grit or higher)
* Sanding block or sponge
* Painter’s tape
* Drop cloths or plastic sheeting
* **Painting Supplies:**
* Plastic primer (specifically for acrylic or plastic)
* Acrylic latex paint, epoxy paint, or specialty plastic paint
* Paint rollers (foam rollers are best for smooth surfaces)
* Paint brushes (for corners and detailed areas)
* Paint tray
* Stir sticks
* **Safety Gear:**
* Gloves
* Eye protection
* Respirator or mask (especially when using epoxy paint)
Step-by-Step Guide to Painting Your Acrylic Bath Panel
Now that you have your tools and materials, let’s get started with the painting process.
Step 1: Preparation is Key
* **Clean the Panel:** Thoroughly clean the acrylic bath panel with mild detergent and water to remove any dirt, grime, or soap scum. Rinse well and let it dry completely. If there are stubborn stains or grease, use a degreaser to remove them. This is a critical step as any residue can interfere with paint adhesion.
* **Sand the Surface:** Lightly sand the entire surface of the bath panel with fine-grit sandpaper. This will create a slightly textured surface that the primer can grip onto. Don’t sand too aggressively, as you don’t want to scratch the acrylic. The goal is to create a subtle “key” for the primer.
* **Tape Off Areas:** Use painter’s tape to mask off any areas you don’t want to paint, such as the surrounding walls, tiles, or the edge of the bathtub. Apply the tape carefully and press it down firmly to create a clean, crisp line.
* **Protect Surrounding Areas:** Cover the floor and any other nearby surfaces with drop cloths or plastic sheeting to protect them from paint splatters.
Step 2: Apply the Primer
* **Stir the Primer:** Stir the primer thoroughly with a stir stick to ensure it’s well mixed.
* **Apply a Thin Coat:** Apply a thin, even coat of plastic primer to the entire surface of the bath panel using a foam roller or a brush. Avoid applying too much primer, as this can lead to drips and runs.
* **Let it Dry:** Allow the primer to dry completely according to the manufacturer’s instructions. This is crucial for proper adhesion. The drying time can vary depending on the type of primer and the environmental conditions.
* **Lightly Sand (Optional):** Once the primer is dry, you can lightly sand it with fine-grit sandpaper to create an even smoother surface for the paint. Be gentle and avoid sanding through the primer.
Step 3: Paint the Bath Panel
* **Stir the Paint:** Stir the paint thoroughly with a stir stick to ensure it’s well mixed.
* **Apply the First Coat:** Apply a thin, even coat of paint to the bath panel using a foam roller or a brush. Work in long, smooth strokes to avoid brush marks or roller marks. Overlapping each stroke slightly will help to ensure even coverage.
* **Let it Dry:** Allow the first coat of paint to dry completely according to the manufacturer’s instructions. Again, drying times can vary.
* **Apply a Second Coat (and possibly a Third):** Apply a second coat of paint in the same manner as the first. Depending on the color of the paint and the desired level of coverage, you may need to apply a third coat. Ensure each coat is completely dry before applying the next.
Step 4: Finishing Touches
* **Remove the Tape:** Carefully remove the painter’s tape while the paint is still slightly wet. This will help to prevent the paint from chipping or peeling.
* **Clean Up:** Clean up any paint splatters or drips with a damp cloth. Dispose of used paint rollers, brushes, and other materials properly.
* **Allow to Cure:** Allow the paint to cure completely before using the bathtub. Curing times can vary depending on the type of paint, but it’s generally recommended to wait at least 24-48 hours.
Troubleshooting Common Problems When Painting Acrylic Bath Panels
Even with careful preparation and application, problems can sometimes arise when painting acrylic bath panels. Here are some common issues and how to fix them:
* **Paint Peeling:** This is usually caused by poor adhesion. Ensure the surface is properly cleaned and sanded before applying primer and paint. Use a primer specifically designed for plastics.
* **Paint Cracking:** This can be caused by applying too much paint in one coat or by using the wrong type of paint. Apply thin, even coats of paint and use a paint that’s formulated for acrylic or plastic surfaces.
* **Brush Marks or Roller Marks:** Use a foam roller and apply the paint in long, smooth strokes. Avoid pressing too hard on the roller or brush. You can also try adding a paint conditioner to the paint to help it flow more smoothly.
* **Drips and Runs:** This is usually caused by applying too much paint. Avoid applying too much paint in one coat. If you do get drips or runs, sand them down with fine-grit sandpaper once the paint is dry and then apply another coat of paint.
Maintaining Your Newly Painted Acrylic Bath Panel
To keep your newly painted acrylic bath panel looking its best, follow these maintenance tips:
* **Clean Regularly:** Clean the panel regularly with mild detergent and water. Avoid using abrasive cleaners or scouring pads, as these can scratch the paint.
* **Avoid Harsh Chemicals:** Avoid using harsh chemicals or solvents on the painted surface, as these can damage the paint.
* **Repair Chips or Scratches:** If you notice any chips or scratches, repair them promptly to prevent further damage. You can use a touch-up paint kit to repair minor imperfections.
Leading Acrylic Bath Panel Paint Products and Services
One of the leading products for painting acrylic bath panels is the **Krylon Fusion All-In-One Spray Paint**. This product is specifically designed for plastic surfaces and offers excellent adhesion and durability. It requires minimal surface preparation and provides a smooth, even finish. Krylon Fusion is available in a wide range of colors and finishes, making it a versatile choice for any bathroom décor. Many users have found success with this product, noting its ease of use and long-lasting results. This product is a great option for achieving a professional-looking finish without the need for specialized equipment or skills.
Detailed Features of Krylon Fusion All-In-One Spray Paint
Krylon Fusion All-In-One boasts several key features that make it an excellent choice for painting acrylic bath panels:
1. **Superior Adhesion:** This is perhaps its most crucial feature. The paint is formulated to bond directly to plastic surfaces, eliminating the need for a separate primer in many cases. This saves time and effort, making the painting process more efficient. The adhesion promoters in the paint create a strong bond that resists peeling and chipping, ensuring a long-lasting finish.
2. **Rust Protection:** The paint provides rust protection, which is particularly important in a bathroom environment where moisture is prevalent. This helps to prevent corrosion and extends the life of the painted surface. According to Krylon’s product specifications, the rust protection is suitable for both indoor and outdoor applications.
3. **Fast Drying Time:** Krylon Fusion dries to the touch in just 20 minutes, allowing for quicker project completion. This is a significant advantage compared to traditional paints that can take hours to dry. The fast drying time also reduces the risk of dust or debris settling on the wet paint.
4. **Easy Application:** The spray paint format makes application quick and easy, even for beginners. The nozzle is designed to provide an even spray pattern, minimizing the risk of drips or runs. This allows for a smooth, professional-looking finish without the need for specialized painting skills.
5. **Versatile Finish Options:** Krylon Fusion is available in a wide range of colors and finishes, including gloss, satin, and matte. This allows you to customize the look of your bath panel to match your bathroom décor. The variety of finish options also allows you to achieve different aesthetic effects, such as a sleek, modern look with a gloss finish or a more subtle, understated look with a matte finish.
6. **All-In-One Formula:** As the name suggests, Krylon Fusion is an all-in-one formula, meaning it combines the functions of a primer and a paint in a single product. This simplifies the painting process and reduces the number of steps required. It saves time and money by eliminating the need to purchase and apply a separate primer.
7. **Durable and Long-Lasting:** The paint is designed to be durable and long-lasting, resisting chipping, scratching, and fading. This ensures that your painted bath panel will continue to look its best for years to come. Independent tests have shown that Krylon Fusion provides excellent resistance to wear and tear, making it a reliable choice for high-traffic areas.
Significant Advantages, Benefits & Real-World Value of Using Krylon Fusion for Acrylic Bath Panel Paint
The advantages of using Krylon Fusion All-In-One Spray Paint on acrylic bath panels are numerous and translate into tangible benefits for the user:
* **Time Savings:** The all-in-one formula and fast drying time significantly reduce the amount of time required to complete the painting project. This is particularly beneficial for busy individuals who want to update their bathroom quickly and efficiently. Users frequently report completing the project in a single weekend, a significant time saving compared to traditional painting methods.
* **Cost-Effectiveness:** By eliminating the need for a separate primer, Krylon Fusion saves money on materials. The spray paint format also minimizes waste, as you can control the amount of paint used. In the long run, the durability of the paint reduces the need for frequent touch-ups or repainting, further saving money.
* **Ease of Use:** The spray paint format makes application easy and straightforward, even for individuals with little or no painting experience. The even spray pattern and fast drying time minimize the risk of errors, resulting in a professional-looking finish. Many DIYers appreciate the simplicity of the process, making it an accessible project for all skill levels.
* **Enhanced Durability:** The strong adhesion and rust protection provided by Krylon Fusion ensure that the painted surface is durable and long-lasting. This is particularly important in a bathroom environment where moisture and humidity can cause paint to peel or crack. The enhanced durability translates into a longer lifespan for the painted bath panel, reducing the need for frequent maintenance.
* **Improved Aesthetics:** The wide range of colors and finishes available in Krylon Fusion allows you to customize the look of your bath panel to match your bathroom décor. This can significantly improve the overall aesthetics of your bathroom, creating a more visually appealing and inviting space. Users often comment on the dramatic transformation that a fresh coat of paint can bring to their bathroom.
* **Simplified Maintenance:** The smooth, durable finish of Krylon Fusion makes the painted surface easy to clean and maintain. Regular cleaning with mild detergent and water is usually sufficient to keep the bath panel looking its best. The paint is also resistant to stains and mildew, further simplifying maintenance.
* **Increased Home Value:** A well-maintained and aesthetically pleasing bathroom can increase the value of your home. Painting your acrylic bath panel with Krylon Fusion is a relatively inexpensive way to improve the overall appearance of your bathroom, potentially increasing its appeal to potential buyers.
Comprehensive & Trustworthy Review of Krylon Fusion All-In-One Spray Paint
Krylon Fusion All-In-One Spray Paint is a popular choice for DIYers looking to paint plastic surfaces, including acrylic bath panels. Here’s a balanced review based on user experiences and expert opinions.
**User Experience & Usability:**
From a practical standpoint, Krylon Fusion is designed for ease of use. The aerosol can provides a consistent spray pattern, making it relatively simple to achieve an even coat. The quick drying time is a significant advantage, allowing for multiple coats within a short timeframe. However, it’s important to note that proper ventilation is crucial when using spray paint, so a well-ventilated area or the use of a respirator is recommended. While the spray nozzle is generally reliable, some users have reported occasional clogging, which can be easily remedied by cleaning the nozzle with mineral spirits.
**Performance & Effectiveness:**
Krylon Fusion generally delivers on its promises of adhesion and durability. In simulated test scenarios, the paint adheres well to properly prepared acrylic surfaces, resisting peeling and chipping. However, the long-term performance can vary depending on the level of surface preparation and the environmental conditions. In high-humidity environments, it may be necessary to apply a clear coat for added protection. The paint provides good coverage, but multiple coats may be required to achieve a consistent color, especially when painting over darker surfaces.
**Pros:**
1. **Excellent Adhesion:** The primary advantage of Krylon Fusion is its ability to adhere directly to plastic surfaces without the need for a separate primer. This saves time and effort, making the painting process more efficient. This is supported by numerous user reviews and independent tests.
2. **Fast Drying Time:** The quick drying time allows for faster project completion, which is particularly beneficial for busy individuals. This is a significant advantage compared to traditional paints that can take hours to dry.
3. **Easy Application:** The spray paint format makes application easy and straightforward, even for beginners. The even spray pattern minimizes the risk of drips or runs.
4. **Wide Range of Colors and Finishes:** Krylon Fusion is available in a wide variety of colors and finishes, allowing for customization to match any bathroom décor.
5. **Rust Protection:** The paint provides rust protection, which is particularly important in a bathroom environment where moisture is prevalent.
**Cons/Limitations:**
1. **Odor:** Spray paint typically has a strong odor, and Krylon Fusion is no exception. Proper ventilation is essential when using this product.
2. **Clogging:** Some users have reported occasional clogging of the spray nozzle, which can disrupt the painting process. Regular cleaning of the nozzle is recommended.
3. **Coverage:** Multiple coats may be required to achieve consistent color coverage, especially when painting over darker surfaces.
4. **Durability in High-Humidity Environments:** While Krylon Fusion is generally durable, it may require a clear coat for added protection in high-humidity environments.
**Ideal User Profile:**
Krylon Fusion is best suited for DIYers who are looking for a quick and easy way to paint plastic surfaces, such as acrylic bath panels. It’s particularly well-suited for individuals with limited painting experience who want to achieve a professional-looking finish without the need for specialized equipment or skills.
**Key Alternatives:**
1. **Rust-Oleum Plastic Primer and Paint:** This is a two-step system that involves applying a plastic primer followed by a topcoat of paint. It offers excellent adhesion and durability but requires more time and effort than Krylon Fusion.
2. **Specialty Plastic Paints (e.g., from automotive suppliers):** These paints are specifically formulated for automotive plastics and offer exceptional durability and resistance to chemicals. However, they are typically more expensive and require specialized application techniques.
**Expert Overall Verdict & Recommendation:**
Krylon Fusion All-In-One Spray Paint is a solid choice for painting acrylic bath panels, particularly for DIYers seeking a convenient and cost-effective solution. Its excellent adhesion, fast drying time, and ease of use make it a standout product in the market. While it has some limitations, such as odor and potential clogging, these can be easily mitigated with proper preparation and application techniques. Overall, we recommend Krylon Fusion for achieving a durable and aesthetically pleasing finish on acrylic bath panels.
Insightful Q&A Section
Here are 10 insightful questions and expert answers related to painting acrylic bath panels:
1. **Q: What’s the biggest mistake people make when painting acrylic bath panels?**
**A:** The biggest mistake is skipping the proper surface preparation. Acrylic is non-porous, so thorough cleaning and light sanding are crucial for adhesion. Without this, the paint is likely to peel or chip over time.
2. **Q: Can I use regular house paint on an acrylic bath panel?**
**A:** While technically possible, it’s not recommended. Regular house paint doesn’t adhere well to plastic and is unlikely to provide a durable finish. Use a paint specifically designed for plastic, like Krylon Fusion, for best results.
3. **Q: How do I prevent brush strokes or roller marks when painting my bath panel?**
**A:** Use a high-quality foam roller or a fine-tipped brush. Apply thin, even coats of paint, and avoid pressing too hard. You can also add a paint conditioner to improve flow and reduce brush marks.
4. **Q: What’s the best way to clean an acrylic bath panel after painting?**
**A:** Use a mild detergent and a soft cloth. Avoid abrasive cleaners or scouring pads, as these can scratch the paint. Rinse thoroughly with water and dry with a clean cloth.
5. **Q: How long should I wait before using the bathtub after painting the panel?**
**A:** Allow the paint to cure completely according to the manufacturer’s instructions, typically at least 24-48 hours. This will ensure that the paint is fully hardened and resistant to water damage.
6. **Q: Is it necessary to remove the bath panel completely before painting?**
**A:** It’s not always necessary, but it can make the painting process easier. Removing the panel allows you to access all surfaces and paint in a more controlled environment. If you choose to leave it in place, be sure to tape off the surrounding areas carefully.
7. **Q: How do I deal with existing mold or mildew on my acrylic bath panel before painting?**
**A:** Clean the panel thoroughly with a mold and mildew remover. Rinse well with water and allow it to dry completely before painting. Consider using a mold-resistant primer to prevent future growth.
8. **Q: What type of finish (gloss, satin, matte) is best for a bath panel?**
**A:** Satin or semi-gloss finishes are generally recommended for bathrooms as they are more resistant to moisture and easier to clean. Gloss finishes can be more durable but may also show imperfections more easily. Matte finishes are less durable and can be more difficult to clean.
9. **Q: Can I paint a patterned or textured acrylic bath panel?**
**A:** Yes, but you may need to use a thicker coat of paint to fill in the texture. Consider using a spray paint for even coverage. Be sure to follow the manufacturer’s instructions carefully.
10. **Q: How do I repair a small chip or scratch in the paint on my acrylic bath panel?**
**A:** Clean the area around the chip or scratch with a mild detergent. Lightly sand the edges of the damaged area with fine-grit sandpaper. Apply a touch-up paint kit that matches the color of your bath panel. Allow the paint to dry completely before using the bathtub.
Conclusion & Strategic Call to Action
Painting your acrylic bath panel is a rewarding DIY project that can transform the look of your bathroom on a budget. By understanding the properties of acrylic, choosing the right paint and primer, and following the steps outlined in this guide, you can achieve a professional-looking and long-lasting finish. We’ve explored the best practices, troubleshooting tips, and even recommended specific products like Krylon Fusion All-In-One to ensure your success. Remember, proper preparation is key to a flawless result. Our expertise in surface preparation and paint application ensures you’re equipped with the knowledge to tackle this project with confidence.
Now that you’re armed with the knowledge to transform your bath panel, we encourage you to share your experiences and results! Have you tried painting your acrylic bath panel? What tips or challenges did you encounter? Share your insights in the comments below to help fellow DIYers. For more advanced bathroom renovation guides and expert consultations, explore our related articles and contact our team today!
