
How to Draw Tattoo Roses Step by Step: A Comprehensive Guide
Interested in learning how to draw tattoo roses step by step? You’ve come to the right place! This comprehensive guide will provide you with everything you need to know, from the basic shapes to the intricate details that make tattoo roses so captivating. Whether you’re an aspiring tattoo artist, a seasoned illustrator, or simply looking for a creative outlet, this step-by-step tutorial will equip you with the skills and knowledge to create stunning tattoo rose designs. We’ll cover everything from understanding rose anatomy to adding shading and highlights, ensuring your roses have depth and realism. This guide is designed to be accessible for all skill levels, and we believe it will provide a clear pathway to creating beautiful rose tattoos.
Unlike other tutorials that offer a simplified approach, this guide delves into the nuances of rose anatomy and tattoo art techniques. We provide insights based on years of experience and observation, ensuring you not only learn the steps but also understand why each step is important. By the end of this guide, you’ll be able to confidently draw tattoo roses that are unique, visually appealing, and ready for the next stage of tattoo design.
Understanding Tattoo Rose Anatomy and Styles
Before we dive into the step-by-step instructions on how to draw tattoo roses step by step, it’s crucial to understand the anatomy of a rose and the various styles commonly used in tattoo art. This foundational knowledge will allow you to create more realistic and visually appealing designs.
Rose Anatomy: Petals, Sepals, and Stem
A rose consists primarily of petals, which form the flower’s head. The number and arrangement of petals vary depending on the rose variety. Sepals are the green, leaf-like structures at the base of the flower, providing support and protection. The stem supports the flower and connects it to the plant’s roots. Understanding these components is key to accurately portraying a rose in your drawings.
Popular Tattoo Rose Styles
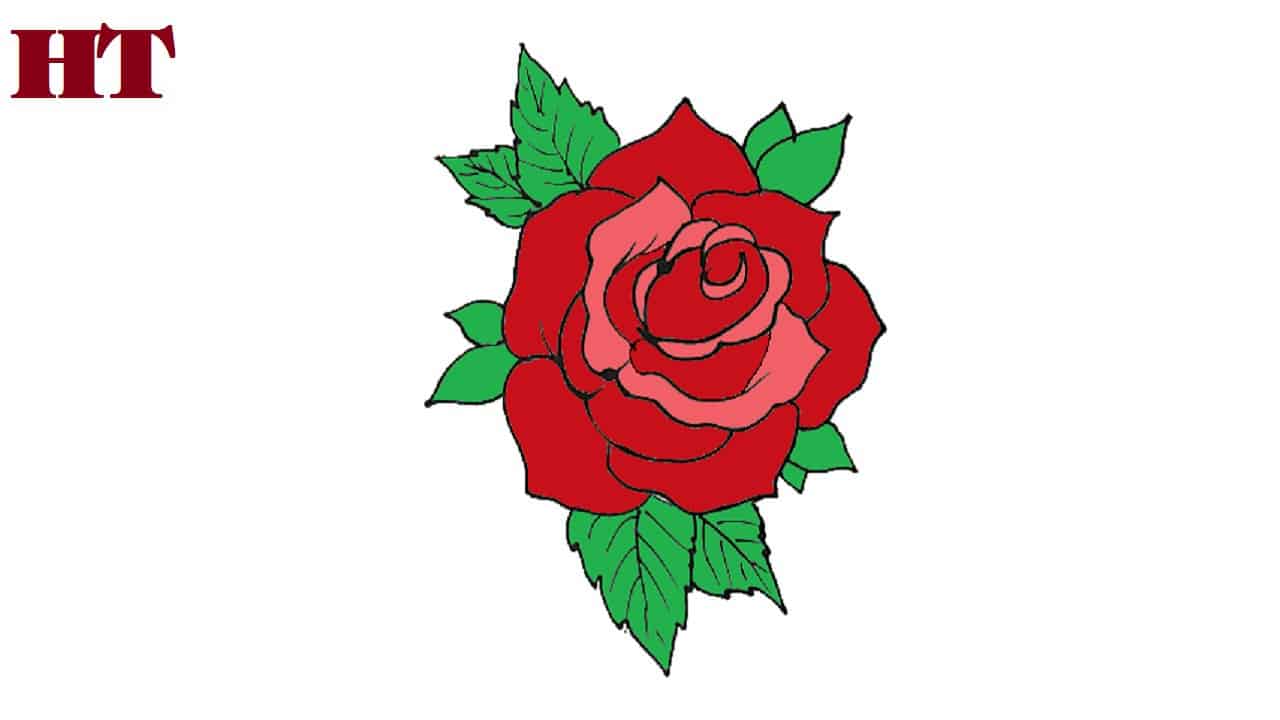
- Traditional Tattoo Rose: Bold outlines, vibrant colors, and minimal shading characterize this style. Often incorporates classic tattoo elements like banners and swallows.
- Neo-Traditional Tattoo Rose: Similar to traditional but with finer lines, more detailed shading, and a wider range of colors.
- Realistic Tattoo Rose: Aims for photorealistic depiction with intricate details and subtle shading variations. Requires advanced drawing skills.
- Watercolor Tattoo Rose: Mimics the look of watercolor paintings with soft gradients and diffused edges.
- Black and Grey Tattoo Rose: Relies on varying shades of black and grey ink to create depth and dimension.
Choosing a style that resonates with your artistic preferences and skill level is an important first step in learning how to draw tattoo roses step by step. Experimenting with different styles can also help you develop your own unique artistic voice.
Step 1: Sketching the Basic Shapes
Every great drawing begins with a strong foundation. When learning how to draw tattoo roses step by step, the first step is to sketch the basic shapes that will define the overall form of the rose.
Creating a Circle for the Rose Head
Start by drawing a light circle. This will serve as the guide for the rose’s head. Don’t worry about making it perfect; it’s just a guideline. Using a light touch allows for easy corrections later.
Adding the Center Swirl
Inside the circle, sketch a tight spiral or swirl. This represents the tightly closed center of the rose. This is a crucial element that gives the rose its characteristic appearance. The tighter the swirl, the more closed the rose will appear.
Outlining the First Layer of Petals
Around the center swirl, begin sketching the first layer of petals. These petals should be small and slightly curved, wrapping around the swirl. Think of them as protective layers for the delicate center. Pay attention to the overlapping of petals to create a sense of depth.
Step 2: Developing the Petal Structure
With the basic shapes in place, the next step in learning how to draw tattoo roses step by step is to develop the petal structure, adding more detail and defining the overall shape of the rose.
Adding More Layers of Petals
Continue adding layers of petals around the first layer. These petals should gradually increase in size and become more open. Vary the shape and curvature of each petal to create a more natural and organic look. Remember that roses aren’t perfectly symmetrical, so embrace imperfections.
Creating Folded and Curled Petals
To add realism, incorporate folded and curled petals. These details add depth and visual interest to your rose. Pay attention to how the light would fall on these folds and curls to create accurate shading later.
Defining the Outer Petals
The outer petals are the most open and expressive. They should be larger and more loosely defined than the inner petals. Consider adding slight tears or imperfections to the edges of these petals for a more realistic look.
Step 3: Adding the Stem and Leaves
No rose is complete without its stem and leaves. This step in learning how to draw tattoo roses step by step focuses on adding these essential elements to your drawing.
Sketching the Stem
Draw a slightly curved line extending from the base of the rose head. This will be the stem. The thickness of the stem should be proportionate to the size of the rose head.
Adding Thorns (Optional)
If desired, add small thorns along the stem. Thorns are a common element in tattoo rose designs and can add a touch of edginess. Keep the thorns small and sharp.
Drawing the Leaves
Rose leaves typically grow in clusters of three or five. Draw these clusters along the stem, varying their size and orientation. The leaves should have serrated edges and a slightly pointed shape.
Step 4: Shading and Highlighting
Shading and highlighting are crucial for adding depth and dimension to your tattoo rose drawing. This step in learning how to draw tattoo roses step by step focuses on mastering these techniques.
Identifying Light Source
First, determine the direction of your light source. This will dictate where the highlights and shadows will fall on the rose.
Adding Shadows to Create Depth
Use light shading to create shadows on the underside of petals, in the folds and creases, and where petals overlap. Gradually build up the shading to create a sense of depth. Consider using cross-hatching or stippling techniques for added texture.
Adding Highlights to Emphasize Form
Use highlights to emphasize the form of the petals and create a sense of light reflecting off the surface. Leave areas of the paper untouched or use a white pencil to create highlights on the edges of petals and in areas where the light would directly hit.
Step 5: Outlining and Refining
The final step in learning how to draw tattoo roses step by step is to outline your drawing and refine the details. This will give your rose a clean and polished look.
Outlining the Drawing with a Fine-Tip Pen
Use a fine-tip pen or marker to carefully outline your drawing. Vary the thickness of the lines to create visual interest. Thicker lines can be used to define the outer edges of the rose, while thinner lines can be used for inner details.
Erasing Pencil Lines
Once the ink is dry, carefully erase any remaining pencil lines. This will leave you with a clean and crisp drawing.
Adding Final Details and Refinements
Take a final look at your drawing and add any final details or refinements. This might include adding more subtle shading, adjusting the linework, or adding small details like water droplets or dew.
Choosing the Right Tools and Materials
The quality of your tools and materials can significantly impact the outcome of your drawing. For learning how to draw tattoo roses step by step, having the right supplies is essential.
Pencils
A variety of pencils ranging from 2H to 6B is recommended. Harder pencils (2H) are great for light sketching and guidelines, while softer pencils (6B) are ideal for shading and creating darker tones.
Paper
Smooth drawing paper is best for detailed work. Avoid paper with too much texture, as it can make it difficult to achieve smooth shading.
Erasers
A kneaded eraser is essential for lifting graphite without damaging the paper. A plastic eraser is useful for removing more stubborn lines.
Fine-Tip Pens and Markers
Fine-tip pens (0.3mm to 0.5mm) are perfect for outlining your drawing. Choose waterproof and fade-resistant inks for long-lasting results. Alcohol-based markers can be used for adding color and shading.
Advanced Techniques for Tattoo Rose Drawings
Once you’ve mastered the basic steps of how to draw tattoo roses step by step, you can explore more advanced techniques to elevate your artwork.
Using Reference Photos
Reference photos are invaluable for capturing the nuances of rose anatomy and creating realistic drawings. Study photos of different rose varieties to understand the variations in petal shape and arrangement.
Experimenting with Different Styles
Don’t be afraid to experiment with different tattoo styles, such as traditional, neo-traditional, realistic, or watercolor. This will help you develop your own unique artistic style.
Adding Color
Adding color can bring your tattoo rose drawings to life. Experiment with different coloring techniques, such as colored pencils, markers, or digital painting software.
Incorporating Other Elements
Consider incorporating other elements into your tattoo rose designs, such as banners, skulls, or other floral elements. This can add symbolism and visual interest to your artwork.
The Importance of Practice and Patience
Learning how to draw tattoo roses step by step takes practice and patience. Don’t get discouraged if your first attempts aren’t perfect. Keep practicing and experimenting, and you’ll gradually improve your skills. Remember that every artist starts somewhere, and even the most skilled artists continue to practice and learn throughout their careers.
One technique that many artists find helpful is to break down the drawing process into smaller, more manageable steps. Focus on mastering each step before moving on to the next. And don’t be afraid to seek feedback from other artists or instructors. Constructive criticism can help you identify areas for improvement and accelerate your learning process.
Frequently Asked Questions (FAQs)
Here are some frequently asked questions about how to draw tattoo roses step by step:
-
What is the best way to learn how to draw tattoo roses?
The best way is to start with the basics, like basic shapes and anatomy, then progressively move towards shading and refining details. Consistent practice is key.
-
What materials do I need to draw tattoo roses?
You’ll need pencils (2H-6B), smooth drawing paper, erasers (kneaded and plastic), and fine-tip pens or markers.
-
How do I make my tattoo roses look more realistic?
Pay close attention to shading and highlighting. Use reference photos to accurately capture the nuances of rose anatomy.
-
What are some common mistakes to avoid when drawing tattoo roses?
Avoid making the petals too symmetrical or uniform. Also, don’t neglect the shading and highlighting, as they are crucial for creating depth.
-
How can I develop my own unique style of drawing tattoo roses?
Experiment with different styles, techniques, and materials. Don’t be afraid to break the rules and create something new.
-
What is the ideal size to draw a tattoo rose for practice?
Start with a medium size, around 4-6 inches in diameter. This allows for enough detail without being overwhelming.
-
How do I choose the right color palette for my tattoo rose design?
Consider the overall aesthetic you want to achieve. Traditional roses look great in bold, vibrant colors, while realistic roses may benefit from more muted tones.
-
How can I incorporate lettering or other elements into my tattoo rose design?
Plan the placement of the lettering or other elements carefully, ensuring they complement the rose and don’t detract from its beauty.
-
What are some good resources for learning more about tattoo art and design?
Explore books, online tutorials, and workshops. Consider studying the work of established tattoo artists for inspiration.
-
How do I transfer my tattoo rose drawing onto skin?
Consult with a professional tattoo artist for advice on transferring your design onto skin. They can provide guidance on stencil creation and placement.
Conclusion
Learning how to draw tattoo roses step by step is a rewarding journey that combines artistic skill with an understanding of rose anatomy and tattoo design principles. By following the steps outlined in this guide and practicing consistently, you can develop the skills to create stunning tattoo rose drawings. Remember to experiment with different styles, techniques, and materials to find your own unique artistic voice. Don’t be afraid to make mistakes and learn from them. The key is to keep practicing and refining your skills until you achieve the results you desire.
We hope this guide has provided you with the knowledge and inspiration you need to embark on your tattoo rose drawing journey. Share your creations with us in the comments below! We’d love to see what you come up with. And if you’re interested in learning more about tattoo art and design, be sure to explore our other resources and tutorials. Happy drawing!
