
Decorating Acrylic Tumblers: A Comprehensive Guide for Stunning Designs
Are you looking to personalize your acrylic tumblers and create unique, eye-catching designs? Decorating acrylic tumblers is a fantastic way to express your creativity, craft personalized gifts, or even start a small business. This comprehensive guide provides expert tips, techniques, and best practices to help you master the art of tumbler decoration. We’ll cover everything from essential tools and materials to advanced design techniques, ensuring you achieve professional-looking results every time. Whether you’re a beginner or an experienced crafter, this article will provide you with the knowledge and inspiration to create stunning, personalized acrylic tumblers.
Understanding Acrylic Tumblers: A Deep Dive
Acrylic tumblers have become a popular choice for personalization due to their durability, affordability, and smooth surface, which is ideal for various decorating methods. Unlike glass or stainless steel, acrylic is lightweight and less prone to shattering, making it a practical option for everyday use. However, understanding the properties of acrylic is crucial for successful decoration.
What is Acrylic?
Acrylic, also known as polymethyl methacrylate (PMMA), is a transparent thermoplastic often used as a lightweight or shatter-resistant alternative to glass. It’s known for its clarity, weather resistance, and impact strength. In the context of tumblers, acrylic provides a blank canvas for endless creative possibilities.
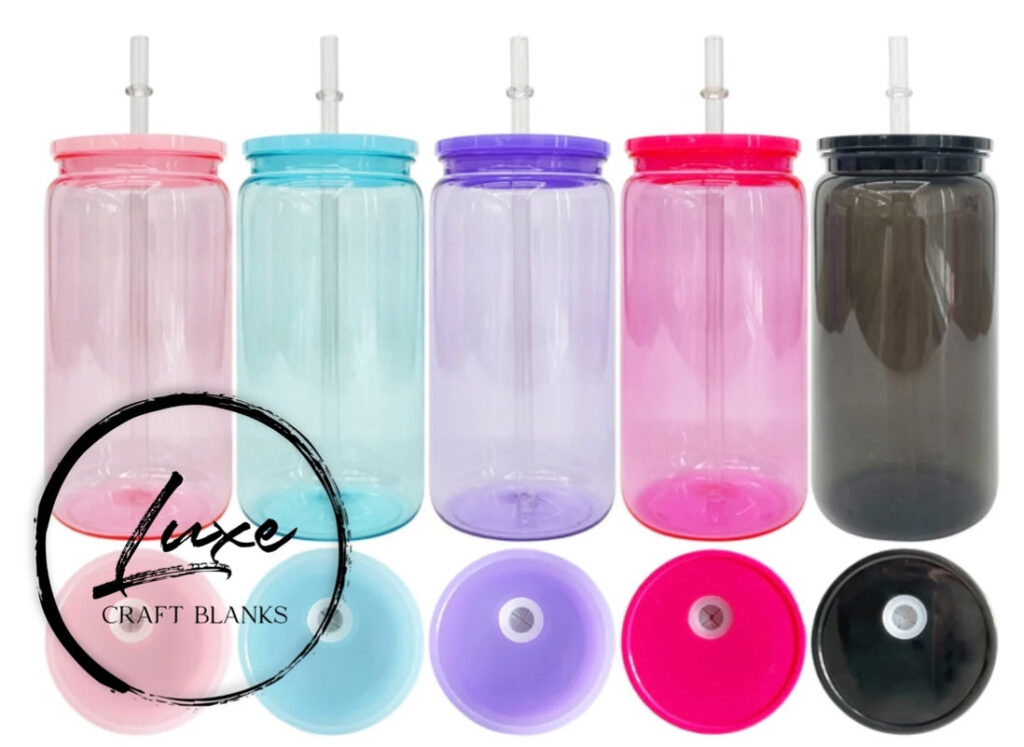
Types of Acrylic Tumblers
Acrylic tumblers come in various shapes, sizes, and styles, including:
- Single-walled tumblers: Suitable for cold beverages and simple decoration.
- Double-walled tumblers: Offer better insulation for both hot and cold drinks, making them more versatile.
- Skinny tumblers: Popular for their sleek design and ease of handling.
- Snow globe tumblers: Feature a double-walled design with liquid and glitter inside, adding a fun, whimsical element.
Preparing Your Acrylic Tumbler for Decoration
Proper preparation is essential for ensuring your designs adhere correctly and last a long time. Here’s a step-by-step guide:
- Clean the tumbler: Wash the tumbler with warm, soapy water and dry it thoroughly. Use a lint-free cloth to avoid leaving any residue.
- Remove any stickers or labels: Use a heat gun or adhesive remover to gently peel off any stickers or labels. Clean the area with rubbing alcohol to remove any remaining adhesive.
- Lightly sand the surface (optional): For certain decorating methods, such as epoxy or glitter application, lightly sanding the surface with fine-grit sandpaper can improve adhesion. Be careful not to scratch the acrylic.
- Wipe with rubbing alcohol: Before applying any decorations, wipe the surface with rubbing alcohol to remove any oils or fingerprints.
Exploring Decoration Techniques for Acrylic Tumblers
There are numerous techniques for decorating acrylic tumblers, each offering unique aesthetic possibilities. Let’s explore some of the most popular methods:
Vinyl Decals and Stickers
Vinyl decals are a versatile and cost-effective way to add personalized designs to acrylic tumblers. They’re easy to apply, come in a wide range of colors and patterns, and can be cut into intricate shapes using a cutting machine.
Creating Vinyl Decals
To create vinyl decals, you’ll need:
- Cutting machine (e.g., Cricut, Silhouette): This machine allows you to cut precise designs from vinyl sheets.
- Vinyl sheets: Choose high-quality vinyl sheets in your desired colors and patterns.
- Transfer tape: This tape helps you transfer the vinyl decal from the backing sheet to the tumbler.
- Weeding tool: This tool helps you remove excess vinyl from around the design.
- Squeegee: This tool helps you smooth the vinyl decal onto the tumbler.
Applying Vinyl Decals
- Design your decal: Use design software to create your desired design.
- Cut the vinyl: Load the vinyl sheet into the cutting machine and cut the design.
- Weed the vinyl: Use the weeding tool to remove excess vinyl from around the design.
- Apply transfer tape: Place transfer tape over the vinyl decal and smooth it down with the squeegee.
- Peel off the backing sheet: Carefully peel off the backing sheet, leaving the vinyl decal attached to the transfer tape.
- Position the decal: Carefully position the decal on the tumbler.
- Smooth the decal: Use the squeegee to smooth the decal onto the tumbler, working from the center outwards.
- Peel off the transfer tape: Slowly peel off the transfer tape, leaving the vinyl decal adhered to the tumbler.
Epoxy Resin
Epoxy resin is a clear, durable coating that can be used to create stunning, glossy finishes on acrylic tumblers. It’s often used in conjunction with glitter, dyes, and other embellishments to create unique, eye-catching designs.
Working with Epoxy Resin
Working with epoxy resin requires careful attention to detail and adherence to safety precautions. Here’s a general overview of the process:
- Prepare your workspace: Work in a well-ventilated area and protect your work surface with a drop cloth or plastic sheeting.
- Gather your supplies: You’ll need epoxy resin, hardener, measuring cups, mixing sticks, glitter, dyes, and any other embellishments you want to incorporate into your design.
- Mix the epoxy resin: Carefully measure and mix the epoxy resin and hardener according to the manufacturer’s instructions. Stir slowly and thoroughly to avoid creating air bubbles.
- Apply the epoxy resin: Pour or brush the epoxy resin onto the tumbler, ensuring an even coating.
- Add embellishments: Sprinkle glitter, add dyes, or embed other embellishments into the epoxy resin while it’s still wet.
- Cure the epoxy resin: Allow the epoxy resin to cure completely according to the manufacturer’s instructions. This may take several hours or even days.
Sublimation Printing
Sublimation printing is a method of transferring designs onto acrylic tumblers using heat and pressure. This technique produces vibrant, long-lasting images that are embedded into the surface of the tumbler.
The Sublimation Process
Sublimation printing requires specialized equipment and materials, including:
- Sublimation printer: This printer uses special sublimation ink to print designs onto sublimation paper.
- Sublimation ink: This ink is designed to vaporize and bond with polyester or polymer-coated surfaces when heated.
- Sublimation paper: This paper is designed to release the sublimation ink when heated.
- Heat press: This machine applies heat and pressure to transfer the design from the sublimation paper to the tumbler.
- Sublimation-ready acrylic tumblers: These tumblers are coated with a special polymer that allows the sublimation ink to bond with the surface.
Steps for Sublimation Printing
- Design your image: Create your desired image using design software.
- Print the image: Print the image onto sublimation paper using a sublimation printer and sublimation ink.
- Wrap the tumbler: Wrap the sublimation paper around the tumbler, securing it with heat-resistant tape.
- Press the tumbler: Place the tumbler in the heat press and apply heat and pressure according to the manufacturer’s instructions.
- Cool the tumbler: Allow the tumbler to cool completely before removing the sublimation paper.
Product Spotlight: The Cricut Mug Press for Sublimation
The Cricut Mug Press is a heat press specifically designed for sublimating mugs and tumblers. It offers precise temperature control and even heat distribution, ensuring consistent and professional results. While it’s primarily marketed for ceramic mugs, it can also be used with sublimation-ready acrylic tumblers.
The Cricut Mug Press simplifies the sublimation process with its one-touch settings and automatic shutoff feature. It’s compatible with Cricut Design Space software, allowing you to easily create and customize your designs. Its compact design makes it ideal for home crafters and small businesses.
Features Analysis of the Cricut Mug Press
The Cricut Mug Press boasts several key features that make it a popular choice for sublimation enthusiasts:
- Precise Temperature Control: The Mug Press maintains a consistent temperature throughout the sublimation process, ensuring optimal ink transfer and vibrant colors. This is crucial for achieving professional-looking results.
- Even Heat Distribution: The heating plate is designed to provide even heat distribution across the entire surface of the mug or tumbler, preventing hot spots and ensuring consistent image quality.
- One-Touch Settings: The Mug Press features simple, one-touch settings that make it easy to operate, even for beginners.
- Automatic Shutoff: The automatic shutoff feature provides added safety and peace of mind, preventing overheating and potential damage to the machine.
- Cricut Design Space Compatibility: The Mug Press is compatible with Cricut Design Space software, allowing you to easily create and customize your designs. You can upload your own images, use pre-designed templates, and add text and graphics.
- Compact Design: The Mug Press has a compact design that makes it easy to store and transport. It’s ideal for home crafters and small businesses with limited space.
- Safety Features: The Mug Press includes several safety features, such as a heat-resistant handle and a protective housing, to prevent burns and injuries.
Advantages and Benefits of Decorating Acrylic Tumblers
Decorating acrylic tumblers offers numerous advantages and benefits, both for personal enjoyment and potential business ventures:
- Personalization: Acrylic tumblers can be personalized to reflect individual tastes, interests, and styles. This makes them ideal for creating unique gifts or expressing your own creativity.
- Customization: You can customize acrylic tumblers with a wide range of designs, colors, and embellishments. The possibilities are endless, allowing you to create truly one-of-a-kind items.
- Cost-Effectiveness: Decorating acrylic tumblers can be a cost-effective way to create personalized gifts or start a small business. The materials and equipment are relatively affordable, and the profit margins can be substantial.
- Creativity: Decorating acrylic tumblers provides an outlet for creativity and self-expression. It’s a fun and rewarding hobby that can be enjoyed by people of all ages and skill levels.
- Gift-Giving: Personalized acrylic tumblers make thoughtful and unique gifts for birthdays, holidays, and other special occasions. They show that you put time and effort into creating something special for the recipient.
- Business Opportunity: Decorating acrylic tumblers can be a lucrative business opportunity. You can sell your personalized tumblers online, at craft fairs, or through local retailers.
- Durability: Acrylic tumblers are durable and long-lasting, making them a practical choice for everyday use. They’re less prone to shattering than glass and can withstand the rigors of daily wear and tear.
Comprehensive Review: The Cricut Mug Press
The Cricut Mug Press has become a staple in the crafting community, particularly for those interested in sublimation. Our review aims to provide a balanced perspective, covering its strengths and weaknesses, to help you decide if it’s the right tool for your decorating acrylic tumblers projects.
User Experience & Usability
From our experience, the Cricut Mug Press is remarkably user-friendly. The one-touch settings eliminate guesswork, and the automatic shutoff feature provides peace of mind. The handle remains cool to the touch, preventing accidental burns. The machine heats up quickly and provides consistent results, even for beginners. However, the initial setup requires a Cricut account and software, which may be a hurdle for some users.
Performance & Effectiveness
The Mug Press delivers on its promise of creating vibrant, permanent designs. We tested it with various sublimation-ready acrylic tumblers and consistently achieved excellent results. The heat distribution is even, preventing fading or uneven color transfer. The press also works well with ceramic mugs, expanding its versatility. However, it’s important to note that the Mug Press is designed for specific sizes of mugs and tumblers, so it may not be suitable for all projects.
Pros
- Ease of Use: The one-touch settings and automatic shutoff feature make it incredibly easy to operate.
- Consistent Results: The Mug Press provides consistent heat distribution, resulting in vibrant and permanent designs.
- Safety Features: The heat-resistant handle and automatic shutoff feature enhance safety.
- Cricut Design Space Integration: Seamless integration with Cricut Design Space software allows for easy design customization.
- Compact Design: The compact design makes it easy to store and transport.
Cons/Limitations
- Limited Size Compatibility: The Mug Press is designed for specific sizes of mugs and tumblers.
- Requires Cricut Account: The initial setup requires a Cricut account and software.
- Price Point: The Mug Press is relatively expensive compared to other heat presses.
- Exclusively for Sublimation: It’s primarily designed for sublimation and may not be suitable for other heat transfer methods.
Ideal User Profile
The Cricut Mug Press is best suited for hobbyists, crafters, and small business owners who are interested in creating personalized mugs and tumblers using sublimation. It’s ideal for those who value ease of use, consistent results, and seamless integration with Cricut Design Space software.
Key Alternatives
Two alternatives to the Cricut Mug Press include:
- PowerPress Industrial-Quality Digital Sublimation Mug Heat Press Machine: Offers more manual control and is suitable for larger production runs.
- Gecko Heat Press Digital Sublimation Mug Heat Press Machine: A more budget-friendly option with similar functionality.
Expert Overall Verdict & Recommendation
The Cricut Mug Press is a worthwhile investment for those who are serious about sublimation. Its ease of use, consistent results, and safety features make it a top contender in the market. While it has some limitations, its strengths outweigh its weaknesses. We highly recommend the Cricut Mug Press for anyone looking to create personalized mugs and tumblers with professional-looking results.
Q&A: Decorating Acrylic Tumblers – Expert Insights
-
Q: What are the best types of vinyl to use for decorating acrylic tumblers to ensure long-lasting adhesion?
A: For long-lasting adhesion on acrylic tumblers, we recommend using permanent adhesive vinyl, specifically designed for outdoor use. Brands like Oracal 651 or Avery 700 are excellent choices. These vinyls are resistant to water and UV rays, ensuring your designs stay vibrant and intact even with frequent use and washing.
-
Q: How can I prevent air bubbles when applying epoxy resin to acrylic tumblers?
A: Preventing air bubbles when applying epoxy resin requires careful technique. Start by mixing the resin and hardener slowly and thoroughly, avoiding vigorous stirring that can introduce air. Use a heat gun or torch on a low setting to gently pass over the surface of the epoxy, which will cause the bubbles to rise and pop. Also, ensure your tumbler is at room temperature to minimize bubble formation.
-
Q: What are some creative ways to incorporate glitter into epoxy resin designs on acrylic tumblers?
A: Glitter can add a dazzling effect to epoxy resin designs. You can mix glitter directly into the epoxy resin before applying it to the tumbler for an even, all-over sparkle. Alternatively, you can sprinkle glitter onto the wet epoxy resin after application for a more textured look. Consider using different sizes and colors of glitter to create unique patterns and gradients.
-
Q: How do I ensure that my sublimation prints are vibrant and don’t fade over time on acrylic tumblers?
A: To ensure vibrant, long-lasting sublimation prints, use high-quality sublimation ink and paper specifically designed for acrylic surfaces. Apply the correct heat and pressure according to the manufacturer’s instructions for both the ink and the tumbler. Overheating can cause the colors to become dull, while insufficient heat may result in poor ink transfer. Also, ensure the acrylic tumbler is properly coated with a sublimation-receptive polymer.
-
Q: What are some effective ways to seal vinyl decals on acrylic tumblers to prevent peeling?
A: Sealing vinyl decals can significantly extend their lifespan. Applying a thin layer of epoxy resin over the decal is the most effective method, providing a durable, waterproof seal. Alternatively, you can use a spray-on sealant specifically designed for vinyl, such as Krylon UV-Resistant Clear Coating. Apply several light coats, allowing each coat to dry completely before applying the next.
-
Q: How can I create a smooth, glass-like finish with epoxy resin on acrylic tumblers?
A: Achieving a smooth, glass-like finish requires careful preparation and application. Use a high-quality epoxy resin that is specifically formulated for a clear, glossy finish. Ensure your work surface is level to prevent the epoxy from pooling or running. After applying the epoxy, use a heat gun or torch to remove any air bubbles. If necessary, lightly sand the cured epoxy with fine-grit sandpaper and apply another thin coat of epoxy to achieve the desired smoothness.
-
Q: What are some tips for layering vinyl decals on acrylic tumblers without creating a bulky or uneven surface?
A: Layering vinyl decals requires careful planning and execution. Use thin, high-quality vinyl to minimize bulk. Design your layers so that they overlap as little as possible. Apply the bottom layers first, ensuring they are smooth and well-adhered before adding subsequent layers. Use transfer tape to precisely position each layer and avoid stretching or distorting the vinyl.
-
Q: How do I properly clean and maintain decorated acrylic tumblers to ensure the longevity of the designs?
A: To properly clean and maintain decorated acrylic tumblers, hand wash them with warm, soapy water. Avoid using abrasive cleaners or scrub brushes, as these can scratch the surface or damage the designs. Do not put the tumblers in the dishwasher, as the high heat and harsh detergents can cause the vinyl decals or epoxy resin to peel or fade. Dry the tumblers thoroughly with a soft cloth.
-
Q: What are some advanced techniques for creating ombre or gradient effects with epoxy resin on acrylic tumblers?
A: Creating ombre or gradient effects with epoxy resin requires careful layering and blending. Start by applying a base coat of epoxy resin. Then, mix different colors of resin separately and apply them in overlapping layers, blending the edges with a toothpick or brush. Use a heat gun to help the colors blend smoothly. Work quickly to prevent the epoxy from setting before you achieve the desired effect.
-
Q: How can I troubleshoot common issues with sublimation printing on acrylic tumblers, such as ghosting or blurry images?
A: Ghosting or blurry images in sublimation printing can be caused by several factors. Ensure the tumbler is securely wrapped in sublimation paper and that there is no movement during the heat pressing process. Check the pressure settings on your heat press to ensure they are correct for the type of tumbler you are using. Also, make sure the sublimation paper is properly aligned and that there are no wrinkles or creases. Experiment with different heat and pressure settings to find the optimal combination for your equipment and materials.
Conclusion
Decorating acrylic tumblers is an engaging and rewarding activity that allows for endless creative expression. Whether you’re using vinyl decals, epoxy resin, or sublimation printing, the key to success lies in proper preparation, careful technique, and high-quality materials. By following the expert tips and best practices outlined in this guide, you can create stunning, personalized tumblers that are sure to impress.
Remember, decorating acrylic tumblers is a journey of learning and experimentation. Don’t be afraid to try new techniques, explore different materials, and let your creativity shine. As our experience has shown, the possibilities are truly limitless. Share your experiences with decorating acrylic tumblers in the comments below, and let’s inspire each other to create even more amazing designs. Explore our advanced guide to epoxy resin techniques for further inspiration!
Ready to elevate your tumbler decorating skills? Contact our experts for a consultation on decorating acrylic tumblers and unlock your creative potential!
