How to Reshape Acrylic Nails: A Definitive Guide for Perfecting Your Manicure
Acrylic nails are a fantastic way to enhance your natural nails, offering durability and a canvas for stunning designs. However, like any manicure, acrylics can sometimes lose their shape due to growth, wear, or accidental damage. Learning how to reshape acrylic nails is an essential skill for maintaining a flawless look and extending the life of your set. This comprehensive guide provides expert insights, step-by-step instructions, and valuable tips to help you achieve salon-quality results at home. We’ll cover everything from understanding the different nail shapes to using the right tools and techniques, ensuring your acrylics always look their best. Consider this your ultimate resource for mastering the art of reshaping acrylic nails, saving you time and money while keeping your manicure impeccable.
Understanding Acrylic Nails and Reshaping
Before diving into the reshaping process, it’s crucial to understand the basics of acrylic nails and why reshaping is necessary. Acrylic nails are created by combining a liquid monomer and a powder polymer, which hardens to form a durable layer over your natural nails. This layer can be sculpted into various shapes and designs. Over time, as your natural nails grow, the acrylics can become unbalanced or lose their initial form. Reshaping addresses these issues, maintaining the structural integrity and aesthetic appeal of your manicure. It’s not just about aesthetics; proper reshaping can also prevent lifting and breakage, prolonging the lifespan of your acrylics.
The Importance of Proper Reshaping Techniques
Using the correct techniques is paramount when learning how to reshape acrylic nails. Incorrect filing or shaping can weaken the acrylic, leading to cracks, breaks, or even damage to your natural nails. This guide emphasizes gentle, controlled filing and shaping methods that minimize stress on the acrylic and promote healthy nail growth. We’ll also highlight common mistakes to avoid, ensuring you can confidently reshape your acrylics without compromising their integrity.
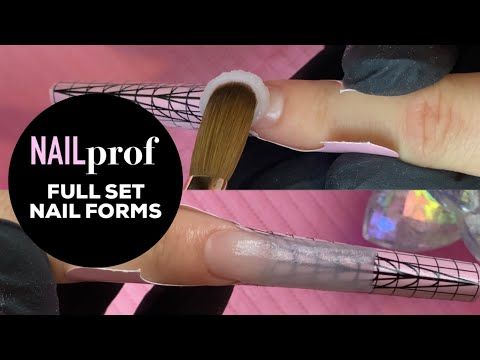
Essential Tools and Materials for Reshaping Acrylic Nails
Having the right tools is half the battle when it comes to successfully reshaping acrylic nails. Here’s a list of essential items you’ll need:
- Nail File (100/180 grit): A coarser grit (100) is ideal for shaping the acrylic, while a finer grit (180) is perfect for smoothing and refining the edges.
- Buffer Block: Used to smooth the surface of the acrylic after filing, creating a seamless finish.
- Nail Clippers: For shortening the length of the acrylics before filing.
- Cuticle Pusher: To gently push back the cuticles and create a clean working area.
- Dust Brush: To remove acrylic dust during the filing process.
- Nail Dehydrator: To remove excess oils from the nail surface, promoting better adhesion of the acrylic.
- Top Coat: To seal and protect the reshaped acrylics, adding shine and durability.
- Nail Oil: To moisturize the cuticles and surrounding skin after reshaping.
Investing in quality tools will not only make the reshaping process easier but also contribute to a more professional and long-lasting result. Consider these tools an investment in your nail health and the longevity of your acrylic manicure.
Step-by-Step Guide: How to Reshape Acrylic Nails
Now, let’s delve into the step-by-step process of how to reshape acrylic nails:
- Prepare Your Nails: Start by washing your hands with soap and water to remove any dirt or oils. Gently push back your cuticles using a cuticle pusher. This creates a clean canvas for reshaping.
- Shorten the Length (If Needed): If your acrylics have grown too long, use nail clippers to carefully shorten them to your desired length. Avoid cutting too much at once to prevent cracking or splitting.
- Shape the Acrylics: Using your 100-grit nail file, begin shaping the acrylics to your desired form. Hold the file at a 45-degree angle and file in one direction, avoiding a sawing motion. Rotate the nail in your hand to ensure a balanced shape.
- Refine the Edges: Switch to your 180-grit nail file and gently refine the edges of the acrylics, smoothing out any rough spots. Pay attention to the sidewalls and free edge, ensuring they are smooth and even.
- Buff the Surface: Use a buffer block to smooth the surface of the acrylics, removing any scratches or imperfections caused by filing. This creates a seamless base for your top coat.
- Clean and Dehydrate: Use a dust brush to remove any acrylic dust from your nails. Then, apply a nail dehydrator to remove excess oils from the nail surface.
- Apply Top Coat: Apply a thin layer of top coat to seal and protect the reshaped acrylics. Allow the top coat to dry completely before proceeding.
- Moisturize: Finish by applying nail oil to your cuticles and surrounding skin. This will help to keep your nails healthy and hydrated.
Choosing the Right Nail Shape
Selecting the right nail shape is crucial for achieving a flattering and stylish manicure. Here are some popular options:
- Square: A classic shape with straight edges and a blunt tip.
- Round: A soft, natural shape with rounded edges.
- Oval: A more elongated version of the round shape, with a slightly pointed tip.
- Almond: A tapered shape that resembles the shape of an almond, with a pointed tip.
- Stiletto: A dramatic shape with a long, pointed tip.
- Coffin/Ballerina: A tapered shape with a flat tip, resembling a coffin or ballerina slipper.
Consider your personal style, nail length, and lifestyle when choosing a nail shape. Experiment with different shapes to find the one that best complements your hands and preferences.
Common Mistakes to Avoid When Reshaping Acrylic Nails
While learning how to reshape acrylic nails, it’s important to be aware of common mistakes that can compromise the integrity of your manicure. Here are some pitfalls to avoid:
- Filing Too Aggressively: Applying too much pressure while filing can weaken the acrylic and lead to cracks or breaks. Use gentle, controlled strokes.
- Sawing Motion: Filing back and forth in a sawing motion can create friction and heat, damaging the acrylic. File in one direction only.
- Filing the Natural Nail: Avoid filing the natural nail underneath the acrylic, as this can cause thinning and damage.
- Using Dull Files: Dull files are less effective and require more pressure, increasing the risk of damage. Replace your files regularly.
- Neglecting Cuticle Care: Failing to push back your cuticles can lead to uneven shaping and lifting of the acrylics.
Acrylic Nail Drill: An Alternative Reshaping Method
An acrylic nail drill is a powered tool used to shape, smooth, and refine acrylic nails. While it offers precision and speed, it also requires skill and caution. When learning how to reshape acrylic nails using an acrylic drill, start with a low speed and use gentle pressure. Avoid lingering in one spot to prevent heat buildup. Practice on a spare acrylic nail or a mannequin hand before using the drill on your own nails.
Benefits of Using an Acrylic Nail Drill
- Speed and Efficiency: Drills can reshape nails faster than manual filing.
- Precision: Allows for precise shaping and refining of edges.
- Versatility: Can be used for various tasks, including removing gel polish and smoothing calluses.
Cautions When Using an Acrylic Nail Drill
- Heat Buildup: Excessive drilling can generate heat, causing discomfort and potential damage.
- Over-Filing: It’s easy to over-file with a drill, thinning the acrylic too much.
- Skill Required: Requires practice and skill to use effectively and safely.
Maintaining Your Reshaped Acrylic Nails
Once you’ve successfully reshaped your acrylic nails, proper maintenance is key to preserving their beauty and longevity. Here are some tips to keep your manicure looking its best:
- Regular Filing: Lightly file your acrylics every few days to maintain their shape and prevent snags.
- Cuticle Oil: Apply cuticle oil daily to keep your cuticles hydrated and prevent dryness.
- Gloves: Wear gloves when doing household chores or working with harsh chemicals to protect your acrylics from damage.
- Avoid Picking: Resist the urge to pick or peel at your acrylics, as this can cause lifting and damage to your natural nails.
- Professional Maintenance: Schedule regular appointments with your nail technician for fills and maintenance to ensure your acrylics remain in top condition.
The Role of Gel Polish in Acrylic Nail Shaping
Gel polish plays an important role in completing the look of reshaped acrylic nails. It adds color, shine, and an extra layer of protection. When applying gel polish, ensure the acrylic surface is smooth and clean. Apply thin, even coats and cure each layer under a UV or LED lamp according to the manufacturer’s instructions. A high-quality top coat is essential for sealing the gel polish and providing a long-lasting, chip-resistant finish.
Expert Insights on Acrylic Nail Trends (2024-2025)
Staying up-to-date with the latest acrylic nail trends can inspire your reshaping and design choices. According to industry experts, in 2024 and moving into 2025, we’re seeing a resurgence of natural-looking shapes like oval and almond, along with minimalist designs and muted color palettes. Bold colors and geometric patterns are also making a statement. Experiment with different trends to find the styles that best suit your personality and preferences.
Q&A: Expert Answers to Your Acrylic Nail Reshaping Questions
- Q: How often should I reshape my acrylic nails?
A: It depends on your nail growth and the wear and tear your acrylics experience. Generally, reshaping every 2-3 weeks is recommended to maintain their shape and prevent lifting.
- Q: Can I reshape my acrylic nails if they are lifting?
A: It’s best to address lifting as soon as possible. Gently file down the lifted area and reapply a thin layer of acrylic or gel to seal it. If the lifting is severe, consult a professional nail technician.
- Q: What is the best nail file for reshaping acrylic nails?
A: A 100/180 grit nail file is ideal. The coarser grit (100) is for shaping, while the finer grit (180) is for smoothing.
- Q: How can I prevent my acrylic nails from cracking while reshaping?
A: Use gentle, controlled strokes when filing and avoid applying too much pressure. Ensure your acrylics are properly hydrated with cuticle oil.
- Q: Can I use a regular nail file to reshape acrylic nails?
A: While you can use a regular nail file, it may not be as effective as a file specifically designed for acrylics. Acrylic files are typically coarser and more durable.
- Q: How do I fix an uneven nail shape after reshaping?
A: Carefully assess the shape and use your nail file to even out any irregularities. Take your time and file in small increments to avoid over-filing.
- Q: Is it possible to change the shape of my acrylic nails drastically?
A: Yes, but it requires skill and patience. Major shape changes may weaken the acrylics, so it’s best to consult a professional nail technician for significant alterations.
- Q: What is the best way to clean my acrylic nails after reshaping?
A: Use a soft nail brush and mild soap to gently clean your acrylics. Avoid harsh chemicals or abrasive cleaners.
- Q: How can I make my reshaped acrylic nails look more natural?
A: Opt for a natural-looking shape like oval or round and use a nude or sheer gel polish. Avoid overly long or dramatic shapes.
- Q: What are the warning signs that my acrylic nails need professional attention?
A: Severe lifting, cracking, discoloration, or pain are all signs that your acrylic nails need professional attention. Do not attempt to fix these issues yourself.
Conclusion: Mastering the Art of Reshaping Acrylic Nails
Learning how to reshape acrylic nails is a valuable skill that empowers you to maintain a flawless manicure from the comfort of your own home. By following the expert tips and step-by-step instructions outlined in this guide, you can confidently reshape your acrylics, extend their lifespan, and keep your nails looking their absolute best. Remember to prioritize proper techniques, use quality tools, and stay up-to-date with the latest trends to achieve salon-quality results. Don’t be afraid to experiment with different shapes and designs to find the styles that best express your unique personality. Now that you are armed with the knowledge to properly reshape your acrylic nails, go ahead and make sure you are always looking your best! Share your experiences and favorite tips in the comments below!
