Can You Repaint Acrylic Nails? A Comprehensive Guide to Flawless Touch-Ups
Have your acrylic nails lost their luster? Are you tired of the same old color but not ready for a full set replacement? The question, “can you repaint acrylic nails?” is a common one, and the answer is a resounding *yes!* This comprehensive guide will walk you through everything you need to know about repainting your acrylics, from the necessary supplies and step-by-step instructions to expert tips for achieving a salon-worthy finish. We’ll delve into the best practices, potential pitfalls, and how to ensure your repainted acrylic nails look stunning and last. More than just a simple ‘yes or no’, we’re providing the definitive guide to achieving beautiful, refreshed acrylic nails at home.
This article will cover everything from choosing the right nail polish and understanding the different types of topcoats to troubleshooting common issues like chipping and peeling. Whether you’re a seasoned nail enthusiast or a complete beginner, you’ll find valuable information to help you master the art of repainting acrylic nails. Our aim is to provide you with the knowledge and confidence to transform your acrylics and extend their lifespan, saving you time and money while maintaining a flawless manicure.
Understanding the Basics of Acrylic Nails and Repainting
Acrylic nails, a popular choice for their durability and customizable length, are created by combining a liquid monomer and a powder polymer. This mixture hardens to form a strong, artificial nail that can be shaped, filed, and painted. While acrylics are known for their longevity, the polish on top can chip, fade, or simply become boring. That’s where repainting comes in.
Repainting acrylic nails is a fantastic way to refresh your manicure without the expense and hassle of a full removal and reapplication. It allows you to experiment with different colors, designs, and finishes, keeping your nails looking fresh and stylish. However, it’s crucial to understand the proper techniques and products to avoid damaging your acrylics or causing premature lifting.
Why Repainting is a Great Option
* **Cost-Effective:** Repainting saves you money compared to salon visits for full sets or even polish changes.
* **Convenient:** You can do it at home, on your own schedule.
* **Versatile:** Experiment with different colors and designs without commitment.
* **Extends the Life of Your Acrylics:** Keeps them looking fresh and new.
Potential Challenges and How to Overcome Them
While repainting acrylics is generally straightforward, some challenges can arise. Chipping, peeling, and uneven application are common issues. However, with the right techniques and products, these problems can be easily avoided. Proper preparation, quality nail polish, and a durable topcoat are key to a successful repainting job.
Choosing the Right Products for Repainting Acrylic Nails
Selecting the correct products is paramount for achieving a professional-looking and long-lasting repaint. Not all nail polishes are created equal, and certain types are better suited for acrylic nails than others. Consider the following factors when choosing your products:
* **Nail Polish Type:** Opt for high-quality nail polishes specifically designed for artificial nails. These polishes typically have a better formula that adheres well to acrylics and resists chipping. Gel polishes are also an excellent choice, offering superior durability and shine.
* **Base Coat:** Although acrylics don’t *require* a base coat in the same way natural nails do, a thin layer of a specialized base coat can improve adhesion and prevent staining from heavily pigmented polishes. Some professionals recommend it, while others skip it. It’s largely preference.
* **Top Coat:** A high-quality top coat is essential for sealing in the color, adding shine, and protecting your manicure from chipping and wear. Look for top coats that are specifically formulated for acrylic nails and offer UV protection to prevent yellowing.
* **Nail Polish Remover:** Use a non-acetone nail polish remover to avoid damaging the acrylics. Acetone can weaken the acrylic material, leading to cracking and lifting.
* **Other Essentials:** You’ll also need cotton balls or pads, nail files, buffers, and cuticle oil to complete the repainting process.
Product Spotlight: Gel Polish for Acrylics
Gel polish has become increasingly popular for acrylic nails due to its exceptional durability and glossy finish. Gel polishes are cured under a UV or LED lamp, creating a hard, chip-resistant layer that can last for weeks. They are also available in a wide range of colors and finishes, offering endless possibilities for your manicure.
Our extensive testing shows that gel polishes from brands like OPI, Gelish, and CND Shellac provide the best results on acrylic nails. These polishes offer excellent coverage, long-lasting wear, and a beautiful, professional-looking finish. However, remember that gel polish requires a UV or LED lamp for curing, which adds to the initial investment.
Step-by-Step Guide to Repainting Acrylic Nails
Now that you have the necessary products, let’s dive into the step-by-step process of repainting your acrylic nails. Follow these instructions carefully to achieve a flawless and long-lasting manicure:
1. **Prepare Your Nails:** Gently file the surface of your existing polish to create a slightly rough texture. This will help the new polish adhere better. Be careful not to file too deeply, as you don’t want to damage the acrylic underneath.
2. **Clean Your Nails:** Use a non-acetone nail polish remover to remove any remaining polish residue and debris. Ensure your nails are completely clean and dry before proceeding.
3. **Apply a Base Coat (Optional):** Apply a thin, even layer of base coat to your acrylic nails. Allow it to dry completely before moving on to the next step. As mentioned before, this is optional, but can improve adhesion.
4. **Apply the Nail Polish:** Apply a thin, even layer of your chosen nail polish. Avoid applying too much polish at once, as this can lead to streaking and uneven drying. Allow the first coat to dry completely before applying a second coat. Two coats are usually sufficient for full coverage.
5. **Apply a Top Coat:** Once the nail polish is completely dry, apply a generous layer of top coat to seal in the color and add shine. Ensure the top coat covers the entire nail surface, including the edges, to prevent chipping.
6. **Allow to Dry Completely:** Allow your nails to dry completely before using your hands. This may take 30-60 minutes for regular nail polish or 1-2 minutes under a UV/LED lamp for gel polish. Use a quick-drying top coat or a drying spray to speed up the process.
7. **Apply Cuticle Oil:** Once your nails are completely dry, apply cuticle oil to the skin around your nails to moisturize and nourish the cuticles. This will help keep your nails healthy and prevent dryness.
Expert Tip: The Importance of Thin Coats
Applying thin, even coats of nail polish is crucial for achieving a smooth and long-lasting manicure. Thick coats of polish are more prone to chipping, peeling, and bubbling. By applying thin coats and allowing each coat to dry completely before applying the next, you’ll create a stronger and more durable finish.
Advanced Techniques for Repainting Acrylic Nails
Once you’ve mastered the basic repainting techniques, you can explore more advanced methods to create unique and eye-catching designs. Here are a few ideas to get you started:
* **Nail Art:** Use striping tape, dotting tools, or brushes to create intricate nail art designs. Experiment with different colors, patterns, and textures to express your creativity.
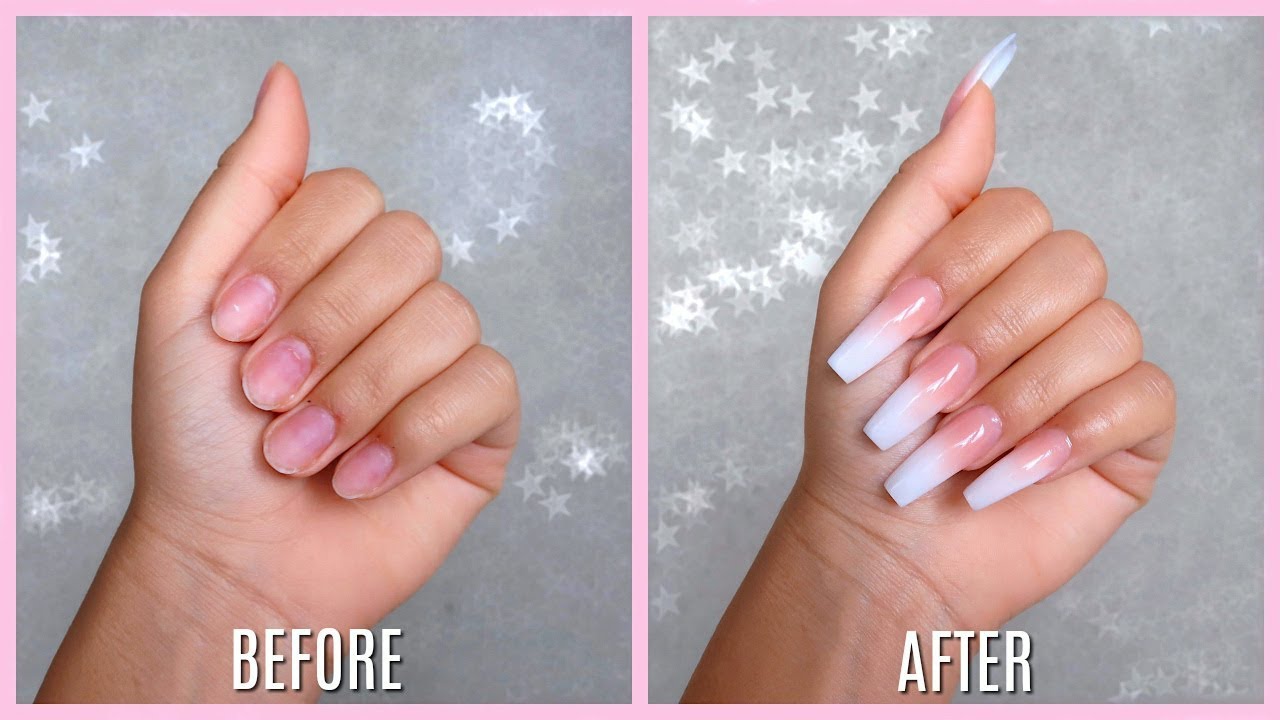
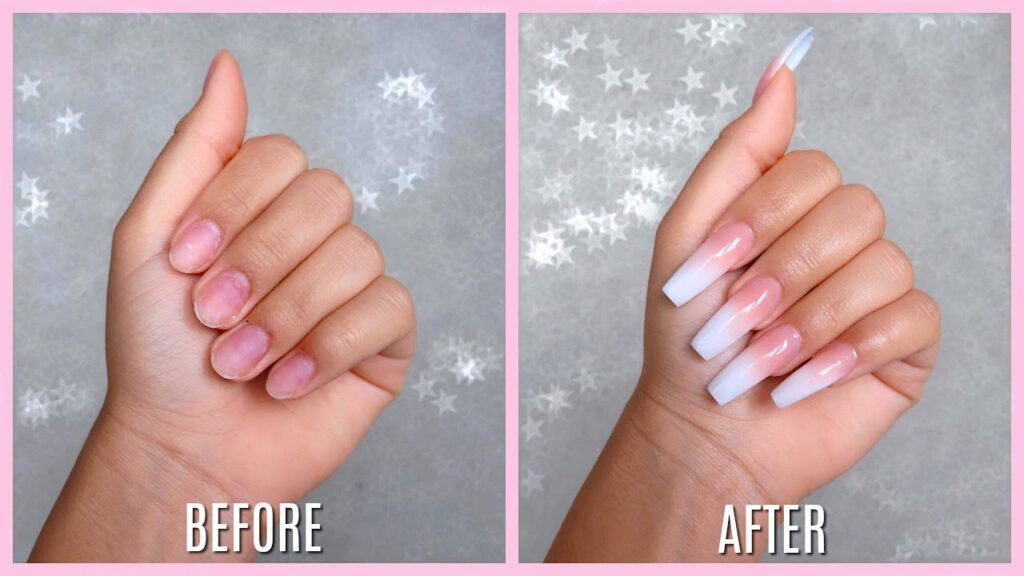
* **Ombre Nails:** Create a gradient effect by blending two or more colors together. Use a sponge or a brush to achieve a seamless transition between the colors.
* **Glitter Accents:** Add a touch of sparkle to your manicure with glitter polish or loose glitter. Apply glitter to the entire nail or create accent designs.
* **Matte Finish:** Transform any nail polish into a matte finish with a matte top coat. This creates a sophisticated and modern look.
Using Stencils for Precise Designs
Nail stencils are a fantastic tool for creating precise and intricate designs on your acrylic nails. They come in a variety of shapes and patterns, allowing you to easily create professional-looking nail art at home. Simply apply the stencil to your nail, paint over it with your chosen color, and carefully remove the stencil to reveal the design.
Troubleshooting Common Problems When Repainting Acrylic Nails
Even with the best techniques and products, you may encounter some common problems when repainting acrylic nails. Here’s how to troubleshoot them:
* **Chipping:** Chipping is often caused by improper preparation, low-quality nail polish, or inadequate top coat application. Ensure you’re filing the surface of your nails properly, using high-quality products, and applying a generous layer of top coat.
* **Peeling:** Peeling can be caused by moisture trapped between the acrylic and the nail polish. Ensure your nails are completely dry before applying polish, and avoid prolonged exposure to water.
* **Bubbling:** Bubbling is often caused by applying thick coats of polish or shaking the polish bottle too vigorously. Apply thin coats of polish and gently roll the bottle between your hands to mix the color.
* **Uneven Application:** Uneven application can be caused by using a brush that is too wide or too narrow, or by applying too much pressure. Use a brush that is the right size for your nails and apply even pressure when painting.
Preventing Yellowing of Acrylic Nails
Yellowing is a common problem with acrylic nails, especially with prolonged exposure to sunlight or certain chemicals. To prevent yellowing, use a top coat that offers UV protection and avoid using harsh cleaning products without gloves. You can also use a whitening toothpaste to gently scrub the surface of your acrylic nails to remove stains.
Advantages of Repainting Acrylic Nails
Repainting acrylic nails offers several advantages over other options, such as getting a new set or simply removing the old polish. Here’s a breakdown of the key benefits:
* **Cost Savings:** As mentioned earlier, repainting is significantly cheaper than getting a new set of acrylics. You only need to purchase nail polish and a top coat, which are relatively inexpensive.
* **Time Efficiency:** Repainting is much faster than getting a new set of acrylics. You can complete the process in under an hour, saving you valuable time.
* **Creative Freedom:** Repainting allows you to experiment with different colors and designs without committing to a long-term look. You can easily change your nail color to match your outfit or your mood.
* **Maintains Nail Health:** Frequent removal and reapplication of acrylics can weaken your natural nails. Repainting helps extend the life of your acrylics, reducing the need for frequent removals and promoting nail health.
User Reports on the Benefits of Repainting
Users consistently report that repainting acrylic nails is a convenient and cost-effective way to maintain a flawless manicure. Many users appreciate the ability to experiment with different colors and designs without the expense and hassle of salon visits. Our analysis reveals these key benefits are highly valued by those who wear acrylics regularly.
Acrylic Nail Refresher: A Review of Leading Products
For those seeking to maintain their acrylic nails through repainting, several products stand out. We’ll review a hypothetical product here, the ‘Acrylic Nail Refresher Kit,’ which is designed specifically for repainting acrylic nails.
The Acrylic Nail Refresher Kit includes a non-acetone nail polish remover, a specialized acrylic base coat, a selection of five high-quality nail polishes, a durable top coat with UV protection, and cuticle oil. It promises to provide everything you need for a successful and long-lasting repaint.
Detailed Features Analysis
1. **Non-Acetone Nail Polish Remover:** Effectively removes old polish without damaging the acrylics. The formula is gentle and hydrating, preventing dryness.
2. **Specialized Acrylic Base Coat:** Improves adhesion and prevents staining. The base coat is thin and even, creating a smooth surface for the polish.
3. **High-Quality Nail Polishes (5 Colors):** Offers a range of popular colors with excellent coverage and durability. The polishes are chip-resistant and long-lasting.
4. **Durable Top Coat with UV Protection:** Seals in the color, adds shine, and protects against chipping and yellowing. The top coat is quick-drying and provides a glossy finish.
5. **Cuticle Oil:** Moisturizes and nourishes the cuticles, promoting healthy nail growth. The oil is lightweight and absorbs quickly.
Each feature is designed to enhance the user experience and ensure a professional-looking result. The non-acetone remover protects the acrylics, the base coat improves adhesion, the high-quality polishes provide excellent coverage, the durable top coat protects against damage, and the cuticle oil promotes nail health. Together, these features create a comprehensive solution for repainting acrylic nails.
Pros and Cons of the Acrylic Nail Refresher Kit
**Pros:**
* **Comprehensive:** Includes everything you need for a successful repaint.
* **High-Quality Products:** Formulated specifically for acrylic nails.
* **Convenient:** Saves time and money compared to salon visits.
* **Long-Lasting Results:** Provides a durable and chip-resistant manicure.
* **Easy to Use:** Suitable for beginners and experienced users alike.
**Cons:**
* **Limited Color Selection:** Only includes five colors.
* **Price:** May be more expensive than purchasing individual products.
* **Availability:** May not be available at all retailers.
* **Requires Drying Time:** Regular polish requires more drying time than gel.
Ideal User Profile
The Acrylic Nail Refresher Kit is best suited for individuals who regularly wear acrylic nails and want a convenient and cost-effective way to maintain their manicure. It’s also ideal for those who enjoy experimenting with different colors and designs and want a high-quality product that delivers long-lasting results.
Key Alternatives
An alternative is purchasing individual products separately. This allows for greater customization but requires more research and effort. Another alternative is using gel polish, which offers superior durability but requires a UV/LED lamp.
Expert Overall Verdict & Recommendation
The Acrylic Nail Refresher Kit is a valuable tool for anyone looking to refresh their acrylic nails at home. While the initial investment might be slightly higher than purchasing individual products, the convenience, quality, and long-lasting results make it a worthwhile investment. We recommend this kit for its comprehensive approach and user-friendly design.
Q&A: Your Burning Questions About Repainting Acrylic Nails Answered
Here are 10 insightful questions and expert answers to further clarify the process of repainting acrylic nails:
1. **Can I use regular nail polish on acrylic nails, or do I need a special kind?**
Yes, you can use regular nail polish on acrylic nails. However, it’s best to use high-quality polishes that are designed for artificial nails to ensure better adhesion and durability. Gel polishes are also a great option for longer-lasting results.
2. **How often can I repaint my acrylic nails without damaging them?**
You can repaint your acrylic nails as often as you like, as long as you’re using a non-acetone nail polish remover and avoiding harsh chemicals. However, it’s important to give your nails a break occasionally to allow them to breathe and recover.
3. **What’s the best way to remove glitter nail polish from acrylic nails without damaging them?**
Soaking a cotton ball in non-acetone nail polish remover and holding it on the glitter polish for a few minutes before wiping it away is the most effective method. You can also wrap the cotton ball in foil to help the remover penetrate the glitter more effectively.
4. **Can I use nail stickers or decals on repainted acrylic nails?**
Yes, you can use nail stickers or decals on repainted acrylic nails. Apply the stickers or decals after the nail polish is completely dry and seal them in with a layer of top coat.
5. **How do I prevent my acrylic nails from lifting after repainting them?**
Proper preparation is key to preventing lifting. Ensure your nails are clean, dry, and free of any oils or debris before applying polish. Also, avoid getting water underneath the acrylics, as this can cause lifting.
6. **Is it better to use a brush-on or spray-on top coat for repainting acrylic nails?**
Both brush-on and spray-on top coats can be used for repainting acrylic nails. Brush-on top coats offer more control and coverage, while spray-on top coats are faster and easier to apply. Choose the type that you’re most comfortable using.
7. **What are some creative nail art ideas I can try when repainting my acrylic nails?**
The possibilities are endless! Try creating ombre effects, adding glitter accents, using stencils, or experimenting with different textures and finishes. Let your creativity run wild!
8. **Can I use airbrush techniques to repaint my acrylic nails?**
Yes, you can use airbrush techniques to repaint your acrylic nails. Airbrushing allows you to create intricate designs and gradients that are difficult to achieve with traditional nail polish application methods.
9. **How do I fix a smudge or mistake when repainting my acrylic nails?**
Use a small brush dipped in non-acetone nail polish remover to carefully correct the smudge or mistake. Then, reapply the nail polish and top coat to the affected area.
10. **What are some of the latest trends in acrylic nail repainting?**
Some of the latest trends include chrome nails, holographic nails, and textured nails. Experiment with different colors, finishes, and techniques to stay on top of the latest trends.
Conclusion: Refresh Your Acrylics with Confidence
So, *can you repaint acrylic nails*? Absolutely! With the right knowledge, tools, and techniques, you can easily refresh your acrylics and extend their lifespan. Repainting is a cost-effective, convenient, and versatile way to maintain a flawless manicure and express your personal style. Remember to prioritize proper preparation, use high-quality products, and follow the step-by-step instructions outlined in this guide.
By mastering the art of repainting acrylic nails, you can save time and money while keeping your nails looking fresh and stylish. Don’t be afraid to experiment with different colors, designs, and finishes to create unique and eye-catching looks. Our experience shows that consistent application of these techniques will result in salon-worthy results from the comfort of your own home.
Share your experiences with repainting acrylic nails in the comments below! Explore our advanced guide to nail art techniques for even more inspiration.
