How to Make a Word Document Landscape: A Comprehensive Guide
Tired of your Word document’s default portrait orientation? Do you need more horizontal space for tables, charts, or images? Learning how to make a Word document landscape can dramatically improve the presentation and readability of your content. This comprehensive guide provides a step-by-step walkthrough, advanced tips, and troubleshooting advice to help you master landscape orientation in Microsoft Word. We’ll cover everything from basic page setup to section breaks, ensuring you can seamlessly integrate landscape pages into your documents. This isn’t just a simple tutorial; it’s a deep dive into optimizing your Word documents for visual appeal and professional impact. Whether you’re a student, professional, or casual user, this guide will empower you to create visually stunning and effective documents.
Understanding Landscape Orientation in Microsoft Word
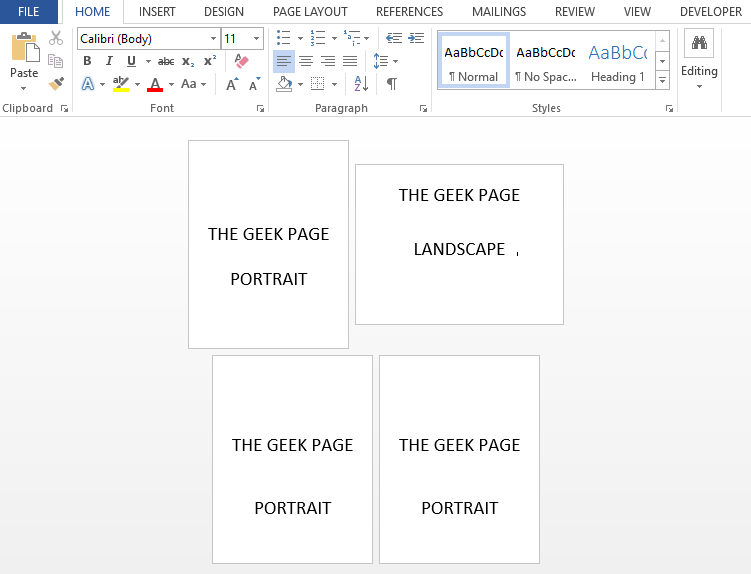
Landscape orientation, in the context of Microsoft Word, refers to positioning the page with its longer side horizontal, as opposed to the default portrait orientation where the longer side is vertical. This simple change can have a significant impact on how your document is perceived and how effectively it conveys information. The concept dates back to the early days of printing and document design, where different page orientations were chosen based on the content being displayed.
Why Use Landscape Orientation?
There are several compelling reasons to use landscape orientation in your Word documents:
* Visual Appeal: Landscape often creates a more visually appealing layout, particularly for documents with a lot of visual elements.
* Data Presentation: It’s ideal for displaying wide tables, charts, and graphs that might be cramped in portrait mode.
* Image Display: Landscape offers more horizontal space for large images or diagrams.
* Brochures and Flyers: It’s a common orientation for creating brochures, flyers, and other marketing materials.
* Improved Readability: For certain types of content, such as code snippets or wide spreadsheets, landscape can improve readability.
When to Avoid Landscape Orientation
While landscape has its advantages, it’s not always the best choice. Avoid it when:
* Text-Heavy Documents: Long, text-heavy documents are generally better suited for portrait orientation.
* Formal Letters: Standard business letters and formal documents typically use portrait orientation.
* Documents Designed for Specific Printing Constraints: If the intended printing method has specific size limitations, portrait might be necessary.
The Importance of Proper Formatting
Regardless of the orientation you choose, proper formatting is crucial. Consistent font sizes, margins, and spacing will ensure your document looks professional and is easy to read.
Step-by-Step Guide: How to Make a Word Document Landscape
This section provides a detailed, step-by-step guide on how to change the orientation of your Word document to landscape.
Method 1: Changing the Orientation for the Entire Document
This is the simplest method and changes the orientation for every page in the document.
1. Open your Microsoft Word document.
2. Navigate to the “Layout” tab. This tab is typically located in the ribbon at the top of the Word window.
3. Click on the “Orientation” button. This button is found in the “Page Setup” group.
4. Select “Landscape” from the dropdown menu.
Method 2: Changing the Orientation for a Specific Section Using Section Breaks
This method allows you to have both portrait and landscape pages within the same document. This is particularly useful for reports, presentations, or any document where some pages require a wider format.
1. Open your Microsoft Word document.
2. Place the cursor at the end of the page *before* the page you want to change to landscape.
3. Navigate to the “Layout” tab.
4. Click on the “Breaks” button in the “Page Setup” group.
5. Choose “Next Page” under the “Section Breaks” options. This inserts a section break at the end of the current page.
6. Place the cursor on the page you want to change to landscape.
7. Navigate to the “Layout” tab.
8. Click on the “Orientation” button and select “Landscape.” This will change the orientation of the current section (and any subsequent sections) to landscape.
9. If you want to return to portrait orientation later in the document, repeat steps 2-5 to insert another section break, then place the cursor on the page where you want to return to portrait and select “Portrait” from the “Orientation” menu.
Method 3: Changing Orientation Using the Page Setup Dialog Box
This method provides more granular control over page settings.
1. Open your Microsoft Word document.
2. Navigate to the “Layout” tab.
3. Click the small arrow in the bottom right corner of the “Page Setup” group. This opens the Page Setup dialog box.
4. In the “Orientation” section, select “Landscape.”
5. In the “Apply to” dropdown menu, choose either “Whole document” or “This section.” If you are using section breaks, choose “This section” to only change the orientation for the current section.
6. Click “OK.”
Troubleshooting Common Issues with Landscape Orientation
Even with careful planning, you might encounter issues when working with landscape orientation in Word. Here are some common problems and their solutions.
Problem: The Orientation Changes for the Entire Document When I Only Want to Change a Section
Solution: This usually happens because you haven’t properly inserted section breaks. Ensure you’ve inserted a “Next Page” section break *before* and *after* the section you want to change to landscape.
Problem: Headers and Footers Are Misaligned in Landscape Mode
Solution: You might need to adjust the header and footer margins separately for the landscape section. Go to the “Insert” tab, click on “Header” or “Footer,” and then select “Edit Header” or “Edit Footer.” Adjust the margins as needed.
Problem: Tables or Images Are Cut Off in Landscape Mode
Solution: This could be due to the table or image being too wide for the page margins. Reduce the size of the table or image, or adjust the page margins in the “Page Setup” dialog box.
Problem: Page Numbers Are Incorrect After Changing Orientation
Solution: Ensure that your page numbering is set up correctly for each section. You might need to unlink the page numbers between sections and restart the numbering in each section.
Microsoft Word: The Industry Standard for Document Creation
Microsoft Word is the leading word processing software, used by millions worldwide. Its versatility and rich feature set make it an indispensable tool for creating professional-quality documents. Understanding how to use its features effectively, including landscape orientation, is crucial for maximizing its potential.
Word’s Dominance in the Market
Word’s popularity stems from its user-friendly interface, extensive formatting options, and seamless integration with other Microsoft Office applications. It’s the go-to choice for businesses, students, and individuals alike.
Word’s Capabilities Beyond Basic Text Editing
Beyond simple text editing, Word offers a wide range of features, including:
* Advanced Formatting: Control over fonts, styles, and page layouts.
* Collaboration Tools: Track changes, comments, and co-authoring capabilities.
* Mail Merge: Create personalized letters and emails.
* Templates: Pre-designed templates for various document types.
* Accessibility Features: Tools to create accessible documents for users with disabilities.
Key Features of Microsoft Word Relevant to Landscape Orientation
These features within Microsoft Word are especially useful when working with landscape orientation.
Section Breaks
As previously discussed, section breaks are essential for creating documents with mixed orientations. They allow you to divide your document into independent sections, each with its own formatting settings.
Page Setup Dialog Box
The Page Setup dialog box provides comprehensive control over page margins, orientation, paper size, and other layout settings. It’s the central hub for customizing your document’s appearance.
Headers and Footers
Headers and footers allow you to add consistent information to the top and bottom of each page, such as page numbers, document titles, and company logos. You can customize headers and footers separately for each section.
Tables and Charts
Word’s table and chart tools allow you to create visually appealing and informative data displays. Landscape orientation is particularly useful for accommodating large tables and charts.
Image Handling
Word provides robust image handling capabilities, allowing you to insert, resize, and position images within your document. Landscape orientation can provide more space for displaying large images.
Styles
Using styles consistently ensures a professional and uniform look throughout your document. Styles allow you to define formatting rules for headings, paragraphs, and other elements, making it easy to apply consistent formatting across multiple pages and sections.
Advantages and Benefits of Mastering Landscape Orientation in Word
Knowing how to effectively use landscape orientation in Word provides numerous benefits.
Enhanced Visual Communication
Landscape orientation allows you to present information in a more visually appealing and engaging way. This is particularly important for documents that need to capture and hold the reader’s attention.
Improved Data Presentation
Landscape is ideal for displaying wide tables and charts, making it easier for readers to understand and interpret complex data.
Increased Flexibility in Document Design
By mastering section breaks and page setup options, you gain greater flexibility in designing your documents. You can seamlessly integrate portrait and landscape pages to create visually dynamic and informative layouts.
Professional-Looking Documents
Using landscape orientation strategically can elevate the overall appearance of your documents, making them look more polished and professional.
Better Use of Space
Landscape orientation allows you to make better use of the available page space, particularly for documents with a lot of visual elements.
Review: Microsoft Word’s Landscape Capabilities
Microsoft Word offers a robust and versatile set of features for working with landscape orientation. However, there are also some limitations to consider.
User Experience and Usability
Word’s interface is generally user-friendly, but some features, such as section breaks, can be confusing for beginners. The learning curve can be steep for users who are not familiar with advanced formatting options.
Performance and Effectiveness
Word generally performs well, even with complex documents. However, large documents with many images or tables can sometimes experience performance issues. The effectiveness of landscape orientation depends on the specific content and the user’s design skills.
Pros
* Versatile: Supports a wide range of document types and formatting options.
* Widely Used: Industry-standard software with extensive support and resources.
* Feature-Rich: Offers a comprehensive set of tools for creating professional-quality documents.
* Integrates with Other Microsoft Applications: Seamlessly integrates with Excel, PowerPoint, and other Office applications.
* Customizable: Allows for extensive customization of page layouts and formatting.
Cons/Limitations
* Can Be Complex: Advanced features can be difficult to master.
* Performance Issues: Large documents can sometimes experience performance problems.
* Cost: Microsoft Word is a paid software, which may be a barrier for some users.
* Compatibility Issues: Documents may not always display correctly on other word processors.
Ideal User Profile
Microsoft Word is best suited for users who need to create professional-quality documents with advanced formatting options. It’s a great choice for businesses, students, and individuals who need a versatile and reliable word processing software.
Key Alternatives
* Google Docs: A free, web-based word processor that offers collaborative editing features.
* LibreOffice Writer: A free, open-source word processor that provides a similar feature set to Microsoft Word.
Expert Overall Verdict & Recommendation
Microsoft Word remains the industry standard for word processing, and its landscape orientation capabilities are robust and versatile. While there are some limitations to consider, the advantages far outweigh the drawbacks. We highly recommend Microsoft Word for anyone who needs to create professional-quality documents with advanced formatting options.
Q&A: Advanced Questions About Landscape in Word
Here are some frequently asked questions about landscape orientation in Microsoft Word, going beyond the basics.
Q: How can I create different headers and footers for portrait and landscape sections?
A: After inserting section breaks, double-click on the header or footer in the landscape section. In the “Header & Footer Tools Design” tab, uncheck the “Link to Previous” option. This will unlink the header/footer from the previous section, allowing you to create unique headers and footers for each orientation.
Q: Can I automatically adjust table widths when switching between portrait and landscape?
A: Word doesn’t offer an automatic adjustment feature. However, you can manually adjust table widths by selecting the table and using the “Layout” tab’s “AutoFit” options, such as “AutoFit to Window.” Consider creating separate table styles for portrait and landscape sections for easier management.
Q: How do I prevent a table from breaking across pages in landscape mode?
A: Select the table, right-click, and choose “Table Properties.” In the “Row” tab, uncheck the “Allow row to break across pages” option. This will force the entire table to stay on one page, even if it means moving to the next page.
Q: Is there a way to rotate text within a cell in landscape mode?
A: Yes, you can rotate text within a table cell. Select the cell, right-click, and choose “Text Direction.” Choose the desired orientation. This is useful for labeling columns or rows in a visually appealing way.
Q: How can I create a booklet with both portrait and landscape pages?
A: Creating a booklet with mixed orientations requires careful planning. You’ll need to use section breaks to control the orientation of each page. Then, use Word’s “Book Fold” layout option (found in the “Page Setup” dialog box) to arrange the pages in the correct order for printing.
Q: How does landscape orientation affect printing margins?
A: The printing margins remain the same, but they are applied to the rotated page. Ensure that your content fits within the margins in both portrait and landscape sections. You may need to adjust the margins separately for each section.
Q: Can I use different paper sizes for portrait and landscape sections?
A: Yes, you can specify different paper sizes for each section. Use section breaks and then navigate to the “Layout” tab, click the small arrow in the bottom right corner of the “Page Setup” group. In the “Paper” tab, select the desired paper size. Make sure to select “This section” in the “Apply to” dropdown.
Q: How do I create a watermark that only appears on landscape pages?
A: After inserting section breaks, go to the “Design” tab and click on “Watermark.” Select “Custom Watermark.” In the “Print Watermark” dialog box, insert your desired watermark. Then, in the landscape section, double-click the header or footer to access the header/footer area. Select the watermark and cut it. Paste the watermark back into the header/footer area, but this time, ensure the “Different First Page” or “Different Odd & Even Pages” option is *not* selected.
Q: How can I link text boxes across multiple landscape pages?
A: Create the text boxes on the first landscape page. Then, in the “Shape Format” tab, click on “Create Link.” Click on the next text box on the subsequent landscape page to create the link. Text will automatically flow from the first text box to the linked text box.
Q: How do I create a landscape-oriented table of contents?
A: You’ll need to create the table of contents in a separate section that’s set to landscape orientation. Insert a section break before and after the table of contents. Then, generate the table of contents as usual (References > Table of Contents). Ensure that the table of contents style is properly formatted to fit the landscape page.
Conclusion
Mastering how to make a Word document landscape opens up a world of possibilities for creating visually engaging and informative documents. From presenting complex data in tables and charts to designing eye-catching brochures, landscape orientation is a powerful tool in your document design arsenal. By understanding the nuances of section breaks, page setup options, and troubleshooting common issues, you can confidently create professional-quality documents that effectively communicate your message. We encourage you to experiment with these techniques and share your experiences in the comments below. Explore our other guides for advanced Word formatting tips and tricks. Contact our experts for personalized assistance with your document design needs.
