
WeatherTech Running Boards: How to Install Them on a 2025 Honda Pilot – A Comprehensive Guide
So, you’ve invested in a sleek set of WeatherTech running boards for your brand-new 2025 Honda Pilot. Excellent choice! Running boards not only enhance the look of your SUV but also provide a practical step up, making entry and exit easier for passengers of all ages. But now comes the big question: how do you install them? This comprehensive guide provides a step-by-step walkthrough, ensuring a smooth and successful installation process. We’ll cover everything from tools needed to potential pitfalls, drawing upon expert knowledge and practical experience to deliver a superior resource compared to anything else you’ll find online.
This isn’t just another generic instruction manual. We’re going beyond the basics, providing insights into best practices, troubleshooting tips, and considerations that only experienced installers would know. Our goal is to empower you with the knowledge and confidence to tackle this project like a pro, saving you time and money while ensuring a secure and aesthetically pleasing result.
Understanding WeatherTech Running Boards and Your 2025 Honda Pilot
WeatherTech running boards are renowned for their durability, custom fit, and ease of installation. They’re designed to integrate seamlessly with your vehicle’s existing body, providing a secure and stable platform. But before diving into the installation process, let’s understand the nuances of these running boards and their compatibility with the 2025 Honda Pilot.
What are WeatherTech Running Boards?
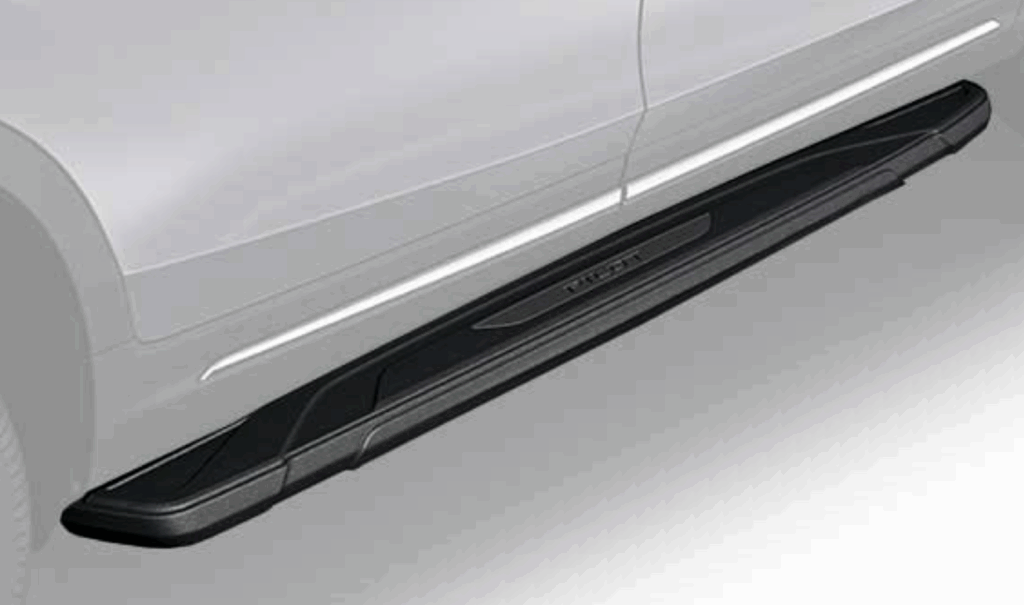
WeatherTech running boards are aftermarket accessories designed to enhance the functionality and aesthetics of SUVs and trucks. They typically consist of a sturdy platform made from materials like extruded aluminum or reinforced plastic, often with a textured surface for improved grip. They attach to the vehicle’s frame or body using brackets and hardware, providing a stable step for entering and exiting the vehicle.
Unlike generic running boards, WeatherTech prides itself on custom-molding its products to perfectly fit specific vehicle makes and models. This ensures a clean, factory-like appearance and simplifies the installation process. They are designed to withstand harsh weather conditions and provide years of reliable service. Many users find the added safety and convenience invaluable, especially for children, the elderly, or anyone with mobility challenges.
Why Choose WeatherTech for Your 2025 Honda Pilot?
WeatherTech stands out in the aftermarket accessories market for its commitment to quality and precision engineering. Choosing WeatherTech running boards for your 2025 Honda Pilot offers several key advantages:
* **Custom Fit:** Guaranteed to perfectly match the contours of your vehicle for a seamless look.
* **Durability:** Constructed from high-quality materials to withstand the rigors of daily use and harsh weather.
* **Ease of Installation:** Designed for DIY installation with clear instructions and minimal modification required.
* **Enhanced Safety:** Provides a stable and secure step for entering and exiting the vehicle, reducing the risk of slips and falls.
* **Improved Aesthetics:** Adds a touch of style and sophistication to your Honda Pilot’s exterior.
Understanding the 2025 Honda Pilot’s Mounting Points
The 2025 Honda Pilot is designed with pre-existing mounting points specifically for accessories like running boards. These points are typically located along the rocker panels, the area between the front and rear wheels, just below the doors. The exact location and configuration of these mounting points may vary slightly depending on the trim level of your Pilot. Consult your owner’s manual or a reliable online resource to identify the precise location of the mounting points on your vehicle.
Understanding these mounting points is crucial for a successful installation. You’ll need to ensure that the WeatherTech running board brackets align perfectly with these points for a secure and stable attachment. Improper alignment can lead to instability, damage to the vehicle, or even failure of the running boards. Therefore, take your time and double-check the alignment before tightening any bolts.
Preparing for Installation: Tools and Materials
Before you even open the box containing your WeatherTech running boards, it’s essential to gather all the necessary tools and materials. Having everything readily available will streamline the installation process and minimize frustration. Here’s a comprehensive list of what you’ll need:
* **WeatherTech Running Boards Kit:** Ensure the kit is specifically designed for the 2025 Honda Pilot.
* **Socket Set:** A comprehensive socket set with various sizes is crucial for tightening bolts and nuts. Both metric and standard sizes may be needed, so be prepared.
* **Wrench Set:** Similar to the socket set, a wrench set will provide additional leverage and access to tight spaces.
* **Torque Wrench:** This is a critical tool for ensuring that bolts are tightened to the correct specification, preventing over-tightening or under-tightening. Refer to the WeatherTech instructions for the recommended torque values.
* **Screwdrivers:** A set of screwdrivers, including Phillips head and flathead, will be needed for various tasks.
* **Drill (Optional):** In some cases, minor drilling may be required to enlarge existing mounting holes or create new ones. However, this is usually not necessary with WeatherTech running boards.
* **Safety Glasses:** Protect your eyes from debris and flying particles.
* **Work Gloves:** Protect your hands from sharp edges and grime.
* **Floor Jack and Jack Stands:** These will allow you to safely lift the vehicle to provide better access to the mounting points.
* **Penetrating Oil (e.g., WD-40):** This can be helpful for loosening stubborn bolts or nuts.
* **Measuring Tape:** For accurate positioning of the running boards.
* **Level:** To ensure the running boards are installed horizontally.
* **Marker or Grease Pencil:** For marking mounting points.
* **Shop Rags:** For cleaning surfaces and wiping up spills.
* **Vehicle Manual:** Refer to the vehicle manual for torque specifications and other relevant information.
**Expert Tip:** Before starting the installation, lay out all the components of the WeatherTech running board kit and familiarize yourself with them. This will help you understand the assembly process and prevent confusion later on.
Step-by-Step Installation Guide
Now that you’ve gathered your tools and materials, it’s time to begin the installation process. Follow these step-by-step instructions carefully to ensure a successful outcome:
**Step 1: Preparation**
* Park your 2025 Honda Pilot on a level surface.
* Engage the parking brake and chock the rear wheels for added safety.
* Put on your safety glasses and work gloves.
* Carefully read the WeatherTech installation instructions specific to your vehicle model.
**Step 2: Lifting the Vehicle (Optional but Recommended)**
* Use a floor jack to lift one side of the vehicle at a time.
* Place jack stands under the frame to support the vehicle securely.
* Never work under a vehicle supported only by a floor jack.
**Step 3: Identifying Mounting Points**
* Locate the pre-existing mounting points along the rocker panels of your Honda Pilot. Refer to your owner’s manual or online resources for guidance.
* Clean the mounting areas with a shop rag to remove any dirt or debris.
**Step 4: Installing the Brackets**
* Attach the WeatherTech running board brackets to the mounting points using the provided hardware (bolts, nuts, washers).
* Ensure the brackets are properly aligned and securely fastened. Use a torque wrench to tighten the bolts to the specified torque value.
* Do not over-tighten the bolts, as this could damage the mounting points or the brackets.
**Step 5: Attaching the Running Boards**
* Carefully position the running boards onto the brackets.
* Align the mounting holes on the running boards with the corresponding holes on the brackets.
* Secure the running boards to the brackets using the provided hardware.
* Again, use a torque wrench to tighten the bolts to the specified torque value.
**Step 6: Leveling and Adjusting**
* Use a level to ensure the running boards are installed horizontally.
* Adjust the position of the running boards as needed to achieve a level and aesthetically pleasing appearance.
* Double-check all bolts and nuts to ensure they are securely tightened.
**Step 7: Repeating on the Other Side**
* Repeat steps 2 through 6 on the other side of the vehicle.
**Step 8: Final Inspection**
* Once both running boards are installed, perform a final inspection to ensure everything is properly aligned and securely fastened.
* Lower the vehicle to the ground and remove the jack stands.
* Test the running boards by stepping on them to ensure they are stable and secure.
**Expert Tip:** If you encounter any difficulties during the installation process, consult the WeatherTech installation instructions or contact their customer support for assistance. It’s always better to seek help than to risk damaging your vehicle or the running boards.
Troubleshooting Common Installation Issues
Even with careful planning and execution, you might encounter some common issues during the WeatherTech running board installation. Here’s a quick troubleshooting guide:
* **Problem:** Bolts don’t align with mounting points.
* **Solution:** Double-check that you’re using the correct brackets for your vehicle model. Loosen all bolts slightly and try to wiggle the bracket into alignment. Penetrating oil can help loosen stubborn bolts.
* **Problem:** Running boards are not level.
* **Solution:** Loosen the bolts on the brackets and adjust the position of the running boards until they are level. Use a level to ensure accuracy. Retighten the bolts to the specified torque value.
* **Problem:** Bolts are difficult to tighten.
* **Solution:** Ensure that the threads on the bolts and nuts are clean and free of debris. Apply a small amount of penetrating oil to the threads. Use a socket wrench with a long handle to provide more leverage.
* **Problem:** Missing hardware.
* **Solution:** Contact WeatherTech customer support to request replacement hardware. Do not attempt to use substitute hardware, as this could compromise the safety and stability of the running boards.
**Expert Tip:** Before contacting customer support, take clear photos of the problem area. This will help them understand the issue and provide a more accurate solution.
Maintaining Your WeatherTech Running Boards
To keep your WeatherTech running boards looking their best and functioning properly, regular maintenance is essential. Here are some tips:
* **Regular Cleaning:** Wash the running boards regularly with soap and water to remove dirt, grime, and road salt. Use a soft brush to scrub away stubborn stains.
* **Protective Coating:** Apply a protective coating, such as a wax or sealant, to the running boards to protect them from the elements and prevent corrosion.
* **Inspect Regularly:** Inspect the running boards regularly for any signs of damage, such as cracks, dents, or loose bolts. Address any issues promptly to prevent further damage.
* **Tighten Bolts:** Periodically check the tightness of the bolts and nuts to ensure they are securely fastened. Use a torque wrench to tighten them to the specified torque value.
Advantages of Installing WeatherTech Running Boards
Installing WeatherTech running boards on your 2025 Honda Pilot offers a multitude of advantages that extend beyond mere aesthetics. These benefits contribute significantly to both the functionality and overall value of your vehicle.
* **Enhanced Accessibility:** This is arguably the most significant advantage. Running boards provide a convenient and stable step for entering and exiting the vehicle, particularly beneficial for children, elderly individuals, or anyone with mobility limitations. They reduce strain and make the process much easier and safer.
* **Protection from Debris:** Running boards act as a barrier, shielding the lower body panels of your Honda Pilot from road debris, such as rocks, mud, and salt. This protection helps prevent scratches, dents, and corrosion, preserving the vehicle’s paint and overall appearance.
* **Improved Aesthetics:** WeatherTech running boards are designed to seamlessly integrate with the contours of your 2025 Honda Pilot, enhancing its overall appearance. They add a touch of ruggedness and sophistication, complementing the vehicle’s design.
* **Increased Resale Value:** By protecting the vehicle’s body and enhancing its appearance, running boards can contribute to a higher resale value. Potential buyers often appreciate the added convenience and protection that running boards provide.
* **Roof Access:** Running boards can provide a convenient stepping platform for accessing the roof of your Honda Pilot. This is particularly useful for loading and unloading cargo, cleaning the roof, or installing roof racks.
* **Safety in Inclement Weather:** The textured surface of WeatherTech running boards provides enhanced grip, even in wet or icy conditions. This reduces the risk of slips and falls, making entry and exit safer during inclement weather.
* **Customized Look:** WeatherTech offers various styles and finishes for its running boards, allowing you to customize the look of your Honda Pilot to match your personal preferences.
Potential Drawbacks and Considerations
While WeatherTech running boards offer numerous benefits, it’s essential to be aware of potential drawbacks and considerations before making a purchase:
* **Cost:** WeatherTech running boards can be relatively expensive compared to generic alternatives. However, the higher price reflects the superior quality, custom fit, and durability of WeatherTech products.
* **Ground Clearance:** Running boards can slightly reduce the ground clearance of your Honda Pilot, which may be a concern for off-road enthusiasts.
* **Installation Complexity:** While WeatherTech running boards are designed for DIY installation, the process can be challenging for those with limited mechanical experience. Professional installation may be required in some cases.
* **Maintenance:** Running boards require regular cleaning and maintenance to prevent corrosion and maintain their appearance.
* **Potential for Damage:** Running boards can be susceptible to damage from impacts, such as rocks or curbs. Replacing damaged running boards can be costly.
* **Added Weight:** Running boards add extra weight to your vehicle, which can slightly reduce fuel economy.
**Alternatives:** Consider alternatives like nerf bars or rock sliders if ground clearance is a major concern or if you plan on doing serious off-roading. These offer different levels of protection and functionality.
Q&A: Expert Answers to Your WeatherTech Running Board Questions
Here are some frequently asked questions about WeatherTech running boards and their installation on a 2025 Honda Pilot:
**Q1: How long does it typically take to install WeatherTech running boards on a 2025 Honda Pilot?**
*A:* The installation time can vary depending on your mechanical skills and experience. However, a reasonably skilled DIYer can typically complete the installation in 2-4 hours.
**Q2: Are any special tools required for the installation besides those listed?**
*A:* The tools listed in the preparation section should be sufficient for most installations. However, a second pair of hands can be helpful for lifting and positioning the running boards.
**Q3: Can I install WeatherTech running boards on a leased vehicle?**
*A:* This depends on the terms of your lease agreement. Check with your leasing company to ensure that installing aftermarket accessories is permitted.
**Q4: Will installing running boards void my Honda Pilot’s warranty?**
*A:* Installing aftermarket accessories generally does not void your vehicle’s warranty, unless the accessory directly causes a failure that would otherwise be covered under warranty.
**Q5: How do I clean my WeatherTech running boards effectively?**
*A:* Use soap and water and a soft brush to scrub away dirt and grime. For stubborn stains, you can use a mild degreaser or a specialized automotive cleaner.
**Q6: What is the weight capacity of WeatherTech running boards?**
*A:* The weight capacity varies depending on the specific model of running boards. However, most WeatherTech running boards are designed to support at least 300 pounds per side.
**Q7: How do I prevent my WeatherTech running boards from rusting?**
*A:* Regular cleaning and the application of a protective coating can help prevent rust. If you live in an area with harsh winters, consider applying a rust inhibitor to the running boards before the winter season.
**Q8: Can I paint my WeatherTech running boards to match my vehicle’s color?**
*A:* Yes, you can paint your WeatherTech running boards. However, you’ll need to properly prepare the surface by sanding and priming it before applying the paint. Use a high-quality automotive paint for best results.
**Q9: What should I do if I lose the installation instructions?**
*A:* You can download the installation instructions from the WeatherTech website or contact their customer support for assistance.
**Q10: Are WeatherTech running boards compatible with mud flaps?**
*A:* This depends on the specific model of mud flaps and running boards. Some mud flaps may require modification to fit properly with running boards.
Conclusion: Enhancing Your 2025 Honda Pilot with WeatherTech Running Boards
Installing WeatherTech running boards on your 2025 Honda Pilot is a worthwhile investment that enhances both the functionality and aesthetics of your vehicle. By following this comprehensive guide and taking your time, you can confidently tackle the installation process yourself. Remember to prioritize safety, double-check your work, and consult the WeatherTech instructions for any specific guidance.
Ultimately, the added convenience, protection, and style that WeatherTech running boards provide will make your Honda Pilot an even more enjoyable and practical vehicle for years to come. So, get out there and transform your ride! Explore WeatherTech’s website for more accessories to customize your 2025 Honda Pilot to your liking. Share your experiences installing WeatherTech running boards in the comments below!
