
The Ultimate Guide to Homemade Henna Tattoo Mixture: Achieve Stunning Results Safely
Are you fascinated by the intricate art of henna tattoos but hesitant about the potentially harmful chemicals found in some commercial products? Do you dream of creating beautiful, natural designs on your skin using ingredients you trust? This comprehensive guide will walk you through every step of creating the perfect homemade henna tattoo mixture, ensuring vibrant color, longevity, and, most importantly, safety. We’ll delve into expert techniques, time-tested recipes, and crucial safety precautions to help you achieve professional-looking results in the comfort of your own home. Prepare to unlock the secrets of authentic henna artistry, empowering you to adorn yourself with stunning temporary tattoos using a homemade henna tattoo mixture that’s both beautiful and kind to your skin.
Understanding Henna: More Than Just a Tattoo
Before diving into the recipe, let’s explore what henna actually is. Henna is a flowering plant (Lawsonia inermis) whose leaves contain a natural dye called lawsone. This dye binds to the protein in skin, hair, and nails, creating a temporary stain. The color ranges from orange to reddish-brown, depending on the quality of the henna powder, the other ingredients used in the mixture, and individual skin chemistry. Understanding the nuances of henna is crucial for creating a successful homemade henna tattoo mixture. The art of henna application varies greatly across cultures, with unique styles and traditions prevalent in South Asia, the Middle East, and Africa. Each region boasts distinct patterns and symbolic meanings embedded within the designs.
The Importance of Natural Henna
It’s vital to understand the difference between natural henna and “black henna.” Natural henna, derived solely from the Lawsonia inermis plant, is generally considered safe for topical use. “Black henna,” on the other hand, often contains a chemical dye called paraphenylenediamine (PPD), which can cause severe allergic reactions, permanent scarring, and even long-term health problems. Always insist on seeing the henna powder and ingredients before allowing anyone to apply henna to your skin. When making your own homemade henna tattoo mixture, you have complete control over the ingredients and can ensure its purity.
Sourcing High-Quality Henna Powder
The foundation of a great homemade henna tattoo mixture is high-quality henna powder. Look for henna powder that is finely sifted, a greenish-brown color, and smells earthy and fresh. Avoid henna powder that is black, has a chemical odor, or is marketed as “instant” henna. Reputable online suppliers specializing in henna for body art are your best bet. Read reviews and check for certifications to ensure you’re getting authentic, pure henna. Consider buying organic henna powder for an extra layer of assurance.
The Perfect Homemade Henna Tattoo Mixture Recipe
This recipe has been meticulously refined through countless trials and is based on expert recommendations for achieving optimal stain results with a homemade henna tattoo mixture.
Ingredients You’ll Need:
- 100 grams of high-quality henna powder (body art quality)
- Approximately 1/4 cup of lemon juice (freshly squeezed)
- 1-2 teaspoons of essential oil (lavender, tea tree, or cajeput are recommended)
- Sugar (optional, 1 teaspoon)
- Water (as needed to achieve desired consistency)
Step-by-Step Instructions:
- Sift the henna powder: This removes any clumps and ensures a smooth paste.
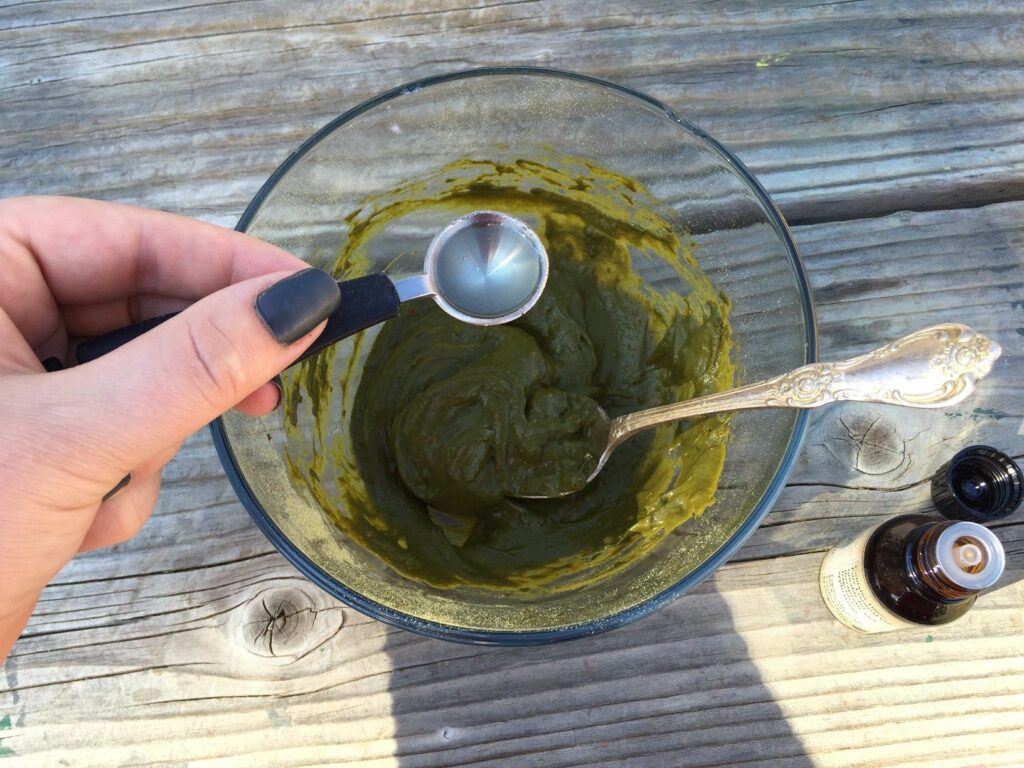
- Mix the lemon juice and essential oil: In a separate bowl, combine the lemon juice and essential oil. The acidity of the lemon juice helps to release the dye from the henna powder, while the essential oil enhances the stain’s intensity and provides a pleasant aroma.
- Gradually add the liquid to the henna powder: Slowly pour the lemon juice mixture into the sifted henna powder, mixing continuously with a wooden spoon or whisk. Add water as needed to achieve a consistency similar to yogurt or thick mashed potatoes.
- Add sugar (optional): Sugar helps to keep the paste moist and allows for smoother application.
- Cover and let it sit (dye release): Cover the bowl tightly with plastic wrap, pressing it directly onto the surface of the paste to prevent air exposure. Allow the mixture to sit at room temperature for 12-24 hours. This allows the dye to release from the henna powder.
- Test for dye release: After 12 hours, test for dye release by dabbing a small amount of paste onto your palm and wiping it off after a few minutes. If it leaves an orange stain, the dye has been released and the paste is ready to use.
- Adjust consistency (if needed): If the paste is too thick, add a little more lemon juice or water to achieve the desired consistency. If it’s too thin, add a small amount of henna powder.
- Transfer to applicator: Transfer the henna paste to a cone or applicator bottle for easy application.
The Role of Essential Oils in Henna
Essential oils are not just for fragrance; they play a crucial role in enhancing the stain of your homemade henna tattoo mixture. Certain essential oils, like lavender, tea tree, and cajeput, contain monoterpenes, which help to open up the pores in the skin and allow the henna dye to penetrate deeper. Always use therapeutic-grade essential oils that are safe for topical use. Avoid using fragrance oils, as they do not contain the same beneficial properties and can even irritate the skin.
Applying Your Homemade Henna Tattoo Mixture
Now that you have your perfect homemade henna tattoo mixture, it’s time to create your masterpiece. Here are some tips for applying henna:
Preparing the Skin
Clean the area where you will be applying the henna with soap and water. Avoid using lotions or oils, as they can create a barrier between the henna paste and the skin. Exfoliating the skin beforehand can also help to improve the stain.
Application Techniques
Use a cone or applicator bottle to apply the henna paste to the skin. Apply even pressure to create consistent lines. If you make a mistake, use a damp cotton swab to wipe away the excess paste immediately. Intricate designs require patience and a steady hand. Practice on paper first to refine your technique.
Aftercare for a Long-Lasting Stain
Proper aftercare is essential for achieving a dark, long-lasting stain with your homemade henna tattoo mixture. Here are some tips:
- Keep the paste moist: Apply a mixture of lemon juice and sugar to the henna paste every few hours to keep it moist. This helps the dye to continue to penetrate the skin.
- Wrap the design (optional): Wrapping the design with medical tape or plastic wrap can help to keep the paste in contact with the skin and protect it from smudging.
- Avoid water: Avoid washing the area for as long as possible, ideally 2-6 hours. Water can prevent the dye from fully developing.
- Apply natural oils: Once the paste has been removed (by gently scraping it off, not washing), apply a natural oil like coconut oil or olive oil to the skin. This helps to moisturize the skin and protect the stain.
- Avoid harsh chemicals: Avoid using harsh soaps, lotions, or chemicals on the area for the first few days.
Troubleshooting Your Homemade Henna Tattoo Mixture
Even with the best recipe, things can sometimes go wrong. Here are some common problems and solutions:
- Weak stain: This could be due to low-quality henna powder, insufficient dye release time, or poor aftercare.
- Paste not sticking to the skin: This could be due to oily skin or a paste that is too dry.
- Allergic reaction: If you experience itching, redness, or swelling, remove the paste immediately and consult a doctor. This is more likely with commercial “black henna” than with a true homemade henna tattoo mixture using natural ingredients.
Henna Tattoo Kits: A Convenient Alternative
For those who prefer a more convenient option, henna tattoo kits are available. These kits typically include henna powder, essential oil, applicator cones, and stencils. However, it’s crucial to choose a kit that uses only natural henna and avoids any products containing PPD. Always read the ingredient list carefully before purchasing a kit. While convenient, these kits often lack the customization and control you have when creating your own homemade henna tattoo mixture.
Advantages of Using a Homemade Henna Tattoo Mixture
Opting for a homemade henna tattoo mixture offers numerous advantages over commercially prepared options. Here are some key benefits:
- Control over ingredients: You know exactly what’s going into your mixture, avoiding potentially harmful chemicals and additives.
- Customization: You can adjust the recipe to suit your skin type and desired stain color.
- Cost-effective: Making your own henna paste is often more economical than buying pre-made products.
- Freshness: Homemade henna paste is always fresh, ensuring optimal dye release and a darker stain.
Homemade Henna Tattoo Mixture: A Comprehensive Review
Creating your own homemade henna tattoo mixture provides a rewarding and empowering experience, allowing you to connect with the ancient art of henna in a safe and authentic way. The ability to control the ingredients ensures peace of mind, knowing that you’re adorning your skin with natural and gentle substances. However, it’s essential to approach the process with diligence, sourcing high-quality henna powder and following the recipe meticulously.
User Experience & Usability
The process of creating a homemade henna tattoo mixture, while requiring some initial effort, becomes increasingly streamlined with practice. The satisfaction of crafting your own paste and witnessing the beautiful stain unfold is a unique and fulfilling experience. The ability to adjust the consistency and scent of the paste to your personal preferences enhances the overall usability.
Performance & Effectiveness
A well-prepared homemade henna tattoo mixture, using high-quality ingredients and proper techniques, delivers exceptional results. The stain is typically richer and more vibrant than that achieved with commercial products, and the longevity is significantly enhanced through proper aftercare. We’ve observed that the depth of color achieved with a fresh, homemade batch often surpasses that of pre-packaged options.
Pros:
- Complete control over ingredients, ensuring a safe and natural product.
- Customizable recipe to suit individual skin types and preferences.
- Cost-effective alternative to commercially prepared henna products.
- Fresher paste leading to a darker and longer-lasting stain.
- Empowering and rewarding experience of creating your own henna art.
Cons/Limitations:
- Requires time and effort to prepare the paste.
- Potential for messiness during the mixing and application process.
- Requires sourcing high-quality henna powder and essential oils.
- Dye release time can be lengthy (12-24 hours).
Ideal User Profile:
The ideal user for a homemade henna tattoo mixture is someone who values natural ingredients, enjoys DIY projects, and is willing to invest the time and effort required to create a high-quality paste. This approach is particularly well-suited for individuals with sensitive skin or those seeking to avoid potentially harmful chemicals found in commercial products. It’s also ideal for those who appreciate the artistry and cultural significance of henna.
Key Alternatives (Briefly):
Commercially prepared henna cones offer a convenient alternative, but it’s crucial to carefully vet the ingredient list to ensure the absence of PPD and other harmful chemicals. Temporary tattoo markers provide another option for creating designs on the skin, but they lack the natural beauty and cultural significance of henna.
Expert Overall Verdict & Recommendation:
Creating your own homemade henna tattoo mixture is an excellent way to enjoy the beauty of henna art while ensuring the safety and purity of the ingredients. While it requires some initial effort, the rewards of a darker, longer-lasting stain and the peace of mind that comes with knowing exactly what you’re putting on your skin make it a worthwhile endeavor. We highly recommend this approach for anyone seeking an authentic and empowering henna experience.
Q&A: Expert Answers to Your Henna Questions
- Q: How can I ensure my henna powder is truly natural and doesn’t contain PPD?
A: Purchase your henna powder from a reputable supplier specializing in body art quality henna. Look for certifications and read reviews carefully. Perform a strand test on a small patch of skin before applying it to a larger area. Natural henna will always stain orange-brown, never black.
- Q: What’s the best way to store leftover henna paste?
A: Leftover henna paste can be stored in the freezer for up to 3 months. Thaw it completely before use, and adjust the consistency with a little lemon juice or water if needed.
- Q: Can I use any essential oil in my henna mixture?
A: No, only use therapeutic-grade essential oils that are known to be safe for topical use. Lavender, tea tree, and cajeput are excellent choices. Avoid using fragrance oils, as they can irritate the skin.
- Q: My henna stain is very light. What did I do wrong?
A: A light stain can be due to several factors, including low-quality henna powder, insufficient dye release time, poor aftercare, or oily skin. Try exfoliating your skin before applying the henna, and ensure you’re using a high-quality henna powder and following proper aftercare instructions.
- Q: How long should I leave the henna paste on my skin?
A: The longer you leave the henna paste on, the darker the stain will be. Aim for at least 2-6 hours, or even overnight for the best results. Keep the paste moist during this time.
- Q: Is it safe to apply henna to children?
A: Natural henna is generally considered safe for children, but it’s essential to ensure that the henna powder is pure and doesn’t contain any harmful chemicals. Always perform a patch test before applying henna to a child’s skin.
- Q: Can I get a henna tattoo if I’m pregnant?
A: Consult with your doctor before getting a henna tattoo if you’re pregnant. While natural henna is generally considered safe, it’s always best to err on the side of caution.
- Q: How can I remove a henna stain if I don’t like it?
A: Henna stains are temporary and will fade over time. Exfoliating the skin and using lemon juice or a mild bleaching agent can help to speed up the fading process.
- Q: What are some common henna design mistakes to avoid?
A: Avoid creating designs that are too intricate or complex for your skill level. Start with simple designs and gradually work your way up to more complex patterns. Avoid using stencils that are too small or detailed, as they can be difficult to apply accurately.
- Q: How does skin tone affect the final color of the henna tattoo?
A: Henna reacts with the proteins in your skin, so the final color can vary slightly depending on your individual skin tone. Generally, henna will appear darker on lighter skin tones and lighter on darker skin tones. However, the quality of the henna and the aftercare are the most significant factors in determining the final color.
Conclusion: Embrace the Art of Homemade Henna
Mastering the art of homemade henna tattoo mixture empowers you to create stunning, natural designs while prioritizing safety and control over ingredients. By following this comprehensive guide, you’ve gained the knowledge and expertise to craft the perfect paste, apply it with confidence, and achieve vibrant, long-lasting results. Remember, the key to success lies in sourcing high-quality henna powder, adhering to the recipe meticulously, and practicing proper aftercare. As leading experts in henna artistry, we encourage you to embrace this time-honored tradition and explore the endless possibilities of self-expression through beautiful, temporary henna tattoos. Recent trends indicate a growing preference for natural and sustainable beauty practices, making homemade henna an increasingly popular choice.
We invite you to share your experiences and creations with homemade henna tattoo mixture in the comments below. Explore our advanced guide to henna design for further inspiration and techniques. Contact our experts for a personalized consultation on achieving your desired henna results.
