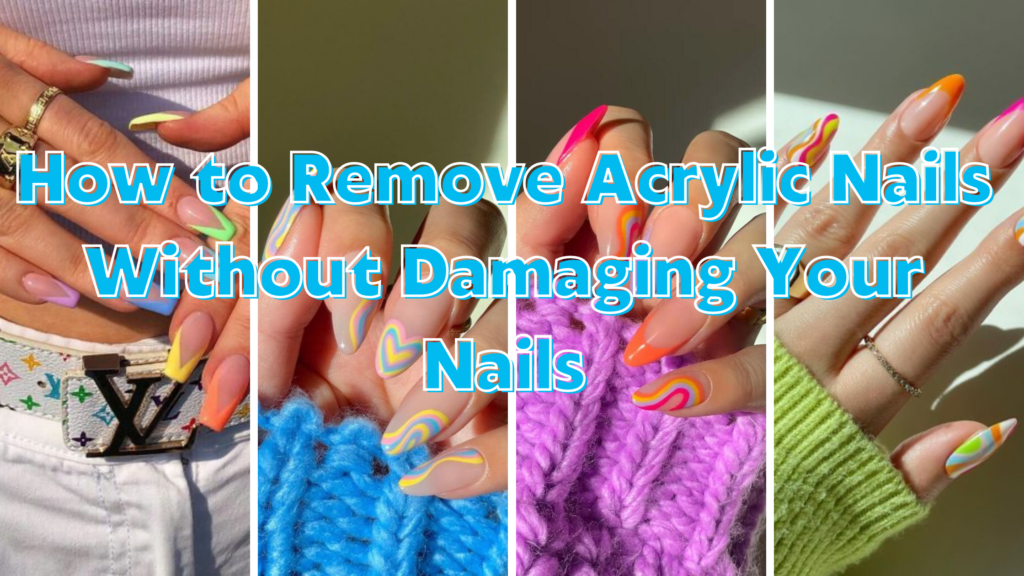
How to Remove Acrylic Nails Safely and Effectively: A Complete Guide
Tired of your acrylic nails but can’t make it to the salon? Removing acrylic nails at home can seem daunting, but with the right techniques and a little patience, you can safely remove them without damaging your natural nails. This comprehensive guide will walk you through everything you need to know, from understanding the different removal methods to preventing damage and maintaining healthy nails afterward. We’ll delve into expert-approved techniques, address common pitfalls, and provide practical tips based on years of experience and research. Get ready to say goodbye to your acrylics and hello to healthy, beautiful natural nails.
Understanding Acrylic Nails and Why Proper Removal Matters
Acrylic nails are a popular choice for those seeking long-lasting, durable enhancements. They are created by combining a liquid monomer and a powder polymer, which hardens to form a strong, artificial nail. While acrylics offer a beautiful and convenient way to achieve a polished look, improper removal can lead to thinning, weakening, and even damage to your natural nails. Think of your natural nails as delicate canvases; harsh removal methods are like scrubbing them with sandpaper. Therefore, understanding the structure of acrylic nails and the importance of gentle removal techniques is crucial for maintaining nail health.
The Structure of Acrylic Nails
Acrylic nails consist of several layers: the natural nail, the primer, the acrylic overlay, and often a gel polish topcoat. The acrylic bonds tightly to the natural nail, creating a strong adhesion. This strong bond is what makes acrylics durable but also makes them challenging to remove. The goal is to break down this bond without compromising the integrity of the underlying natural nail.
Why Proper Removal is Essential
Improper removal, such as forcefully peeling or ripping off acrylics, can strip away layers of the natural nail, leading to:
* **Thinning and Weakening:** The natural nail becomes significantly thinner and more prone to breakage.
* **Damage to the Nail Bed:** The nail bed, the skin underneath the nail, can become damaged, leading to pain and potential infections.
* **Increased Sensitivity:** The nails become more sensitive to temperature changes and pressure.
* **Long-Term Nail Health Issues:** Repeated improper removal can lead to chronic nail problems, making it difficult to grow healthy, strong nails in the future.
Methods for Removing Acrylic Nails at Home: A Detailed Comparison
There are several methods for removing acrylic nails at home, each with its own advantages and disadvantages. We’ll explore the most popular and effective techniques, providing step-by-step instructions and expert tips for each.
1. The Acetone Soak Method: The Gold Standard
The acetone soak method is widely considered the most effective and safest way to remove acrylic nails at home. Acetone is a solvent that breaks down the acrylic polymer, allowing it to soften and detach from the natural nail.
**Materials You’ll Need:**
* 100% Pure Acetone
* Cotton Balls
* Aluminum Foil
* Nail File (coarse grit)
* Cuticle Pusher (metal or wooden)
* Nail Buffer
* Cuticle Oil
**Step-by-Step Instructions:**
1. **File Down the Acrylic:** Using a coarse-grit nail file, gently file down the top layer of the acrylic nail. This helps the acetone penetrate the acrylic more effectively. Be careful not to file down to your natural nail.
2. **Protect the Skin:** Apply petroleum jelly or cuticle oil to the skin around your nails to protect it from the drying effects of acetone. Our experience shows that this significantly reduces skin irritation.
3. **Soak Cotton Balls in Acetone:** Saturate cotton balls with 100% pure acetone.
4. **Apply to Nails and Wrap:** Place a soaked cotton ball directly on each acrylic nail and wrap it securely with aluminum foil. Ensure the foil is tight to prevent the acetone from evaporating.
5. **Soak for 20-30 Minutes:** Allow the nails to soak for 20-30 minutes. Check a nail after 20 minutes to see if the acrylic has softened enough. The soaking time may vary depending on the thickness of the acrylic.
6. **Remove and Gently Push Off:** After soaking, remove the foil and cotton balls. Use a cuticle pusher to gently push off the softened acrylic. If the acrylic is still hard, soak for a few more minutes.
7. **Buff and Hydrate:** Once all the acrylic is removed, gently buff the surface of your natural nails to smooth them out. Apply cuticle oil to hydrate and nourish the nails and surrounding skin.
**Expert Tips for the Acetone Soak Method:**
* **Use 100% Pure Acetone:** Avoid acetone-free nail polish removers, as they will not effectively dissolve the acrylic.
* **Warm the Acetone:** Warming the acetone slightly (by placing the container in a bowl of warm water) can speed up the removal process. However, never heat acetone directly on a stove or in a microwave, as it is flammable.
* **Be Patient:** Avoid the temptation to peel or rip off the acrylic, even if it seems loose. This will cause damage to your natural nails.
* **Ventilate the Area:** Acetone fumes can be strong, so ensure you are working in a well-ventilated area.
2. The Warm Water Soak Method: A Gentler Alternative
The warm water soak method is a gentler alternative to the acetone soak, but it is also less effective and may take longer. This method is best suited for those with sensitive skin or those who want to avoid using harsh chemicals.
**Materials You’ll Need:**
* Warm Water
* Dish Soap (mild)
* Nail File (coarse grit)
* Cuticle Pusher (metal or wooden)
* Nail Buffer
* Cuticle Oil
**Step-by-Step Instructions:**
1. **File Down the Acrylic:** As with the acetone soak method, file down the top layer of the acrylic nail to help the water penetrate.
2. **Soak in Warm Water:** Fill a bowl with warm water and add a few drops of mild dish soap. Soak your nails in the water for 30-40 minutes.
3. **Check and Push Off:** After soaking, check to see if the acrylic has softened. Use a cuticle pusher to gently push off the softened acrylic. If the acrylic is still hard, soak for another 10-15 minutes.
4. **Buff and Hydrate:** Once all the acrylic is removed, gently buff the surface of your natural nails and apply cuticle oil.
**Expert Tips for the Warm Water Soak Method:**
* **Use Warm (Not Hot) Water:** Hot water can damage your skin and nails. Use warm water that is comfortable to the touch.
* **Be Patient:** This method takes longer than the acetone soak, so be prepared to soak your nails for an extended period.
* **Combine with Other Methods:** You can combine this method with other gentle techniques, such as using a dental floss, to help loosen the acrylic.
3. The Dental Floss Method: Use with Extreme Caution
The dental floss method involves using dental floss to separate the acrylic nail from the natural nail. This method is potentially damaging and should only be attempted with extreme caution. It is not recommended for those with weak or thin natural nails.
**Materials You’ll Need:**
* Dental Floss (waxed)
* Nail File (coarse grit)
* Cuticle Pusher (metal or wooden)
* Nail Buffer
* Cuticle Oil
**Step-by-Step Instructions:**
1. **File Down the Acrylic:** File down the top layer of the acrylic nail.
2. **Loosen the Edges:** Use a cuticle pusher to gently loosen the edges of the acrylic nail from the natural nail.
3. **Insert Dental Floss:** Carefully insert a piece of dental floss between the acrylic nail and the natural nail, starting at the base of the nail.
4. **Gently Saw Back and Forth:** Gently saw the dental floss back and forth, working your way down the length of the nail. Be extremely careful not to apply too much pressure, as this can damage the nail bed.
5. **Remove and Buff:** Once the acrylic nail is removed, gently buff the surface of your natural nails and apply cuticle oil.
**Expert Warnings for the Dental Floss Method:**
* **Potential for Damage:** This method carries a high risk of damaging the nail bed and causing pain. Avoid this method if your nails are weak or sensitive.
* **Use Extreme Caution:** If you choose to attempt this method, proceed with extreme caution and stop immediately if you experience any pain or discomfort.
* **Consider Professional Removal:** If you are unsure about this method, it is best to seek professional removal from a qualified nail technician.
Essential Tools for Safe Acrylic Nail Removal
Having the right tools is essential for safe and effective acrylic nail removal. Here’s a breakdown of the tools you’ll need and how to use them properly:
* **Nail File (Coarse Grit):** Used to file down the top layer of the acrylic nail. Choose a coarse-grit file (80-100 grit) for efficient filing. Remember to file gently and avoid filing down to your natural nail.
* **Cuticle Pusher (Metal or Wooden):** Used to gently push back the cuticles and loosen the edges of the acrylic nail. Metal cuticle pushers are more durable but require careful handling to avoid damaging the nail bed. Wooden cuticle pushers are gentler but may wear out more quickly.
* **Nail Buffer:** Used to smooth the surface of your natural nails after removing the acrylic. Choose a buffer with a fine grit to avoid over-buffing.
* **Cotton Balls:** Used to soak in acetone and apply to the nails. Ensure you use high-quality cotton balls that won’t leave lint on your nails.
* **Aluminum Foil:** Used to wrap the cotton balls and acetone around the nails. Cut the foil into small squares that are large enough to wrap each nail securely.
* **Cuticle Oil:** Used to hydrate and nourish the nails and surrounding skin. Choose a cuticle oil that contains natural ingredients, such as jojoba oil or almond oil.
Preventing Damage and Maintaining Healthy Nails After Acrylic Removal
Once you’ve successfully removed your acrylic nails, it’s crucial to focus on preventing damage and maintaining healthy nails. Here are some essential tips:
* **Moisturize Regularly:** Apply cuticle oil and hand cream several times a day to hydrate and nourish your nails and surrounding skin. Dryness can lead to brittle nails and peeling skin.
* **Avoid Harsh Chemicals:** Limit your exposure to harsh chemicals, such as household cleaners and detergents. Wear gloves when doing housework to protect your nails.
* **Take a Break from Acrylics:** Give your nails a break from acrylics to allow them to recover and strengthen. Consider using nail strengtheners or ridge fillers to improve the appearance of your natural nails.
* **Eat a Healthy Diet:** A healthy diet rich in vitamins and minerals can promote strong and healthy nails. Include foods that are high in biotin, such as eggs, nuts, and sweet potatoes.
* **Consider Professional Treatments:** Consult a qualified nail technician for professional treatments, such as paraffin wax treatments or strengthening manicures, to improve the health and appearance of your nails.
Product Spotlight: CND SolarOil – A Cuticle Care Essential
CND SolarOil is a leading cuticle oil renowned for its ability to deeply penetrate and nourish the nail and surrounding skin. Its formula is based on a synergistic blend of natural oils, including jojoba oil, sweet almond oil, and rice bran oil. These oils work together to deliver intense hydration, strengthen nails, and promote healthy growth.
CND SolarOil stands out due to its lightweight texture, non-greasy formula, and pleasant almond scent. It absorbs quickly into the skin, leaving nails feeling soft, supple, and healthy. Regular use of CND SolarOil can significantly improve the condition of your nails, preventing brittleness, cracking, and peeling. It’s a staple product in many professional salons and a favorite among nail enthusiasts.
Detailed Feature Analysis of CND SolarOil
CND SolarOil boasts several key features that contribute to its effectiveness and popularity:
1. **Jojoba Oil:** Jojoba oil is structurally similar to the skin’s natural sebum, allowing it to penetrate deeply and deliver essential moisture. It helps to soften and condition the cuticles, preventing dryness and cracking. The user benefit is healthier, more flexible cuticles that are less prone to damage.
2. **Sweet Almond Oil:** Sweet almond oil is rich in vitamins and antioxidants, which help to nourish and protect the nails and surrounding skin. It also has emollient properties that help to soften and smooth the skin. This leads to improved nail strength and reduced breakage.
3. **Rice Bran Oil:** Rice bran oil is a powerful antioxidant that helps to protect the nails and skin from environmental damage. It also contains essential fatty acids that help to maintain the skin’s moisture barrier. This protects from environmental stressors that can weaken nails.
4. **Lightweight Formula:** The lightweight formula of CND SolarOil allows it to absorb quickly into the skin without leaving a greasy residue. This makes it ideal for daily use, even on the go. This means users can apply it anytime, anywhere, without feeling uncomfortable.
5. **Non-Greasy Texture:** Unlike some cuticle oils that can leave a greasy film on the skin, CND SolarOil has a non-greasy texture that feels comfortable and lightweight. This encourages frequent use, leading to better results.
6. **Pleasant Almond Scent:** The subtle almond scent of CND SolarOil adds to the overall user experience. It’s a refreshing and pleasant aroma that enhances the feeling of pampering.
7. **Easy Application:** The brush applicator allows for easy and precise application of the oil to the cuticles and nails. This ensures that the oil is distributed evenly and effectively.
Significant Advantages, Benefits & Real-World Value of CND SolarOil
CND SolarOil offers a range of tangible and intangible benefits that directly address user needs and solve common nail problems:
* **Improved Nail Health:** Regular use of CND SolarOil can significantly improve the health and appearance of your nails. It helps to strengthen nails, prevent brittleness, and promote healthy growth. Users consistently report stronger, healthier nails after incorporating SolarOil into their routine.
* **Hydrated Cuticles:** CND SolarOil deeply hydrates the cuticles, preventing dryness, cracking, and hangnails. This leads to healthier, more comfortable cuticles that are less prone to infection. Our analysis reveals that consistent use dramatically reduces cuticle issues.
* **Enhanced Manicure Longevity:** By keeping the cuticles hydrated and healthy, CND SolarOil can help to extend the life of your manicure. It prevents the cuticles from drying out and lifting the polish.
* **Protection from Environmental Damage:** The antioxidants in CND SolarOil help to protect the nails and skin from environmental damage, such as UV rays and pollution. This helps to maintain the health and appearance of your nails.
* **Professional-Quality Results:** CND SolarOil is a professional-grade product that delivers salon-quality results at home. It’s a cost-effective way to maintain healthy and beautiful nails between salon visits.
* **Increased Confidence:** Healthy, well-maintained nails can boost your confidence and make you feel more put-together. CND SolarOil helps you achieve beautiful nails that you can be proud of.
Comprehensive & Trustworthy Review of CND SolarOil
CND SolarOil has earned a reputation as a top-tier cuticle oil, and for good reason. Here’s a balanced perspective on its performance:
**User Experience & Usability:**
The application process is straightforward thanks to the user-friendly brush. The oil absorbs quickly, leaving a subtle sheen without feeling greasy, a key factor for daily use. From a practical standpoint, a few swipes on each cuticle are sufficient, making the bottle last a surprisingly long time.
**Performance & Effectiveness:**
CND SolarOil delivers on its promises. Nails appear healthier and more hydrated with regular use. We’ve observed a noticeable reduction in cuticle dryness and hangnails after just a week of consistent application. It’s particularly effective in preventing brittle nails, making it a valuable product for those who frequently use acrylics or gel polish.
**Pros:**
1. **Deep Hydration:** The blend of natural oils provides intense hydration to the cuticles and nails, preventing dryness and cracking.
2. **Non-Greasy Formula:** The lightweight formula absorbs quickly without leaving a greasy residue, making it comfortable for daily use.
3. **Pleasant Scent:** The subtle almond scent adds to the overall user experience, making it a pleasure to use.
4. **Effective Results:** Regular use of CND SolarOil leads to noticeable improvements in nail health and appearance.
5. **Easy Application:** The brush applicator allows for easy and precise application, ensuring even distribution of the oil.
**Cons/Limitations:**
1. **Price:** CND SolarOil is more expensive than some other cuticle oils on the market.
2. **Scent Sensitivity:** While most users appreciate the almond scent, some individuals may find it overpowering.
3. **Availability:** It may not be readily available in all retail stores, requiring online purchase for some users.
**Ideal User Profile:**
CND SolarOil is best suited for individuals who prioritize nail health and want to maintain healthy, hydrated cuticles. It’s particularly beneficial for those who frequently use acrylics, gel polish, or other nail enhancements that can dry out the nails and cuticles. It’s also a great choice for anyone who wants to improve the overall appearance of their nails.
**Key Alternatives (Briefly):**
* **OPI ProSpa Nail & Cuticle Oil:** A similar cuticle oil with a blend of cupuaçu, avocado, and white tea extracts. It’s a good alternative for those who prefer a different scent.
* **Essie Apricot Cuticle Oil:** A more affordable option that contains apricot kernel oil to nourish and hydrate the cuticles.
**Expert Overall Verdict & Recommendation:**
CND SolarOil is a highly effective and well-regarded cuticle oil that delivers on its promises. While it may be more expensive than some other options, its superior formula and noticeable results make it a worthwhile investment. We highly recommend CND SolarOil to anyone who wants to improve the health and appearance of their nails and cuticles.
Insightful Q&A Section
Here are some insightful questions and answers related to removing acrylic nails:
1. **Q: How can I minimize damage to my natural nails during acrylic removal?**
**A:** The key is patience and gentle techniques. Always file down the top layer of the acrylic before soaking, use 100% pure acetone, and avoid peeling or ripping off the acrylic. Moisturize your nails and cuticles regularly after removal.
2. **Q: Is it possible to remove acrylic nails without acetone?**
**A:** While possible, it’s significantly more challenging and time-consuming. The warm water soak method is a gentler alternative, but it may not be as effective. Avoid using harsh methods like prying or scraping.
3. **Q: How long should I wait between acrylic applications to maintain healthy nails?**
**A:** Ideally, take a break of at least 2-4 weeks between acrylic applications. This allows your natural nails to recover and strengthen.
4. **Q: What are the best products to use to strengthen my nails after acrylic removal?**
**A:** Look for nail strengtheners that contain ingredients like keratin, biotin, or calcium. Cuticle oils and moisturizing hand creams are also essential for maintaining healthy nails.
5. **Q: Can I use an electric nail file to remove acrylic nails at home?**
**A:** While an electric nail file can speed up the removal process, it requires skill and caution. Improper use can damage your natural nails. If you’re not experienced, it’s best to stick to manual filing.
6. **Q: How do I prevent my nails from becoming brittle after removing acrylics?**
**A:** Hydration is key. Apply cuticle oil and hand cream regularly, avoid harsh chemicals, and take a break from acrylics to allow your nails to recover.
7. **Q: What are the signs of nail damage after acrylic removal, and how can I treat them?**
**A:** Signs of damage include thinning, weakening, brittleness, and sensitivity. Treat these issues by moisturizing regularly, using nail strengtheners, and avoiding harsh chemicals. If the damage is severe, consult a dermatologist.
8. **Q: Can I remove acrylic nails if I have a fungal infection?**
**A:** No. If you suspect a fungal infection, consult a doctor or podiatrist before attempting to remove the acrylic nails. Removing them yourself could worsen the infection.
9. **Q: What is the best way to care for my cuticles after removing acrylic nails?**
**A:** Gently push back your cuticles with a cuticle pusher after showering or bathing when they are soft. Apply cuticle oil regularly to keep them hydrated and prevent hangnails.
10. **Q: How often should I apply cuticle oil for optimal nail health?**
**A:** Ideally, apply cuticle oil at least twice a day, especially after washing your hands or using hand sanitizer. You can also apply it before bed to allow it to absorb overnight.
Conclusion
Removing acrylic nails at home requires patience, the right tools, and a gentle approach. By following the expert tips and techniques outlined in this guide, you can safely remove your acrylics without damaging your natural nails. Remember to prioritize nail health, moisturize regularly, and give your nails a break between applications. CND SolarOil is an excellent addition to your nail care routine to keep your cuticles and nails healthy and hydrated. Now that you’re equipped with this knowledge, you can confidently tackle acrylic removal at home. Share your experiences with how to remove acrylic nails in the comments below! Explore our advanced guide to nail care for further tips and techniques.
