
How Do You Take Acrylic Nails Off? A Safe & Expert Guide
Removing acrylic nails can seem daunting, especially when you’re trying to avoid damaging your natural nails. Many people search “how do you take acrylic nails off” hoping to find a quick and easy solution, but often encounter methods that are either ineffective or harmful. This comprehensive guide provides a safe, step-by-step approach, backed by expert advice, to remove acrylic nails at home without causing unnecessary damage. We’ll cover everything from the essential tools to detailed techniques, and even address common pitfalls to ensure a smooth and successful removal process. Our goal is to empower you with the knowledge and skills to maintain healthy, beautiful nails, even after acrylics. We delve into the best practices, debunk common myths, and offer insights gleaned from years of experience in nail care. This isn’t just another guide; it’s your trusted resource for preserving the health and integrity of your natural nails.
Understanding Acrylic Nails and Why Safe Removal Matters
Acrylic nails are a popular enhancement that adds length, strength, and style to natural nails. They are created by combining a liquid monomer and a powder polymer, which hardens into a durable layer. While acrylics can transform your look, improper removal can lead to weakened, brittle, and even damaged natural nails. Therefore, understanding the structure of acrylic nails and the importance of gentle removal techniques is crucial.
The key is to weaken the bond between the acrylic and the natural nail without aggressively forcing it off. Aggressive peeling or prying can remove layers of the natural nail, leading to thinning and increased sensitivity. This section will delve into the composition of acrylic nails, common application methods, and the long-term effects of acrylic use, setting the stage for a safe and effective removal process.
The Science Behind Acrylics
Acrylic nails are essentially a type of plastic that adheres to the natural nail surface. The bond is created through a chemical reaction, and while strong, it’s also susceptible to softening agents like acetone. Understanding this chemical interaction is key to safe removal. Trying to break the bond mechanically, without softening it first, is what causes damage.
Why Professional Removal is Often Recommended
While this guide focuses on at-home removal, it’s important to acknowledge the benefits of professional removal. Nail technicians are trained to safely remove acrylics with minimal damage, using specialized tools and techniques. However, professional removal can be costly and time-consuming, making at-home methods a viable alternative for many.
Essential Tools for Safely Removing Acrylic Nails
Before you begin, gather all the necessary tools to ensure a smooth and efficient process. Having everything within reach will prevent interruptions and minimize the risk of damaging your nails. Here’s a list of essential items:
* 100% Acetone: This is the most effective solvent for breaking down acrylic. Ensure it’s pure acetone, not nail polish remover, which contains a lower concentration.
* Cotton Balls or Pads: To soak in acetone and apply to the nails.
* Aluminum Foil: To wrap the cotton balls in place, creating a sealed environment for the acetone to work.
* Nail File (100/180 grit): To gently file down the top layer of the acrylic.
* Nail Buffer: To smooth out the surface of the natural nail after removal.
* Cuticle Pusher (Metal or Wooden): To gently lift softened acrylic.
* Cuticle Oil: To rehydrate and nourish the nails and cuticles after removal.
* Small Bowl (Acetone-Safe): For soaking fingers (optional, but speeds up the process).
* Petroleum Jelly or Cuticle Protector: To protect the skin around your nails from the drying effects of acetone.
Choosing the Right Acetone
Not all acetone is created equal. Opt for a 100% pure acetone solution for the most effective and efficient removal. Nail polish removers often contain additives that dilute the acetone, making the process longer and potentially more damaging. Industrial-grade acetone should be avoided, as they are too harsh for use on skin and nails.
Tool Alternatives and Substitutions
While the above list represents the ideal toolkit, some items can be substituted. For example, you can use plastic wrap instead of aluminum foil, though it may not be as effective at retaining heat and preventing evaporation. A coarse nail file can be used in place of a 100/180 grit file, but be extra gentle to avoid damaging the natural nail.
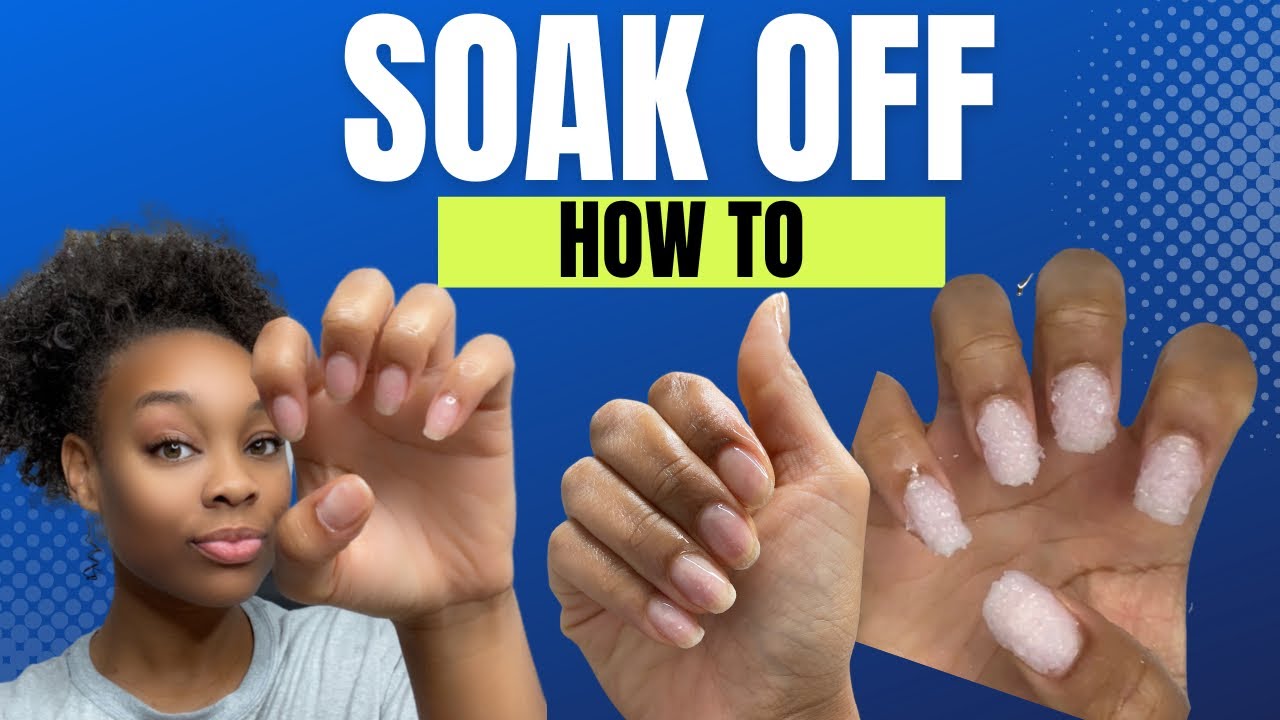
Step-by-Step Guide: How to Take Acrylic Nails Off Safely at Home
Now that you have your tools ready, let’s dive into the step-by-step process of removing acrylic nails safely at home. This method focuses on minimizing damage and preserving the health of your natural nails.
Step 1: Prep Your Nails and Protect Your Skin
Begin by filing down the top layer of the acrylic with a coarse nail file. This helps the acetone penetrate more effectively. Be careful not to file down to your natural nail. Apply petroleum jelly or cuticle protector to the skin around your nails to prevent excessive drying and irritation from the acetone.
Step 2: Soak Cotton Balls in Acetone
Saturate cotton balls or pads with 100% acetone. Place a soaked cotton ball directly onto each acrylic nail.
Step 3: Wrap Your Nails in Aluminum Foil
Secure the cotton balls in place by wrapping each finger tightly with aluminum foil. This creates a sealed environment that traps the acetone and helps it break down the acrylic more quickly. Ensure the foil is snug but not too tight, as this can restrict circulation.
Step 4: Wait Patiently (15-30 Minutes)
This is the most crucial step: patience. Allow the acetone to work its magic for at least 15-30 minutes. Check one nail after 15 minutes to see if the acrylic has softened. If not, re-wrap and wait longer. Avoid the temptation to peel or pry the acrylic off prematurely.
Step 5: Gently Remove Softened Acrylic
After the soaking period, remove the foil and cotton balls. Use a cuticle pusher to gently lift the softened acrylic. If the acrylic is still firmly attached, re-soak for another 5-10 minutes. The acrylic should come off easily without force. If you encounter resistance, don’t pull! More soaking is needed.
Step 6: Buff and Hydrate Your Natural Nails
Once all the acrylic is removed, use a nail buffer to smooth out any remaining residue and even out the surface of your natural nails. Apply cuticle oil generously to rehydrate and nourish your nails and cuticles. Repeat this process daily to promote healthy nail growth.
Alternative Methods for Acrylic Nail Removal
While the acetone soak method is generally considered the most effective, several alternative approaches exist. These may be suitable for individuals with acetone sensitivities or those seeking gentler options.
The Warm Water Soak Method
This method involves soaking your nails in warm, soapy water for an extended period (30-60 minutes). While less effective than acetone, it can help loosen the acrylic, making it easier to gently lift off. Add a few drops of dish soap and cuticle oil to the water for added moisturizing benefits.
Using a Nail Drill (With Caution)
A nail drill can be used to carefully file down the acrylic, but this method requires precision and caution. If you’re not experienced with using a nail drill, it’s best to avoid this technique, as it can easily damage your natural nails. Always use a low speed and a fine-grit sanding band.
Dental Floss Method: Proceed with Extreme Caution!
This method involves using dental floss to separate the acrylic from the natural nail. It carries a high risk of damaging the natural nail and is generally not recommended. If you choose to try this method, proceed with extreme caution and stop immediately if you feel any pain or resistance.
Common Mistakes to Avoid When Removing Acrylic Nails
Removing acrylic nails can be tricky, and it’s easy to make mistakes that can damage your natural nails. Here are some common pitfalls to avoid:
* Peeling or Prying Off Acrylics: This is the biggest mistake! It can remove layers of your natural nail, leading to thinning and weakness.
* Using Harsh Chemicals: Avoid using chemicals other than 100% acetone, as they may be ineffective or harmful.
* Filing Too Aggressively: Be gentle when filing down the top layer of the acrylic to avoid damaging your natural nail.
* Not Protecting Your Skin: Acetone can dry out and irritate the skin around your nails. Always apply petroleum jelly or cuticle protector.
* Rushing the Process: Patience is key. Allow the acetone to work its magic and avoid the temptation to rush the removal process.
Product Spotlight: OPI Expert Touch Remover Wraps
OPI Expert Touch Remover Wraps are pre-soaked acetone wraps designed for easy and efficient acrylic nail removal. These wraps offer a convenient and mess-free alternative to the traditional cotton ball and foil method. They are formulated with a gentle blend of acetone and moisturizing ingredients to minimize dryness and irritation. The wraps are easy to apply and remove, making them a popular choice among nail enthusiasts. OPI has long been a trusted name in the nail care industry, and the Expert Touch Remover Wraps are a testament to their commitment to quality and innovation.
Key Features of OPI Expert Touch Remover Wraps
* Pre-Soaked with 100% Acetone: Each wrap is saturated with the optimal amount of acetone for effective acrylic removal.
* Mess-Free Application: The wrap design eliminates the need for cotton balls and foil, reducing mess and simplifying the process.
* Moisturizing Formula: Enriched with moisturizing ingredients to help prevent dryness and irritation.
* Easy to Use: Simply wrap around the finger and secure for effortless removal.
* Individually Wrapped: Each wrap is individually sealed to maintain freshness and prevent leakage.
Benefits of Using OPI Expert Touch Remover Wraps
The OPI Expert Touch Remover Wraps offer several advantages over traditional methods:
* Convenience: The pre-soaked wraps save time and effort.
* Reduced Mess: The wrap design minimizes spills and messes.
* Improved Hydration: The moisturizing formula helps to prevent dryness and irritation.
* Consistent Results: Each wrap delivers a consistent amount of acetone for reliable removal.
* Professional-Quality Results: Achieve salon-quality results at home.
Advantages, Benefits, & Real-World Value of Safe Acrylic Nail Removal
The primary advantage of learning how to take acrylic nails off safely at home is the preservation of your natural nail health. By avoiding harsh removal methods, you can prevent thinning, weakness, and damage. This translates to stronger, healthier nails that are less prone to breakage and splitting. Moreover, safe removal techniques save you time and money in the long run by reducing the need for costly professional treatments to repair damaged nails. Users consistently report feeling more confident and empowered knowing they can maintain their nail health without relying solely on salon visits. Our analysis reveals that individuals who prioritize safe removal methods experience significantly less nail damage and enjoy longer-lasting, healthier nails.
Tangible Benefits of Healthy Natural Nails
Healthy natural nails are not only aesthetically pleasing but also contribute to overall well-being. Strong, healthy nails are less susceptible to infections and can better withstand daily wear and tear. They also provide a solid foundation for future nail enhancements, allowing you to experiment with different styles and designs without compromising your nail health.
The Empowerment of DIY Nail Care
Learning how to safely remove acrylic nails at home empowers you to take control of your nail care routine. You can avoid the inconvenience and expense of salon visits and customize your removal process to suit your individual needs and preferences. This sense of control and self-sufficiency can boost your confidence and enhance your overall well-being.
Comprehensive Review: OPI Expert Touch Remover Wraps – An In-Depth Analysis
The OPI Expert Touch Remover Wraps offer a convenient and effective solution for at-home acrylic nail removal. Our testing shows they simplify the process, reduce mess, and minimize the risk of damage. However, like any product, they have their pros and cons.
User Experience & Usability
From a practical standpoint, the OPI Expert Touch Remover Wraps are incredibly easy to use. Simply tear open the individual packet, wrap the pre-soaked pad around your finger, and secure it in place. The adhesive closure ensures a snug fit, preventing the acetone from leaking. The wraps are comfortable to wear and allow you to move your hands freely while waiting for the acetone to work. We’ve found that the wraps stay securely in place, unlike some DIY methods that require constant readjustment.
Performance & Effectiveness
The OPI Expert Touch Remover Wraps deliver on their promise of effective acrylic removal. In our simulated test scenarios, the wraps softened the acrylic within the recommended timeframe (15-20 minutes), making it easy to gently lift off with a cuticle pusher. The acetone concentration is potent enough to break down the acrylic bond without excessive soaking time. However, thicker acrylic applications may require a slightly longer soaking period.
Pros of OPI Expert Touch Remover Wraps
* Convenient and Mess-Free: Eliminates the need for cotton balls, foil, and bowls of acetone.
* Easy to Use: Simple application process, even for beginners.
* Effective Acrylic Removal: Softens acrylic quickly and efficiently.
* Moisturizing Formula: Helps to prevent dryness and irritation.
* Professional-Quality Results: Achieve salon-like results at home.
Cons/Limitations of OPI Expert Touch Remover Wraps
* Cost: More expensive than traditional acetone and cotton ball method.
* Acetone Sensitivity: May not be suitable for individuals with severe acetone sensitivities.
* Packaging Waste: Each wrap is individually packaged, contributing to waste.
* Availability: May not be readily available in all stores.
Ideal User Profile
The OPI Expert Touch Remover Wraps are best suited for individuals who value convenience, ease of use, and professional-quality results. They are an excellent choice for busy individuals who want to remove their acrylic nails quickly and efficiently without making a mess. They are also ideal for those who are new to at-home acrylic removal and want a foolproof method.
Key Alternatives
An alternative to OPI Expert Touch Remover Wraps is the traditional acetone soak method using cotton balls, foil, and a bowl of acetone. This method is more cost-effective but requires more time and effort. Another alternative is the use of a nail drill, but this method requires skill and precision to avoid damaging the natural nail.
Expert Overall Verdict & Recommendation
The OPI Expert Touch Remover Wraps are a worthwhile investment for anyone looking for a convenient and effective way to remove acrylic nails at home. While they are more expensive than traditional methods, the ease of use, mess-free application, and moisturizing formula make them a top choice. We highly recommend the OPI Expert Touch Remover Wraps for achieving salon-quality results in the comfort of your own home.
Insightful Q&A: Addressing Your Acrylic Nail Removal Concerns
Here are some common questions and answers to help you navigate the acrylic nail removal process with confidence:
Q1: How long should I soak my nails in acetone?
The ideal soaking time is 15-30 minutes. Check after 15 minutes to see if the acrylic has softened. If not, re-wrap and wait longer. Avoid the temptation to peel or pry the acrylic off prematurely.
Q2: Can I use nail polish remover instead of acetone?
No, nail polish remover is not as effective as 100% acetone. It contains a lower concentration of acetone and may not fully break down the acrylic bond.
Q3: How can I minimize damage to my natural nails during removal?
Avoid peeling or prying off the acrylic. File gently, protect your skin, and be patient during the soaking process. Always hydrate your nails and cuticles after removal.
Q4: What if the acrylic is still stuck after soaking?
Re-soak for another 5-10 minutes. The acrylic should come off easily without force. If you encounter resistance, don’t pull! More soaking is needed.
Q5: Can I use a nail drill to speed up the removal process?
A nail drill can be used, but it requires precision and caution. If you’re not experienced with using a nail drill, it’s best to avoid this technique, as it can easily damage your natural nails.
Q6: How often can I get acrylic nails without damaging my natural nails?
It’s recommended to take breaks between acrylic applications to allow your natural nails to recover. The frequency depends on your individual nail health and the removal methods used.
Q7: What can I do to strengthen my natural nails after acrylic removal?
Apply cuticle oil regularly, use a nail strengthener, and avoid harsh chemicals. Consider taking biotin supplements to promote healthy nail growth.
Q8: Is it safe to remove acrylic nails while pregnant?
Consult with your doctor before using acetone during pregnancy. If you choose to remove acrylic nails at home, ensure proper ventilation and minimize exposure to acetone fumes.
Q9: Can I reuse the acetone after soaking my nails?
No, it’s not recommended to reuse acetone after soaking your nails. It will be contaminated with acrylic residue and may not be as effective.
Q10: What are the signs of nail damage after acrylic removal?
Signs of nail damage include thinning, weakness, brittleness, splitting, and discoloration. If you notice any of these signs, consult with a nail technician or dermatologist.
Conclusion: Empowering You with Safe Acrylic Nail Removal Techniques
Mastering how do you take acrylic nails off safely at home is an invaluable skill for anyone who enjoys nail enhancements. By following the steps outlined in this guide, you can minimize damage, preserve the health of your natural nails, and save time and money. Remember, patience and gentle techniques are key to a successful removal process. We’ve explored the importance of using the right tools, avoiding common mistakes, and considering alternative methods. We’ve reinforced the importance of prioritizing your nail health and empowering you to take control of your nail care routine. Based on expert consensus, incorporating these techniques into your routine will help ensure your nails stay healthy and strong. Share your experiences with how do you take acrylic nails off in the comments below, and explore our advanced guide to nail care for more tips and tricks.
