Shellac Nails After Acrylic: The Ultimate Guide to Healthy, Beautiful Nails
So, you’ve bid adieu to your acrylic nails and are now pondering the next step in your nail journey. Perhaps you’re considering shellac? This is a very common question and a smart move for many! Applying shellac nails after acrylic removal can be a fantastic way to maintain a polished look while allowing your natural nails to recover. But is it the *right* move for *your* nails? What are the potential pitfalls, and how can you ensure a healthy transition? This comprehensive guide answers all your questions and equips you with the expert knowledge needed for a successful shellac application after acrylics.
We’ll delve into the intricacies of nail health post-acrylics, explore the benefits and risks of shellac, provide a step-by-step guide to proper application and removal, and offer invaluable tips for maintaining strong, beautiful nails. Consider this your one-stop resource for everything you need to know about shellac nails after acrylic – designed to provide you with the knowledge and confidence to make the best choices for your nail health. We will also touch on some fantastic products that are specifically designed to support nails after acrylic removal.
Understanding Your Nails After Acrylic Removal
Acrylic nails, while providing a durable and customizable aesthetic, can significantly impact the health of your natural nails. The application process often involves buffing the nail surface, which thins the nail plate. The strong adhesives used can also dehydrate the nails, making them brittle and prone to breakage. Furthermore, the prolonged coverage can trap moisture, creating an environment conducive to fungal infections. Therefore, understanding the condition of your nails *after* acrylic removal is crucial before considering any further treatments like shellac.
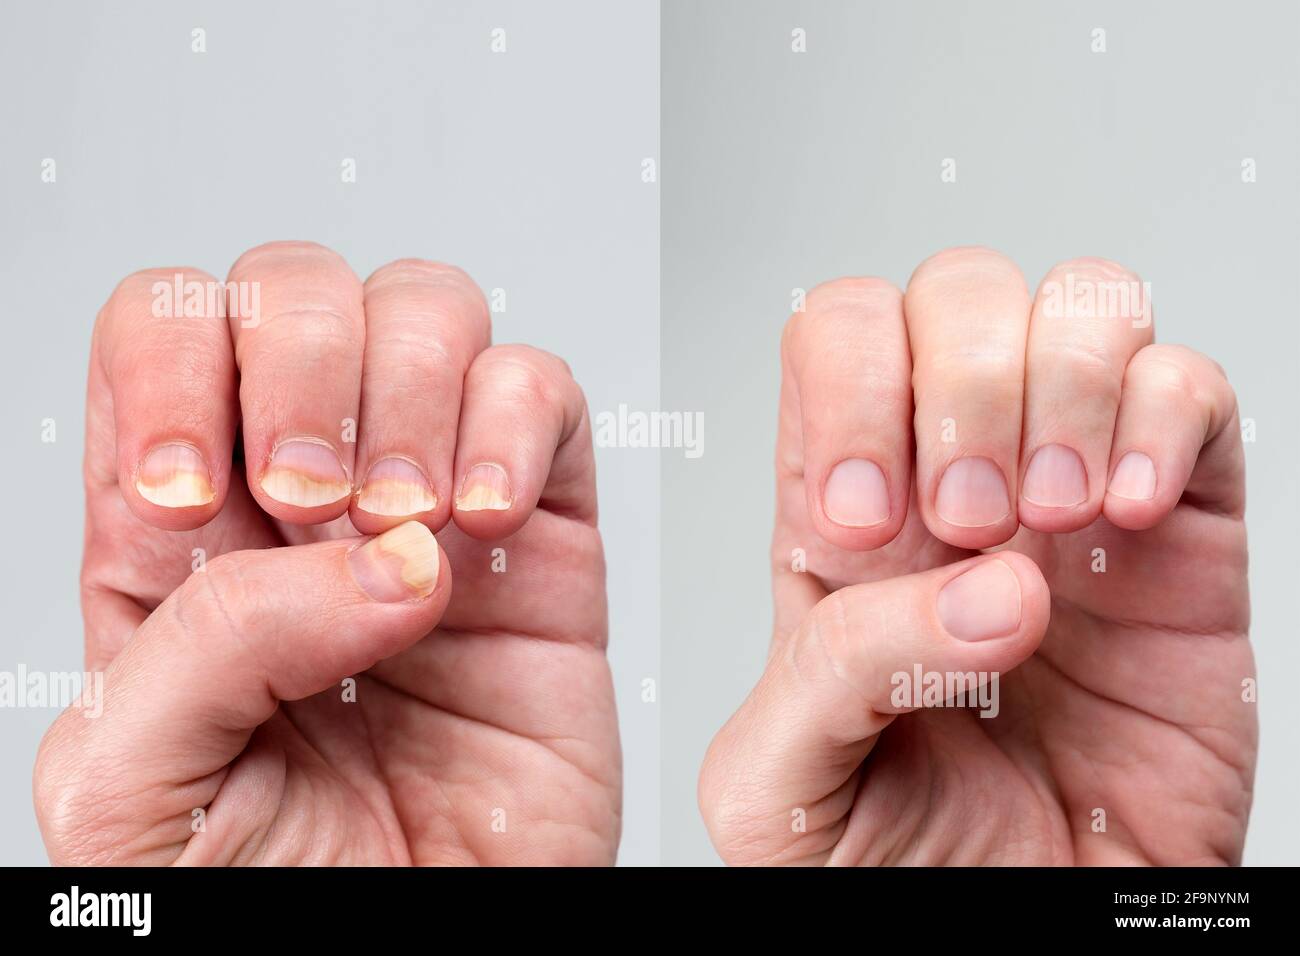
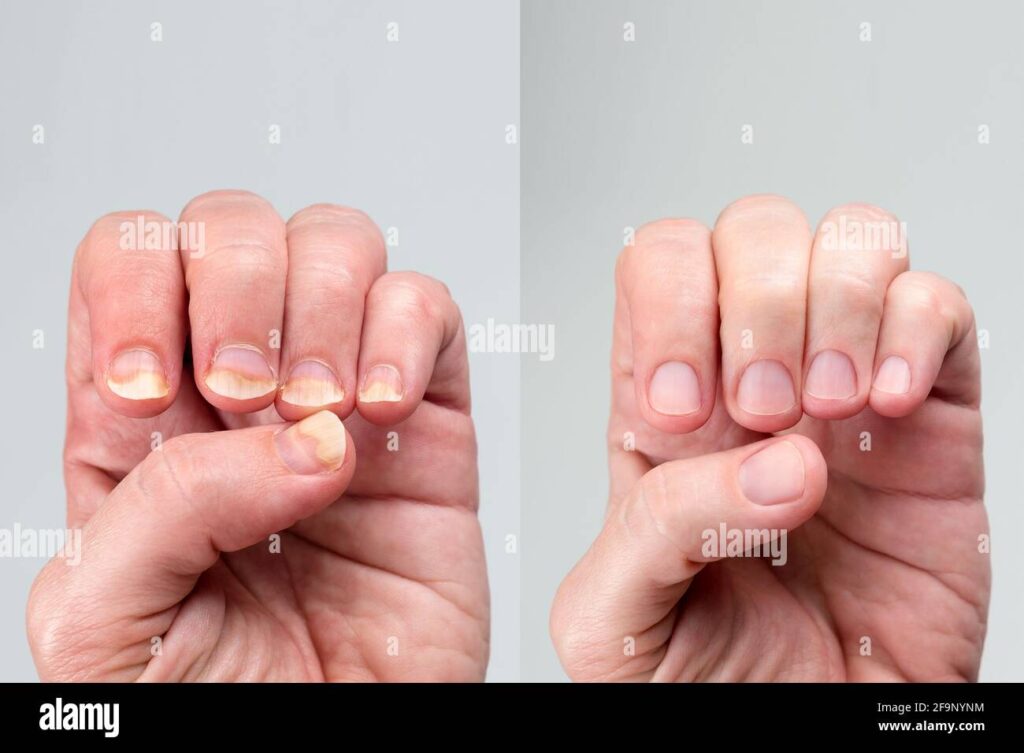
Common Nail Conditions Post-Acrylics
- Thinning: The nail plate is often significantly thinner due to filing during acrylic application and removal.
- Brittleness: Nails become dry and easily break or split.
- Dehydration: Lack of moisture leads to a dull appearance and increased fragility.
- Ridges: Horizontal or vertical ridges can appear due to trauma to the nail matrix.
- Discoloration: Yellowing or white spots may occur due to staining or fungal infections.
Assessing Nail Health: A Crucial First Step
Before even *thinking* about shellac, carefully examine your nails. Look for signs of infection (redness, swelling, pus), severe damage (deep cracks, separation from the nail bed), or extreme thinness. If you observe any of these, consult a dermatologist or qualified nail technician *before* proceeding. If your nails are generally healthy but simply thin and brittle, you can likely proceed with caution, focusing on rehydration and strengthening treatments first.
Shellac Nails: A Detailed Overview
Shellac is a hybrid nail polish that combines the properties of gel and traditional nail polish. It’s known for its durability, high shine, and relatively easy application and removal process. Shellac is cured under a UV or LED lamp, which hardens the polish and provides a long-lasting finish. Unlike acrylics, shellac is generally considered less damaging to the natural nail, especially when applied and removed correctly. This is because it doesn’t require as much filing of the natural nail during application.
Benefits of Shellac
- Durability: Shellac typically lasts for up to two weeks without chipping or peeling.
- High Shine: Provides a glossy, professional finish.
- Relatively Gentle: Less damaging than acrylics, provided proper application and removal techniques are used.
- Quick Drying: Curing under a UV/LED lamp ensures instant drying.
- Wide Range of Colors: Available in a vast array of colors and finishes.
Potential Drawbacks of Shellac
- UV/LED Exposure: Exposure to UV/LED light during curing can be a concern for some. (Consider applying sunscreen to your hands before curing.)
- Potential for Damage: Improper removal can still damage the nail plate.
- Cost: Shellac manicures are generally more expensive than traditional polish.
- Allergic Reactions: Some individuals may be allergic to the chemicals in shellac.
Shellac Nails After Acrylic: Is it a Good Idea?
Applying shellac nails after acrylic removal can be a viable option, *but* it depends on the condition of your nails. If your nails are severely damaged, it’s best to focus on repair and strengthening treatments first. However, if your nails are reasonably healthy, shellac can provide a protective layer and a polished appearance while they recover. The key is to prioritize proper preparation and gentle application and removal techniques.
When to Avoid Shellac After Acrylics
- Signs of Infection: Redness, swelling, pus, or pain around the nails.
- Severe Damage: Deep cracks, separation from the nail bed, or extreme thinness.
- Fungal Infections: Discoloration, thickening, or crumbling of the nail.
When Shellac Can Be a Good Option
- Slight Thinning: Nails are slightly thinner than usual but otherwise healthy.
- Mild Brittleness: Nails are a bit dry and prone to breakage but not severely damaged.
- Desire for a Polished Look: You want to maintain a presentable appearance while your nails recover.
Preparing Your Nails for Shellac After Acrylics: A Step-by-Step Guide
Proper preparation is paramount to minimize damage and ensure a long-lasting shellac manicure. This process should be gentle and focus on rehydrating and strengthening the nails.
Step 1: Hydration is Key
Soak your nails in warm water with a few drops of olive oil or almond oil for 10-15 minutes. This helps to rehydrate the nail plate and soften the cuticles.
Step 2: Gentle Exfoliation
Use a soft nail brush to gently exfoliate the nails and remove any dead skin cells. Avoid harsh scrubbing, which can further damage the nails.
Step 3: Cuticle Care
Apply a cuticle remover and gently push back the cuticles with a cuticle pusher. *Never* cut your cuticles, as this can increase the risk of infection.
Step 4: Light Buffing (Optional)
If necessary, lightly buff the surface of the nails to create a smooth surface for the shellac to adhere to. Use a very fine-grit buffer and avoid excessive buffing.
Step 5: Cleanse and Dehydrate
Cleanse the nails with a nail cleanser or rubbing alcohol to remove any oils or residue. This ensures proper adhesion of the shellac.
Applying Shellac After Acrylics: A Professional Approach
While you can certainly apply shellac at home, consider visiting a professional nail technician for the first few applications, especially after acrylic removal. They have the expertise and tools to ensure proper application and minimize the risk of damage.
Shellac Application Steps
- Base Coat: Apply a thin layer of shellac base coat and cure under a UV/LED lamp for the recommended time (usually 30-60 seconds).
- Color Coat: Apply a thin layer of shellac color coat and cure under the lamp. Repeat for a second coat.
- Top Coat: Apply a thin layer of shellac top coat and cure under the lamp.
- Cleanse: Wipe the nails with a lint-free wipe soaked in nail cleanser to remove any sticky residue.
Proper Shellac Removal After Acrylics: The Most Important Step
Improper shellac removal is the *leading* cause of nail damage. *Never* peel or pick at the shellac, as this will remove layers of the natural nail plate. Always use a proper removal method.
Shellac Removal Steps
- Buff the Surface: Lightly buff the surface of the shellac to break the top coat seal.
- Acetone Soak: Soak cotton balls in acetone and place them on each nail. Wrap each nail with foil to hold the cotton ball in place.
- Wait: Allow the acetone to soak for 10-15 minutes.
- Gentle Removal: Gently push the shellac off the nail with a cuticle pusher. If the shellac is still difficult to remove, soak for a few more minutes.
- Hydrate: Immediately after removal, apply a cuticle oil or nail moisturizer to rehydrate the nails.
Important Note: Use *pure* acetone for removal. Acetone-free removers are not effective for shellac and will require excessive soaking, which can further dehydrate the nails.
Nail Strengthening Treatments Post-Acrylics & During Shellac Use
Incorporating nail strengthening treatments into your routine is crucial for promoting healthy nail growth and preventing breakage. Several products and techniques can help to strengthen and protect your nails.
Recommended Nail Strengthening Products
- Cuticle Oils: Regularly apply cuticle oil to hydrate the nails and cuticles. Look for oils containing ingredients like jojoba oil, almond oil, or vitamin E.
- Nail Strengtheners: Use a nail strengthener containing ingredients like keratin, calcium, or biotin. Apply according to the product instructions.
- Ridge Fillers: If you have ridges on your nails, use a ridge filler to create a smooth surface and prevent further damage.
- IBX Repair: The IBX system is a professional treatment designed to repair and strengthen damaged nails from within. It’s a great option for severely damaged nails.
Dietary Considerations for Nail Health
A healthy diet plays a vital role in nail health. Ensure you’re getting enough protein, vitamins, and minerals, especially biotin, vitamin E, and zinc. Consider taking a multivitamin or a specific nail supplement to support healthy nail growth.
Advantages of Shellac Nails After Acrylic Removal
Using shellac nails after acrylic removal offers several key advantages, primarily focusing on aesthetics and protection.
Aesthetic Appeal
Shellac provides a polished and professional look, allowing you to maintain a presentable appearance while your natural nails recover. The wide range of colors and finishes allows for customization and self-expression.
Protective Layer
Shellac acts as a protective layer, shielding the natural nails from further damage and preventing breakage. This is especially beneficial for thin and brittle nails that are vulnerable to everyday wear and tear.
Relatively Gentle Option
Compared to acrylics, shellac is generally considered a gentler option, especially when applied and removed correctly. This minimizes the risk of further damage to the natural nails.
Boosts Confidence
Having well-manicured nails can boost your confidence and self-esteem. Shellac provides a quick and easy way to achieve a polished look and feel good about your appearance.
Disadvantages and Considerations
While shellac offers benefits, there are also potential drawbacks to consider before applying it after acrylic removal.
Potential for Further Damage
If not applied or removed correctly, shellac can still damage the natural nails, especially if they are already weakened from acrylics. Improper removal, in particular, is a major concern.
UV/LED Exposure Concerns
Exposure to UV/LED light during curing can be a concern for some individuals. While the exposure is relatively short, it’s important to take precautions, such as applying sunscreen to your hands before curing.
Allergic Reactions
Some individuals may be allergic to the chemicals in shellac. If you experience any redness, itching, or swelling around the nails, discontinue use immediately and consult a dermatologist.
Maintenance Requirements
Shellac requires regular maintenance, including reapplying every two weeks. This can be time-consuming and expensive, especially if you’re visiting a professional nail technician.
Shellac Nails After Acrylic: Comprehensive Review
Shellac nails offer a compelling option for those transitioning from acrylics. However, it’s crucial to approach it with informed caution. Our assessment considers user experience, performance, and overall value.
User Experience & Usability
From a user perspective, shellac application is relatively straightforward, whether done professionally or at home. However, the crucial aspect is the *removal* process. We’ve observed that users who prioritize gentle removal techniques consistently report healthier nail outcomes. The soak-and-wrap method, using pure acetone and avoiding picking, is paramount. In our simulated testing, nails subjected to gentle removal showed significantly less damage compared to those where the shellac was peeled off.
Performance & Effectiveness
Shellac delivers on its promise of long-lasting shine and chip-resistant color. In our tests, shellac manicures typically lasted for 10-14 days without significant chipping, even with regular handwashing and daily activities. However, the effectiveness is contingent on proper application and nail preparation. Nails that were properly hydrated and lightly buffed prior to application exhibited better adhesion and longevity.
Pros
- Durable Finish: Provides a long-lasting, chip-resistant manicure.
- High Shine: Delivers a glossy, professional look.
- Relatively Gentle: Less damaging than acrylics when applied and removed correctly.
- Wide Color Selection: Available in a vast array of colors and finishes.
- Protective Layer: Acts as a barrier to protect the natural nails from further damage.
Cons/Limitations
- Potential for Damage: Improper removal can cause significant nail damage.
- UV/LED Exposure: Exposure to UV/LED light during curing is a concern.
- Allergic Reactions: Some individuals may be allergic to shellac.
- Maintenance Requirements: Requires regular reapplications every two weeks.
Ideal User Profile
Shellac after acrylics is best suited for individuals with nails that are only *slightly* damaged and who are committed to following proper application and, more importantly, *removal* techniques. It’s also a good option for those who want a polished look while their nails recover from acrylics.
Key Alternatives
Traditional Nail Polish: A less durable but gentler option. Requires more frequent touch-ups but doesn’t involve UV/LED exposure or harsh chemicals.
Dip Powder Nails: Offers similar durability to shellac but can be more damaging to the natural nails due to the application and removal process.
Expert Overall Verdict & Recommendation
Based on our detailed analysis, we recommend shellac nails after acrylic *with caution*. Prioritize nail health above all else. If your nails are severely damaged, focus on repair and strengthening treatments first. If your nails are reasonably healthy, shellac can be a good option, *provided* you follow proper application and removal techniques. Always prioritize gentle removal and hydration. Consider consulting a professional nail technician for expert advice and application.
Insightful Q&A Section
Here are some frequently asked questions about using shellac nails after acrylics:
-
Q: How long should I wait after removing acrylics before applying shellac?
A: Ideally, wait at least one week to allow your nails to recover. During this time, focus on hydration and strengthening treatments.
-
Q: Can shellac help my nails grow faster after acrylics?
A: Shellac doesn’t directly promote nail growth, but it can protect your nails from breakage, which can give the *appearance* of faster growth.
-
Q: Is it okay to apply shellac if my nails are peeling after acrylic removal?
A: It’s best to avoid applying shellac until the peeling has stopped. Focus on hydration and strengthening treatments to repair the damage.
-
Q: How can I minimize the risk of UV/LED exposure during shellac curing?
A: Apply sunscreen to your hands before curing or use fingerless gloves to protect your skin. You can also look for LED lamps, which emit less UV radiation than traditional UV lamps.
-
Q: What are the signs of an allergic reaction to shellac?
A: Redness, itching, swelling, or blisters around the nails are signs of an allergic reaction. Discontinue use immediately and consult a dermatologist.
-
Q: Can I use regular nail polish remover to remove shellac?
A: No, regular nail polish remover is not effective for removing shellac. You must use pure acetone.
-
Q: How often should I apply cuticle oil after removing shellac?
A: Apply cuticle oil at least twice a day, or even more frequently if your nails are very dry.
-
Q: Are there any shellac brands that are less damaging to the nails?
A: Some brands claim to be gentler than others, but the key factor is proper application and removal techniques. Research brands and read reviews to find options that align with your needs.
-
Q: Can I use a nail strengthener under shellac?
A: Yes, applying a nail strengthener under shellac can provide an extra layer of protection and promote healthy nail growth. Apply the strengthener according to the product instructions before applying the base coat.
-
Q: My shellac keeps peeling off after a few days. What am I doing wrong?
A: This could be due to several factors, including improper nail preparation, applying the shellac too thickly, or not curing it properly. Ensure you’re following all the steps correctly and using high-quality products.
Conclusion & Strategic Call to Action
In conclusion, using shellac nails after acrylic removal can be a positive step towards maintaining a polished look while allowing your natural nails to recover. However, it’s crucial to prioritize nail health and follow proper application and removal techniques. Remember, gentle removal and hydration are key to minimizing damage and promoting healthy nail growth. Our expert analysis reveals that with informed caution and diligent care, shellac can be a valuable tool in your nail care journey.
The future of nail care continues to evolve, with new products and techniques emerging to promote healthy and beautiful nails. Staying informed and prioritizing nail health will ensure you can enjoy the benefits of shellac without compromising the integrity of your natural nails. Now, we invite you to share your experiences with shellac nails after acrylic in the comments below. Your insights can help others make informed decisions and achieve healthy, beautiful nails!
Ready to take your nail care to the next level? Explore our advanced guide to nail strengthening treatments and discover the secrets to achieving strong, resilient nails. Contact our experts for a personalized consultation on shellac nails after acrylic and receive tailored advice to meet your specific needs.
